This post may contain affiliate links. See my disclosure policy.

This easy lemon bar recipe is the perfect summer treat. Made with a rich, buttery shortbread crust topped with a perfectly sweet, tart, and thick lemon custard filling, they’re irresistible and guaranteed to brighten up any afternoon!
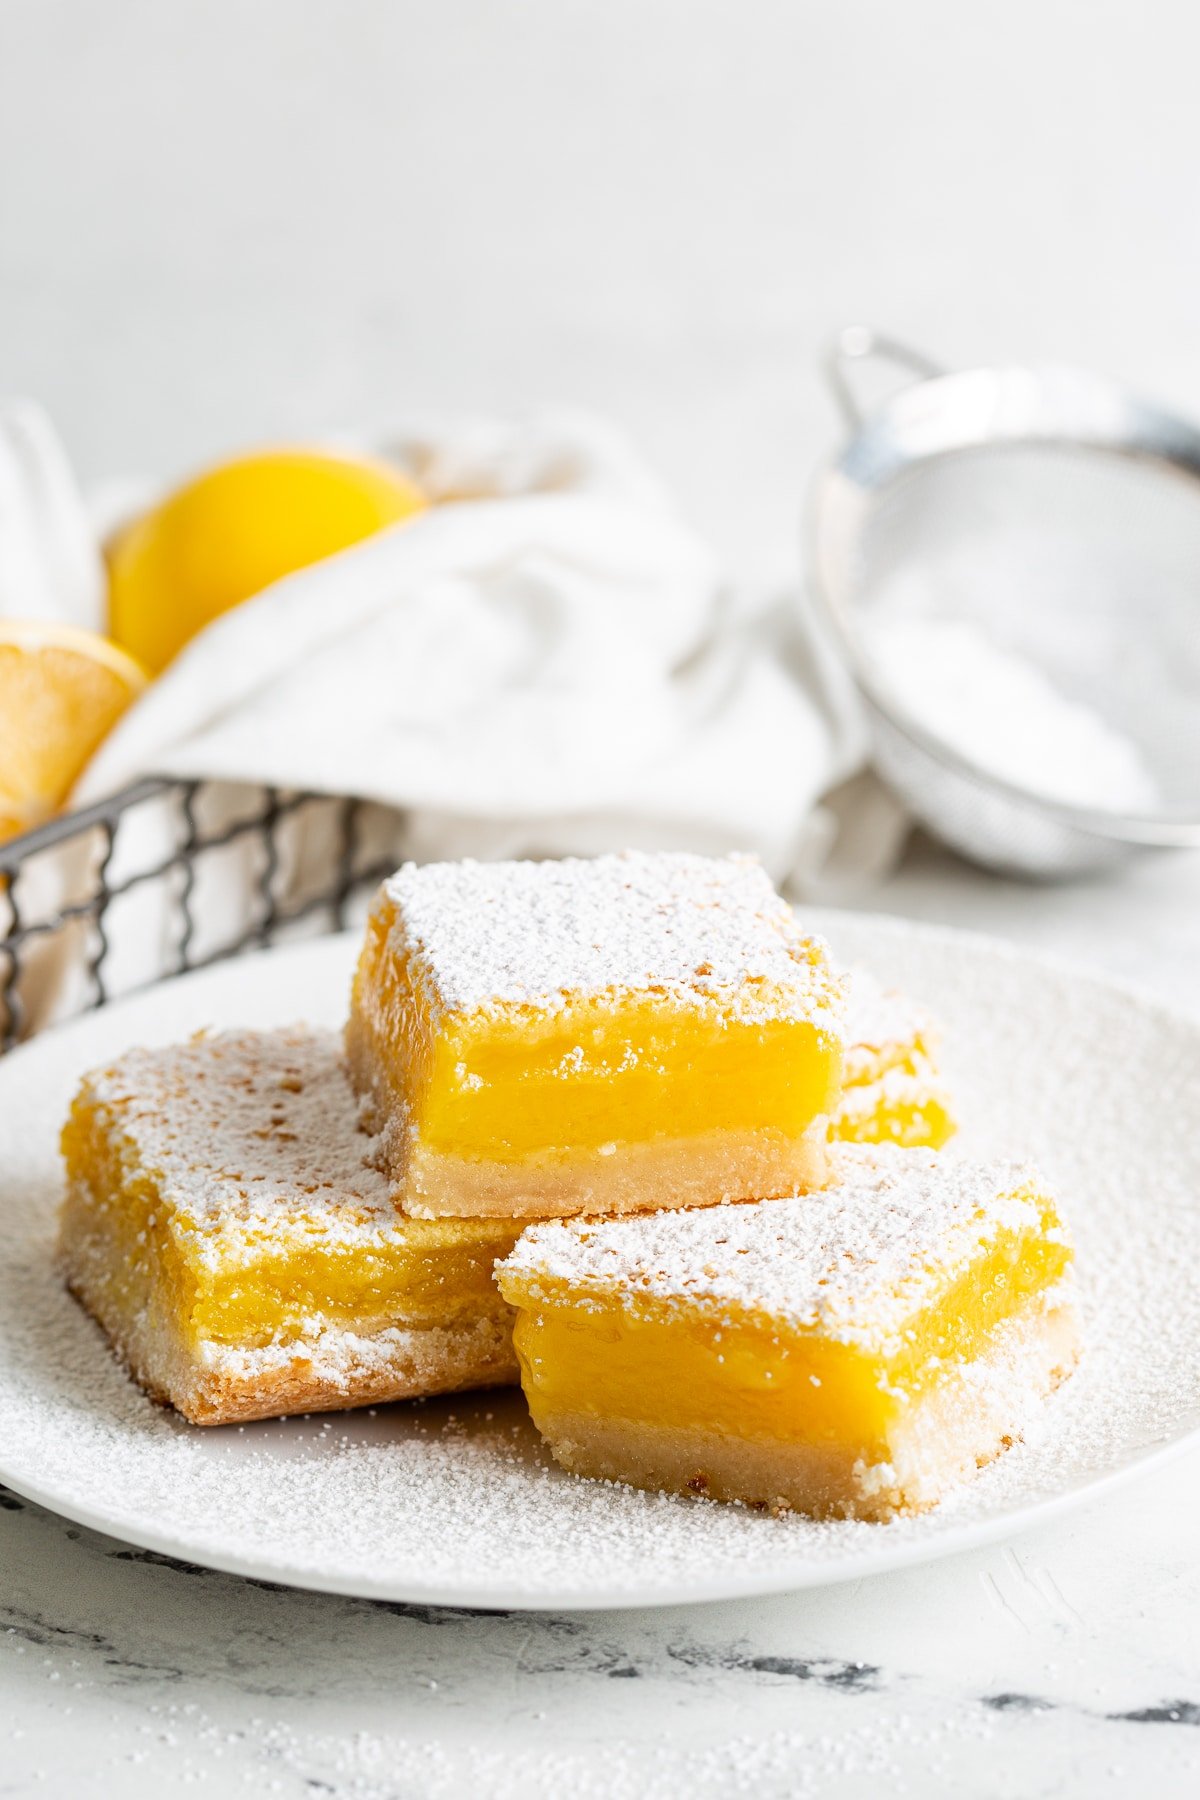
These homemade lemon bars are one of my favorite lemon dessert recipes to make throughout the spring and summer months. The warm, buttery crust and the thick, gooey tart lemon filling complement each other so nicely. They’re easy to make, with hands-on prep taking just 15-20 minutes. The rest is easy: bake them in the oven, slice them into neat squares, and enjoy the cooled bars for days to come.
Table of Contents
How to Make Lemon Bars
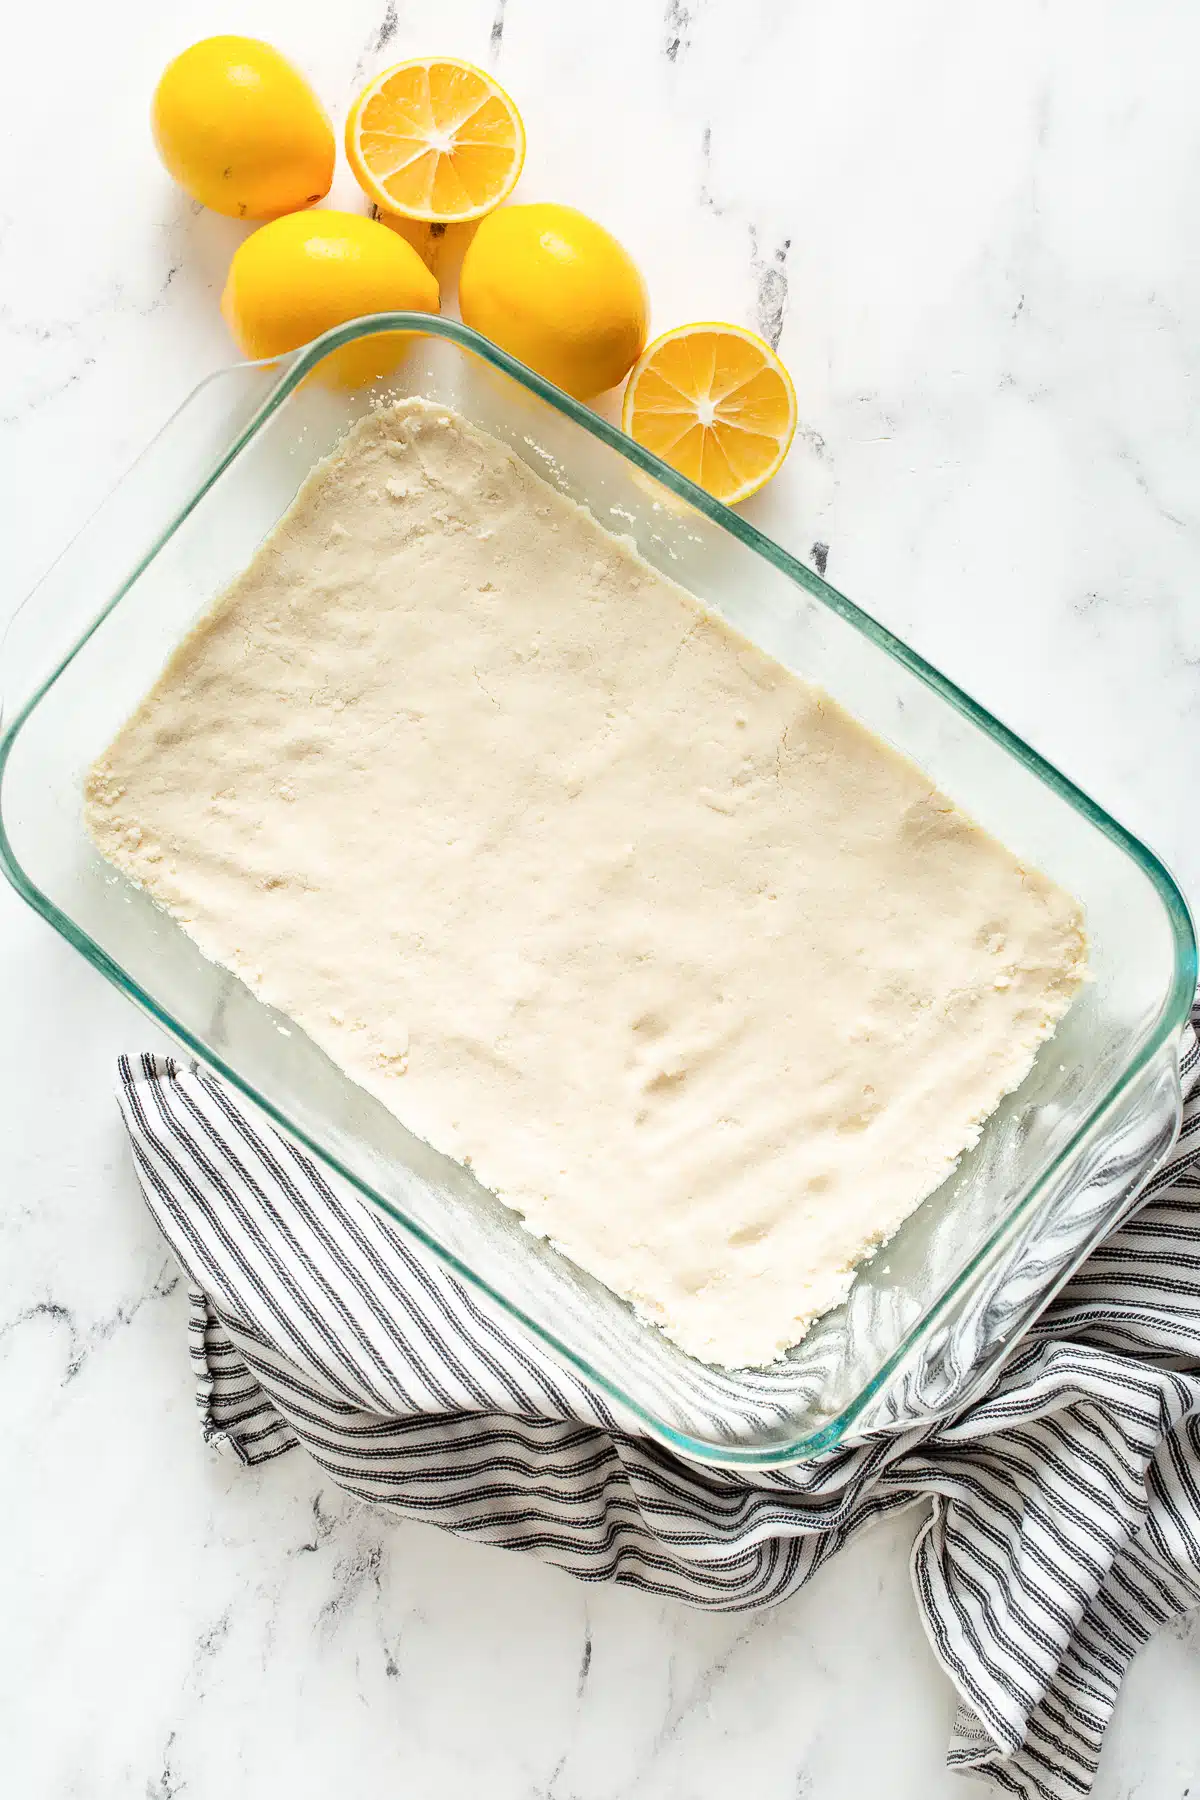
1. First, preheat your oven to 350 degrees F and line a 13×9-inch baking pan with parchment paper so that the parchment paper goes up the sides and spills over. Using parchment paper will make cutting your lemon bars into neat squares much easier, as you will be able to lift the entire block of lemon bars out of the pan using the parchment paper as a sort of hammock. You may also butter your baking pan or spray it with non-stick cooking spray.
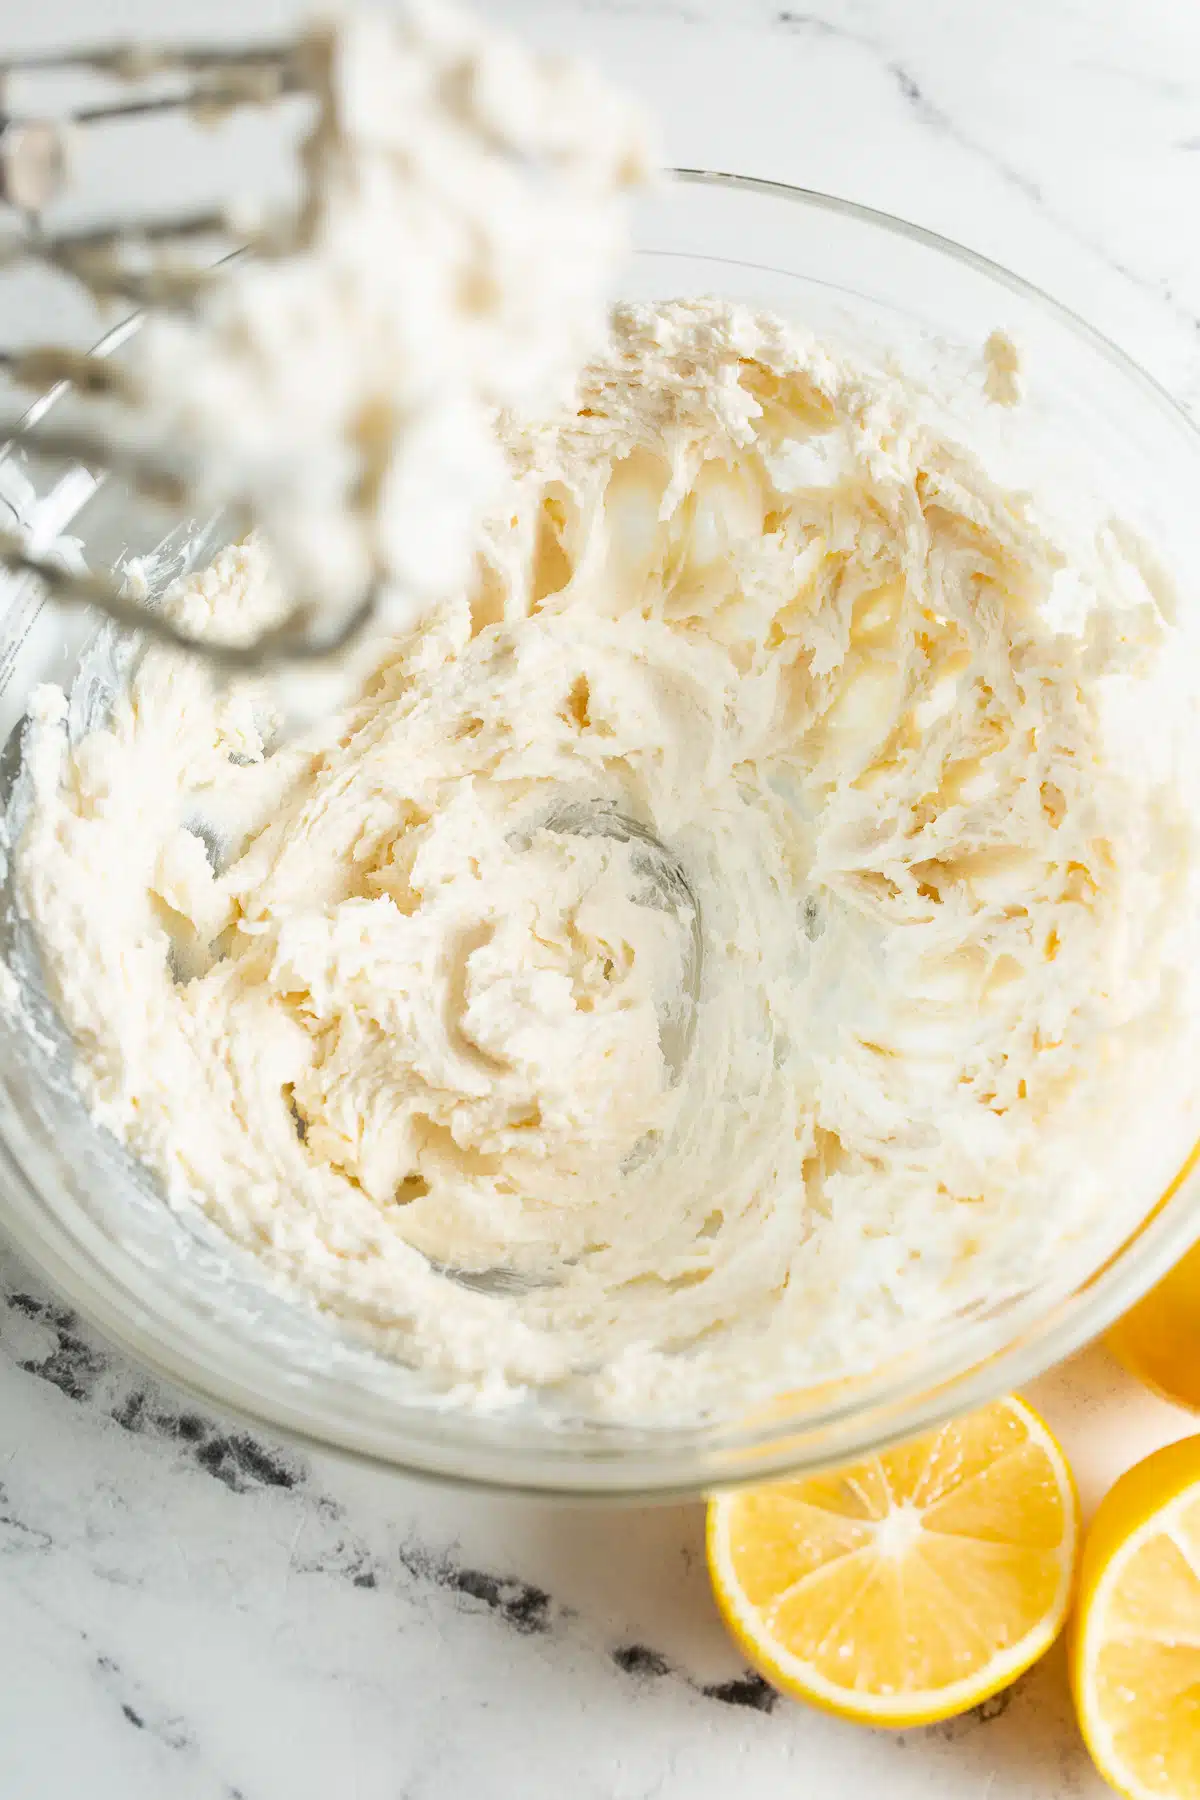
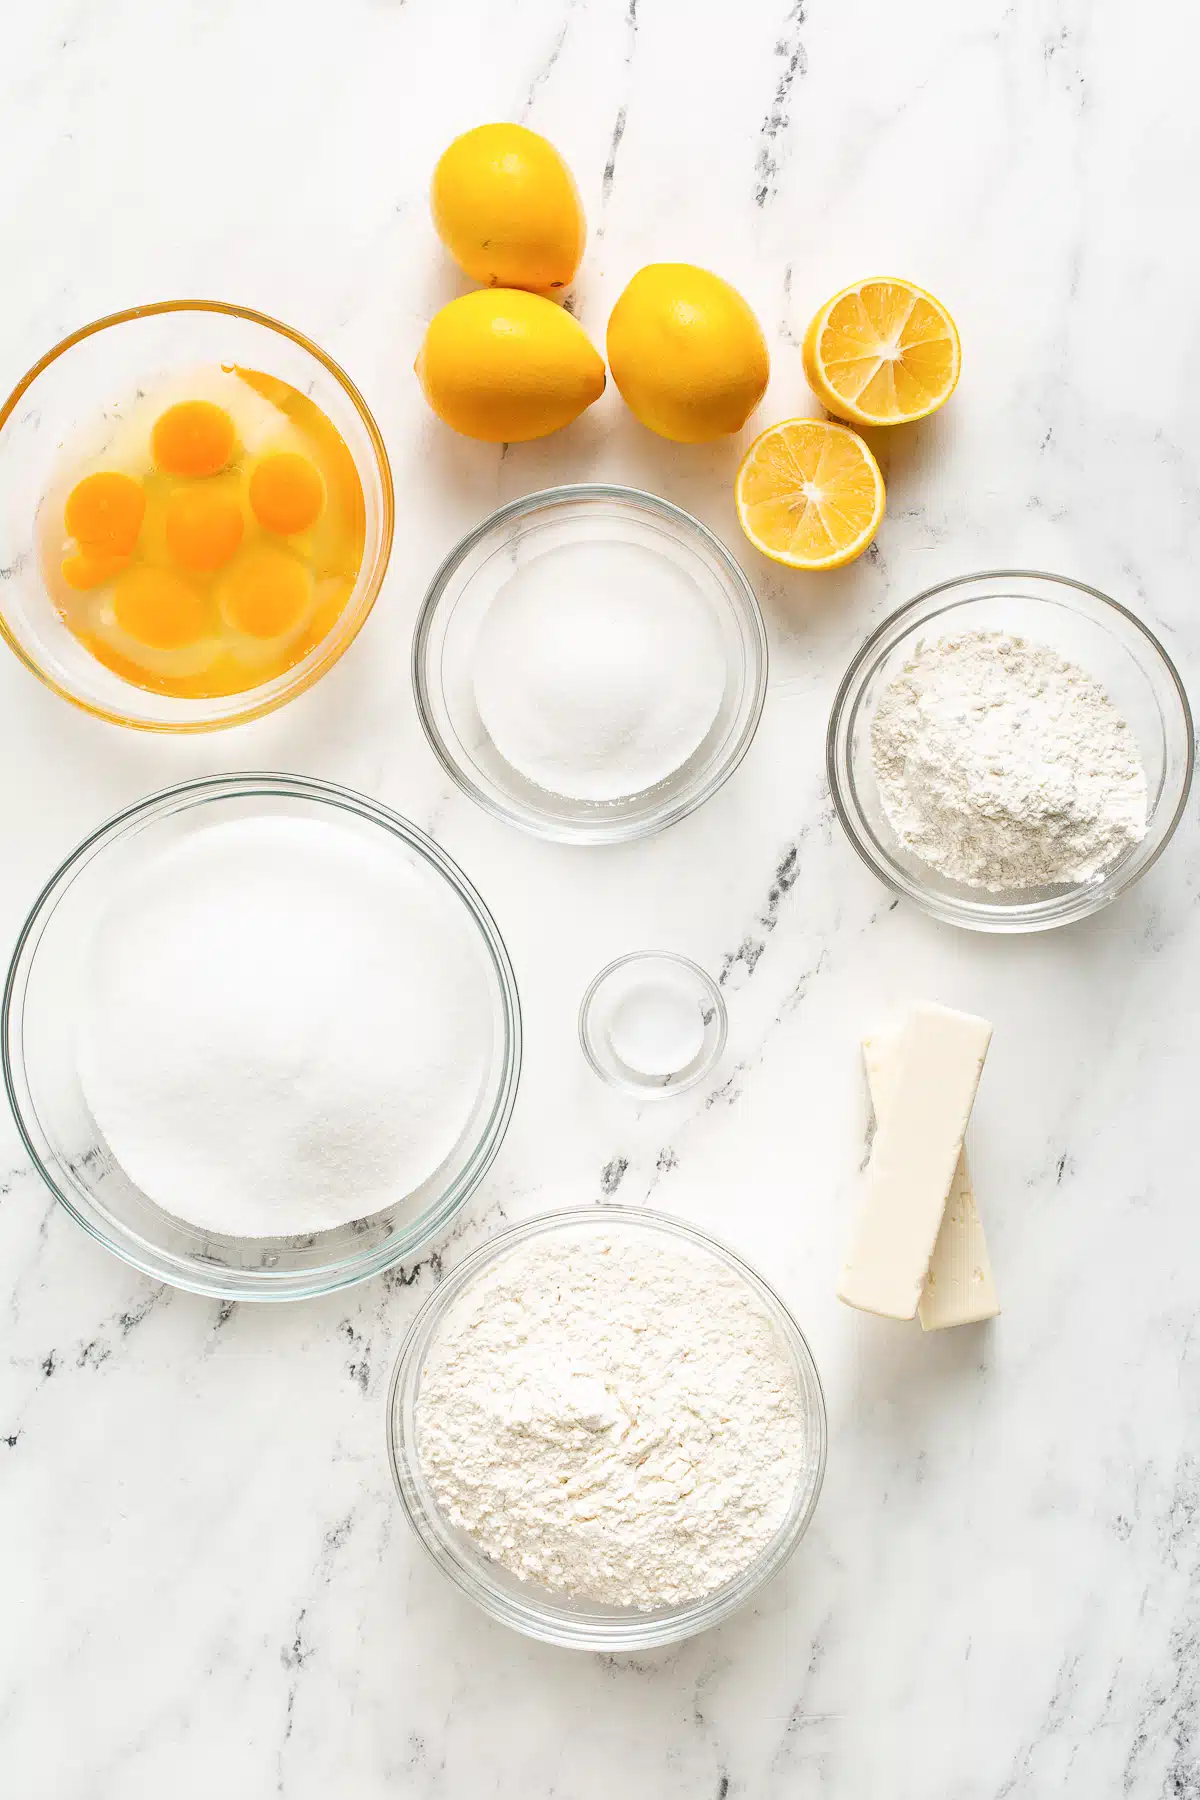
2. Then, prepare the buttery shortbread crust. Add half a pound of unsalted butter and half a cup of granulated sugar to a large bowl. Use a stand mixer or an electric hand mixer to cream the butter and sugar for about 3 minutes (or until light and fluffy).
3. In a separate bowl, add two cups of all-purpose flour and a pinch of salt. Turn your mixer on low and add your flour-salt mixture to the butter mixture. Mix until just combined.
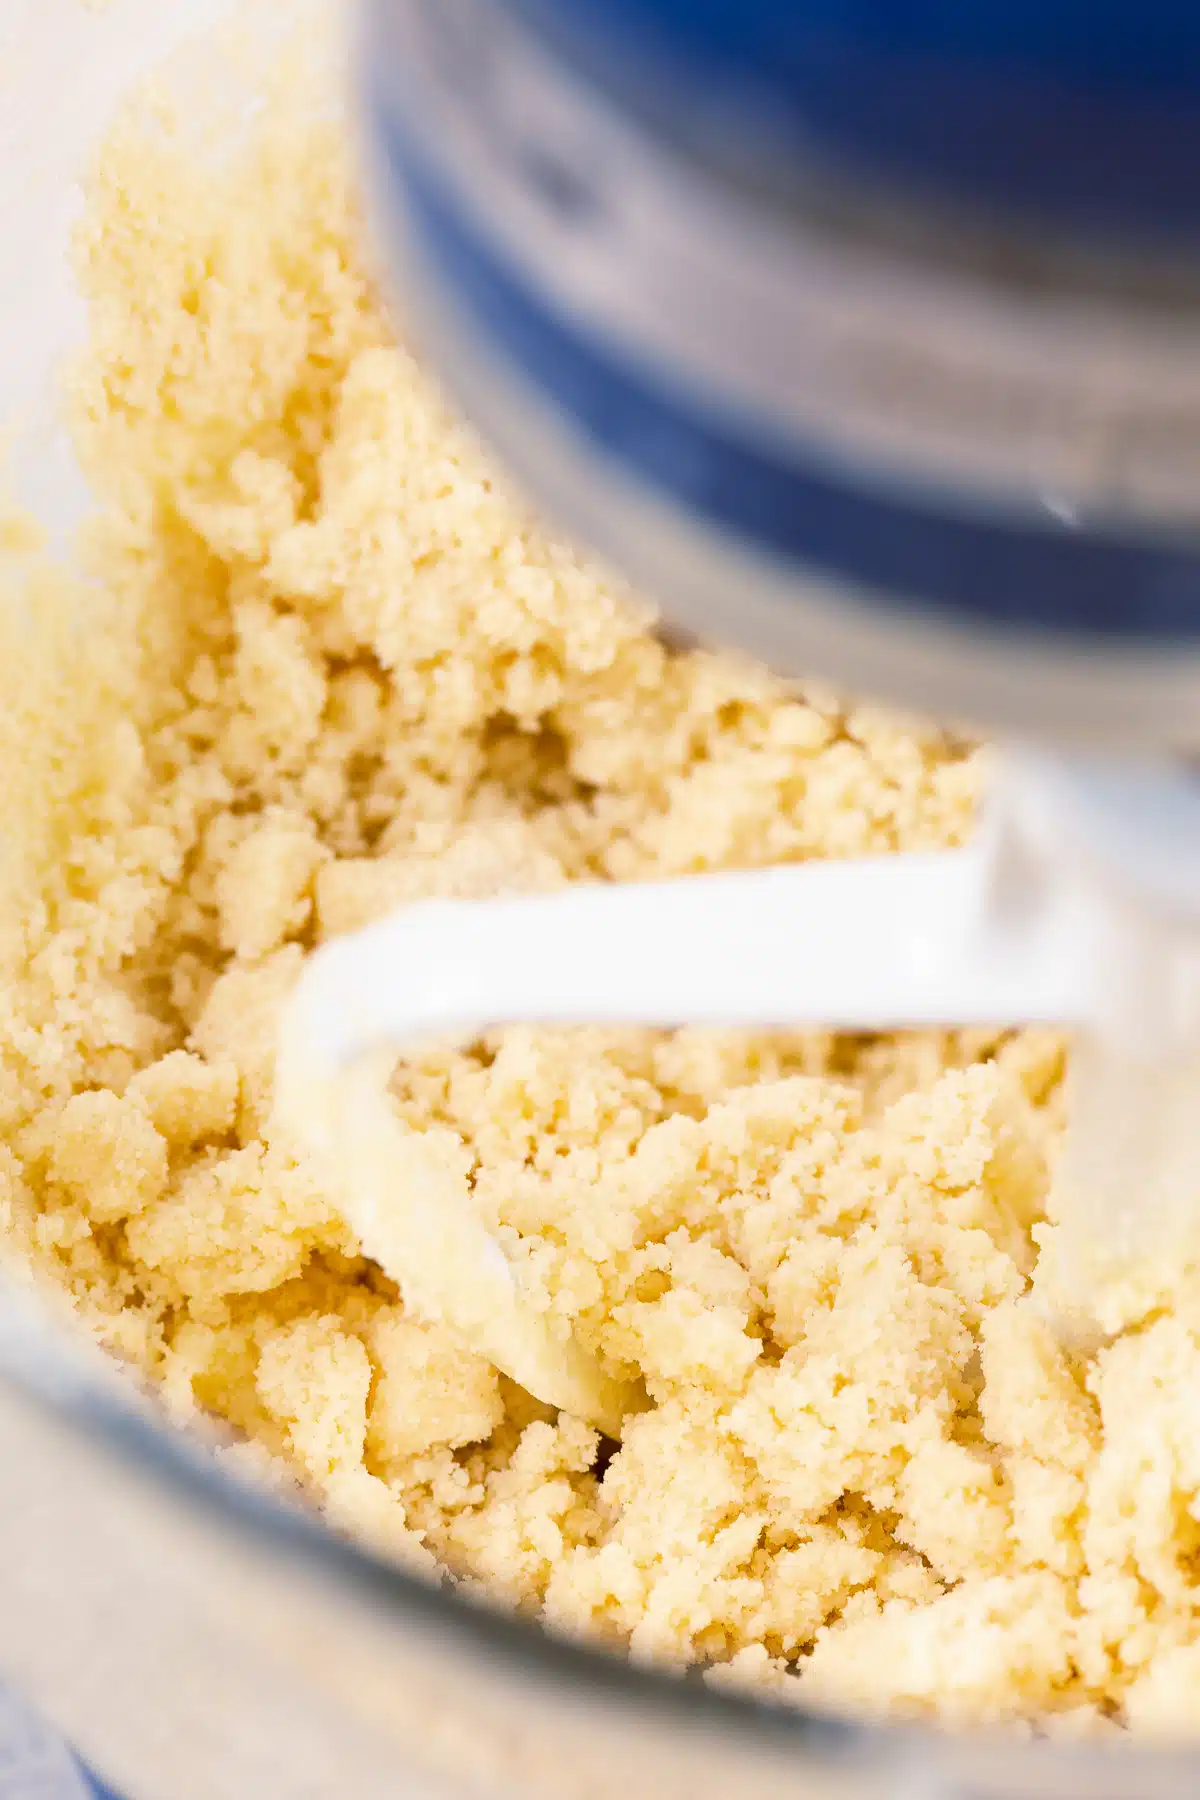
4. With well-floured hands (this will prevent the dough from sticking to your fingers), transfer the dough to your prepared baking dish. Gently flatten the dough into an even layer, building a ½-inch edge up the side of the pan.
5. Place your crust in the oven and par-bake for 15-20 minutes (or until golden brown). Remove from the oven to cool while the oven remains on.
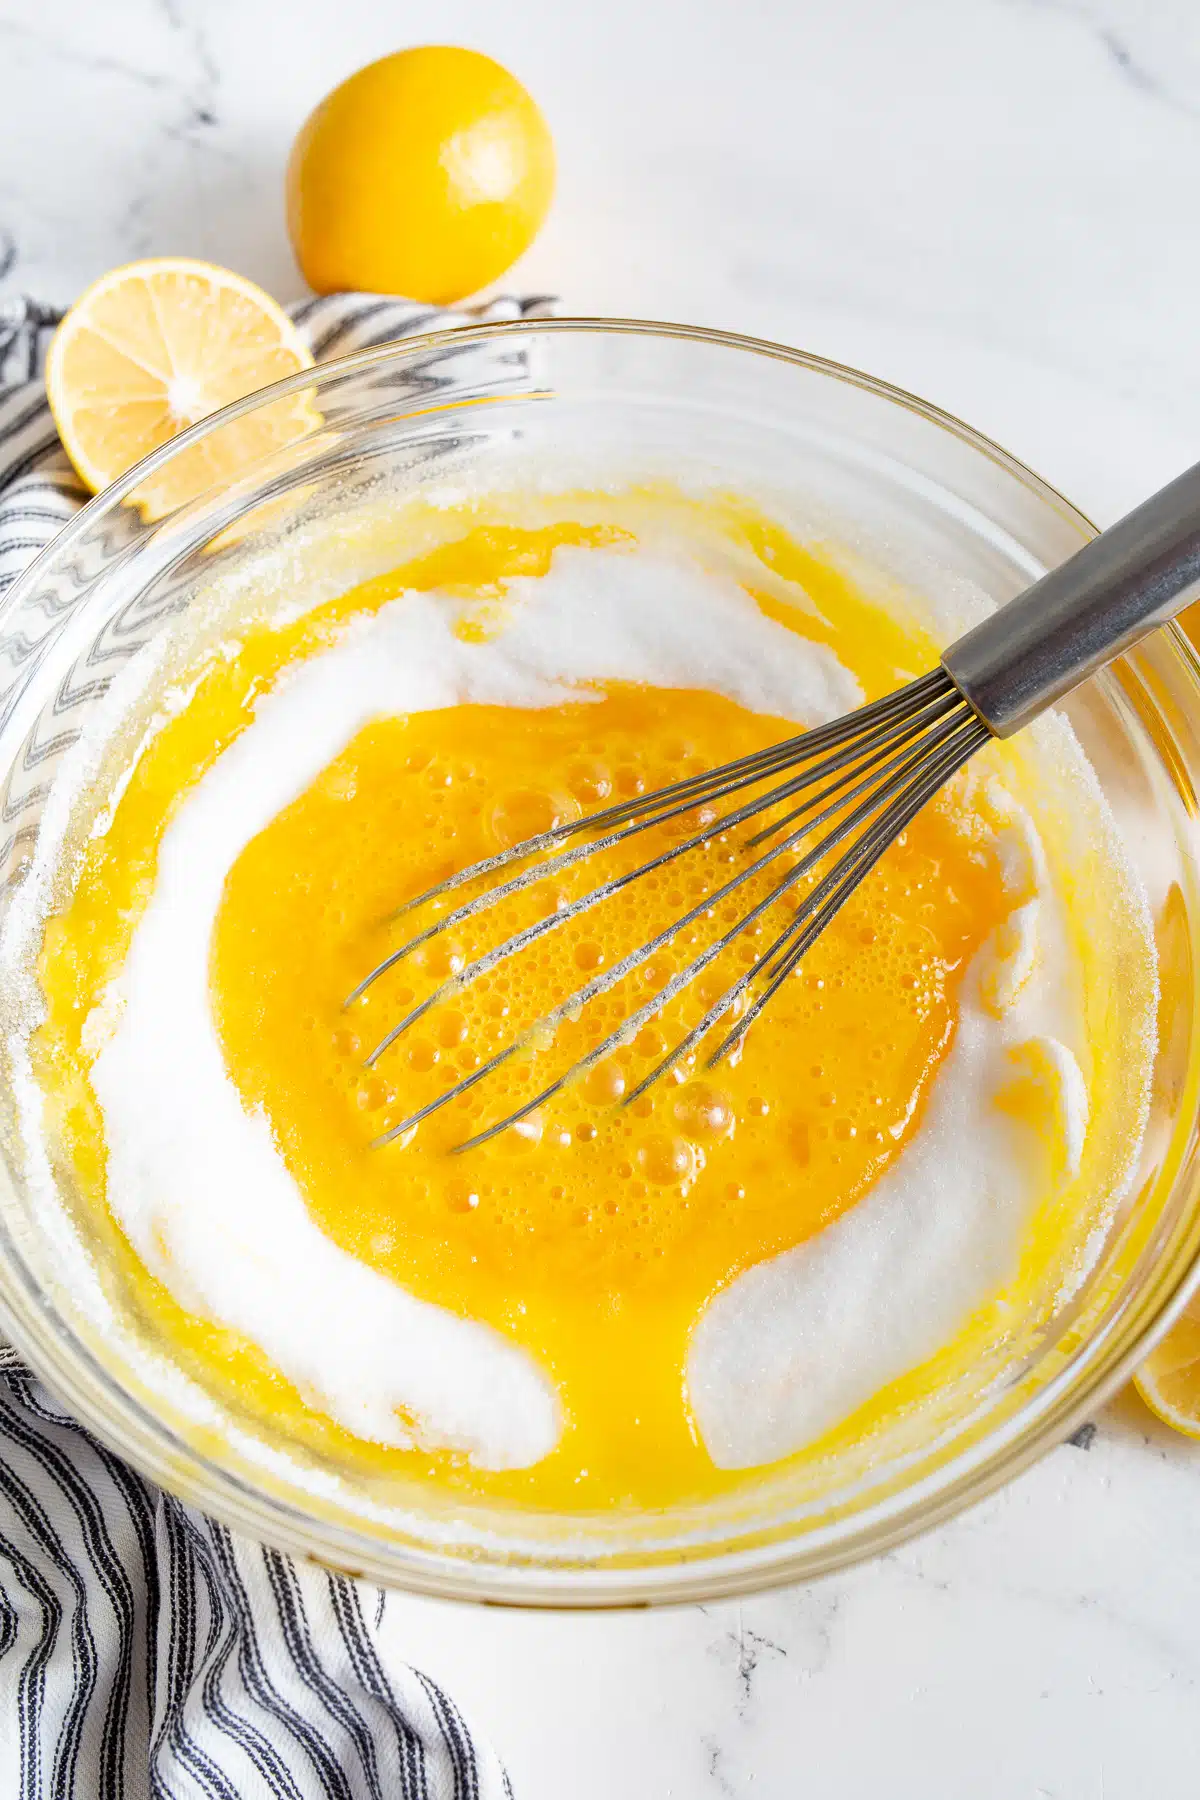
6. As the crust parbakes, start on the filling. In another bowl, whisk together six large eggs, three cups of granulated sugar, four tablespoons of lemon zest, one cup of lemon juice, and one cup of all-purpose flour.
7. Once the crust has cooled, pour your lemon filling over the top. Return to the oven and bake for 35 minutes.

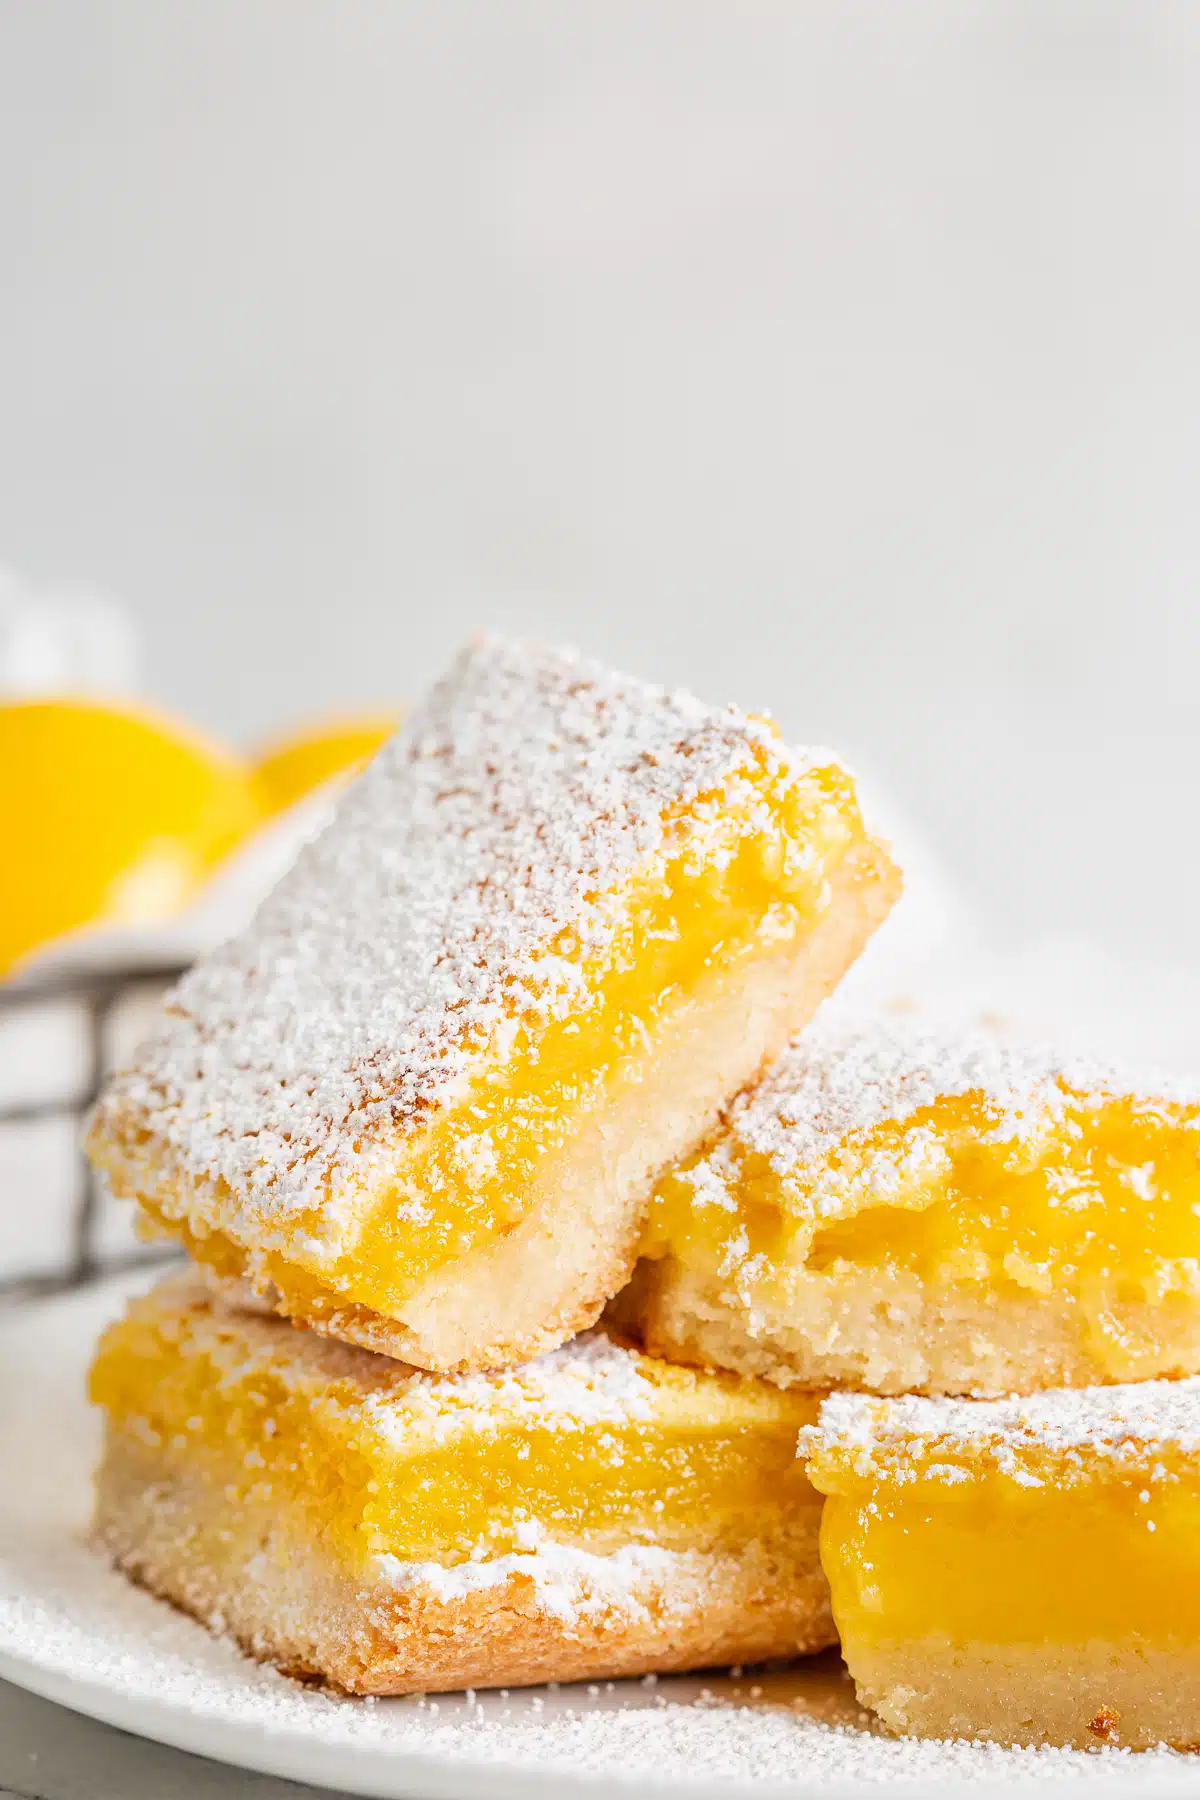
8. Remove from the oven and allow them to set before slicing. You know your lemon bars are set when the center is no longer jiggly. Cut your gooey lemon bars into squares and dust them with powdered sugar. Dig in!
Can I use bottled lemon juice to make lemon bars?
I do not recommend using concentrated lemon juice for the freshest-tasting lemon bars. Fresh lemon juice and lemon zest give the best lemony flavor. I love using this citrus squeezer whenever I need fresh lemon juice.
How to Cut Lemon Bars Cleanly
First, remember to wait until your bars have set, then dampen your knife with water before slicing. Use one downward motion to cut through. After each cut, wipe off and dampen your knife, repeating until all of the lemon bars have been sliced.
For even easier cutting, line your baking dish with parchment paper (with extra paper hanging off the sides). After your lemon bars have set and cooled, remove the pre-cut lemon bars from the pan, place them on a large cutting board, and cut using the method outlined above.
Storage and Freezing
Store any leftover lemon squares in an airtight container or on a tray covered with aluminum foil. They should last for up to a week when stored in the refrigerator. You can also freeze your lemon bars if desired and enjoy them for up to 4-6 months. This is a perfect option if you want to make an easy dessert in advance for your next summer gathering or barbecue.
How to Serve
You can serve your easy lemon bars fresh out of the oven as soon as they’ve cooled. They’re delicious either warm or at room temperature. If you’ve stored your lemon bars in the fridge or freezer, you can heat them up in the microwave, oven, or toaster oven when you’re ready to enjoy them. They’re perfect for parties, an afternoon coffee date, and even bake sales.
More Dessert Recipes:
- Chocolate-Covered Cheesecake Bites
- Lemon Blueberry Cookies
- Raspberry Cookies
- Toffee Pecan Bars
- Arroz con Leche
- Blueberry Crumble Bars
If you try making this Lemon Bars Recipe, please leave me a comment and let me know! I always love to hear your thoughts.

Lemon Bars Recipe
Ingredients
For the Crust
- ½ pound unsalted butter, at room temperature
- ½ cup granulated sugar
- 2 cups all-purpose flour
- ⅛ teaspoon salt
For the Filling
- 6 large eggs, at room temperature
- 3 cups granulated sugar
- 4 tablespoon lemon zest, less if you prefer a less bold lemon flavor
- 1 cup fresh lemon juice
- 1 cup all-purpose flour
- Confectioners’ sugar, for dusting
Instructions
- Preheat your oven to 350 degrees F and line a 13×9 inch baking pan with parchment paper so that the parchment paper goes up the sides and spills over (see notes).
- To make the crust, cream the butter and sugar using a stand mixer or electric hand mixer until light and fluffy (approximately 3 minutes).
- In a separate bowl, combine the flour and salt. With the mixer on low, add the flour to the butter mixture until just combined.
- With well-floured hands (this will prevent the dough from sticking to your fingers), transfer the dough to your prepared baking dish. Gently flatten the dough into an even layer, building a ½-inch edge up the side of the pan.
- Bake the crust for 15 to 20 minutes or until just turning golden brown. Remove from the oven and cool; leaving the oven on.
- To make the filling, whisk together the eggs, sugar, lemon zest, lemon juice, and flour. Pour the egg mixture over the cooled crust and bake for approximately 35 minutes, or until the filling has set. Remove from the oven and cool at room temperature.
- Cut into squares and dust with confectioners' sugar. Store leftovers in an airtight container in the refrigerator for up to 5-7 days.
Video
Notes
- Using parchment paper to line your baking dish makes the removal and cutting of the lemon bars so much easier than simply greasing the baking pan. Just make sure to have enough extra parchment paper hanging off the sides – this will act as a hammock to remove the entire sheet of lemon bars from the pan before slicing.
- You know your lemon bars are set when the center is no longer jiggly.
Nutrition
Nutrition information is automatically calculated, so should only be used as an approximation.


FANTASTIC LEMON BARS!! I threw away my go to recipe and this is the go to now! I love how much filling there is in this recipe! They turned out PERFECT and so thick and so lemony!! Perfect amount of lemon. AND I LOVE LOTS OF LEMON!
THANK YOU!!!
Thanks, Leanna 🙂
Very easy and just the right amount of sweet/sour. Not a complicated recipe to follow.
Thanks for the great rating and feedback, Alfredo 😀