
This post may contain affiliate links. See my disclosure policy.

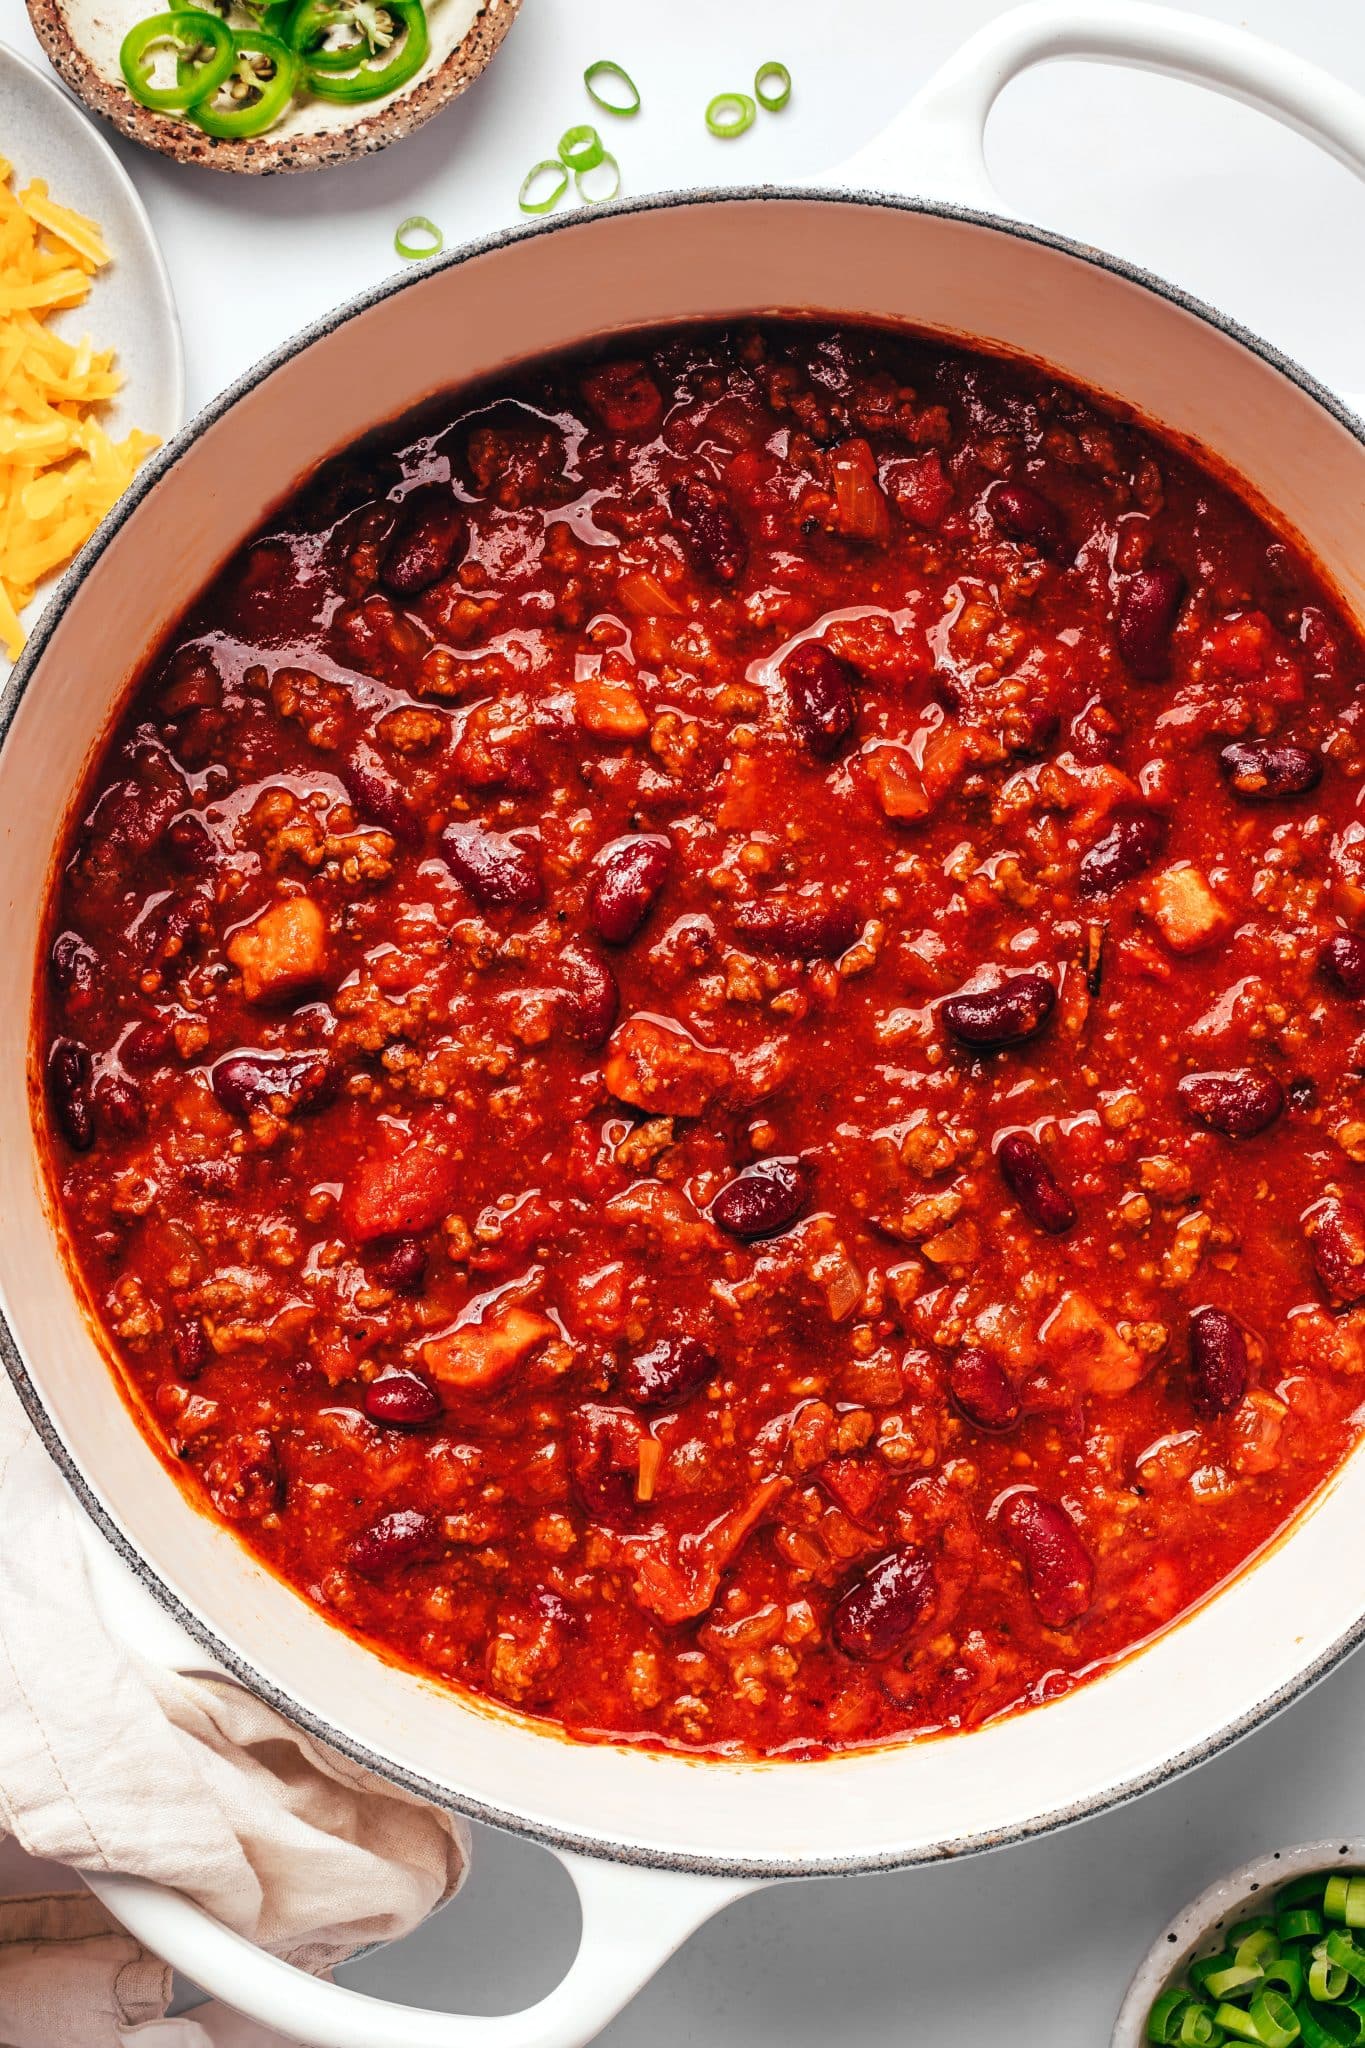
This is my favorite hearty, meaty, and easy homemade chili recipe. Packed with ground beef, smoky bacon, and tender kidney beans simmered in a rich tomato base, it’s truly the BEST chili recipe I’ve ever made. The bacon is cooked first so its flavorful drippings can be used to build the rest of the chili, and everything comes together in one pot for a dinner that’s perfect for weeknights, game days, or family gatherings.

Reader Reviews
★★★★★ 4.87 from 641+ reader ratings
“BEST chili recipe EVER!! My boys told me never to make other chili recipes again. The bacon is a total game changer!” – Caroline
“This is SO good! I’ve never made chili before and picked this one due to the reviews…The flavor is perfect and very satisfying. Thank you!” – Coonellie
Quick Look: Homemade Chili Recipe
- What to expect: A thick, hearty, meaty chili loaded with ground beef, tender kidney beans, rich tomato flavor, and smoky bacon in every bite.
- Flavor: Rich, savory, smoky, and just a little tangy. It’s flavorful without being overly spicy, so it’s an easy crowd-pleaser.
- Texture: Thick and meaty with plenty of tender beans. It’s definitely not a thin or soupy chili, but there’s enough broth to keep everything saucy and spoonable.
- Time: Give yourself about 1 hour and 30 minutes from start to finish, with most of that time spent letting everything simmer together.
- Good to know: Like most great chili recipes, this one tastes even better the next day. Make a big batch and enjoy the leftovers, or stash some in the freezer for later.
This recipe is inspired by my mom’s beef and bean chili, but with an extra layer of smoky bacon flavor that makes it my own. It’s also one of my boys’ most requested dinners, right alongside cozy favorites like classic meatloaf, homemade chicken soup, and American goulash.
So what’s the secret to making the best chili recipe? Bacon, of course!
I cook the bacon first, then use some of the rendered fat to brown the ground beef and cook the onions, so that smoky flavor is built into the chili from the very beginning. Honestly, it’s a total game-changer, you guys. I also love that it’s incredibly approachable, freezer-friendly, and made in just one pot, which means fewer dishes to worry about later on.
Table of Contents
Ingredients and Substitutions
You don’t need anything fancy to make a really great pot of chili. Most of these ingredients are pantry staples, but a few, especially the bacon, ground beef, and tomato paste, do a lot of the heavy lifting when it comes to flavor. You’ll find the full measurements in the recipe card below.
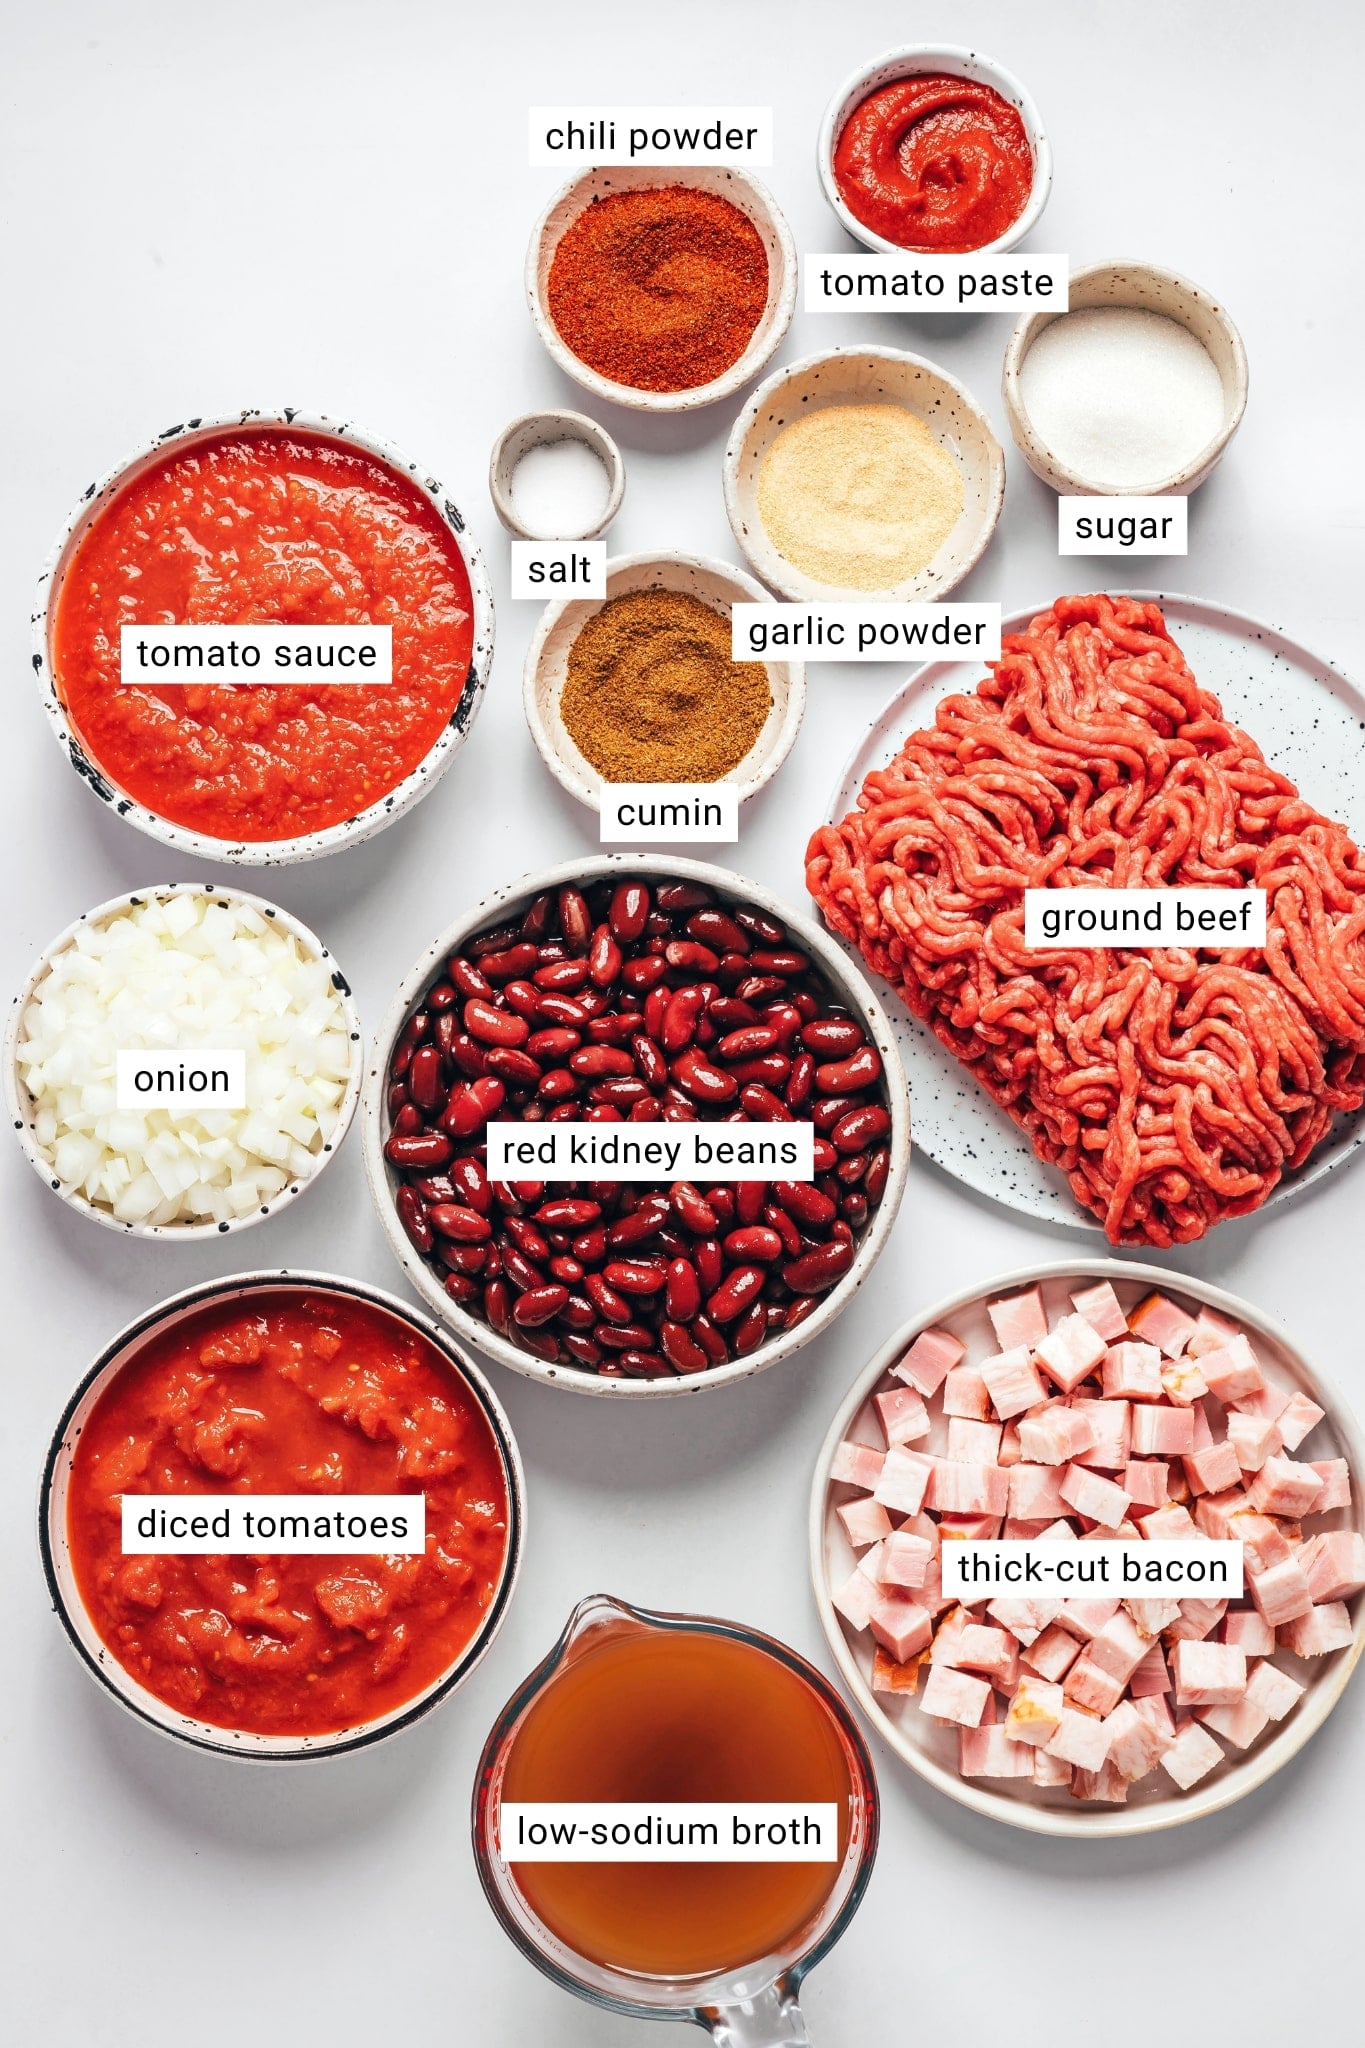
- Bacon: Thick-cut or regular bacon both work here. I usually reach for thick-cut when I want bigger, meatier bites of bacon, while regular bacon cooks faster and gets a little crispier. Whichever you use, don’t toss that bacon fat! I save some of it to brown the beef and cook the onions, which adds smoky flavor throughout the whole pot.
- Ground beef: I like using lean ground beef since the bacon already adds plenty of richness. If you’re using a higher-fat ground beef, you may want to drain off some of the excess grease after browning so the finished chili doesn’t turn oily. Ground turkey or ground chicken will work too, but the flavor won’t be quite as deep and beefy.
- Yellow onion: Two onions may sound like a lot, but trust me, they cook way down. They add a little sweetness and a ton of savory flavor to the base of the chili.
- Chili powder: This is where most of that classic chili flavor comes from. It adds warmth and plenty of flavor without making the chili super spicy. Just keep in mind that chili powder blends can vary quite a bit from brand to brand, so use one you already know and like.
- Ground cumin: Warm, earthy, and basically made for chili. A little cumin goes a long way toward giving the beef, beans, and tomatoes that cozy, slow-simmered flavor.
- Garlic powder: I love garlic powder here because it mixes right in with the other spices and distributes evenly throughout the whole pot. No little bits of garlic, just garlic flavor everywhere.
- Tomato paste: Don’t skip it! Letting the tomato paste cook for a minute or two before adding the rest of the tomatoes deepens the flavor and cooks away that raw, straight-from-the-can taste.
- Diced tomatoes and tomato sauce: This recipe includes both canned diced tomatoes and tomato sauce because they each bring something different. The diced tomatoes add texture, while the tomato sauce gives the chili a rich, saucy base. Several readers have also successfully made this recipe with fresh tomatoes – more on that in the FAQs below.
- Kidney beans: Kidney beans are my go-to for classic chili because they’re hearty and hold their shape really well as everything simmers. Black beans or pinto beans are easy swaps if that’s what you have in the pantry.
- Beef broth: I recommend low-sodium beef broth so you can control the seasoning yourself. Start with the amount listed in the recipe, then add a splash more if the chili gets thicker than you like. Chili is very forgiving that way.
- Sugar: I know, sugar in chili can be controversial! But we’re only using a little, and it helps balance the acidity from all those tomatoes. I do the same thing in my homemade spaghetti sauce. Of course, the chili shouldn’t taste sweet and you are free to reduce it or leave it out altogether if you prefer.
- Salt: Season as you go, but save your final taste test for the end. Bacon, broth, and canned tomatoes can all bring their own saltiness, and the flavors get more concentrated as the chili simmers.
How to Make Chili
This chili is easy to make, but taking a few extra minutes to cook the bacon, brown the beef, and build the tomato base separately makes a huge difference in the final flavor.

- Cook the bacon. Add the chopped bacon to a large Dutch oven or heavy-bottomed pot over medium heat. Cook until the bacon is browned and crisp, stirring occasionally. Use a slotted spoon to transfer the bacon to a clean plate, then carefully pour off the excess grease, leaving about 2 tablespoons in the pot.
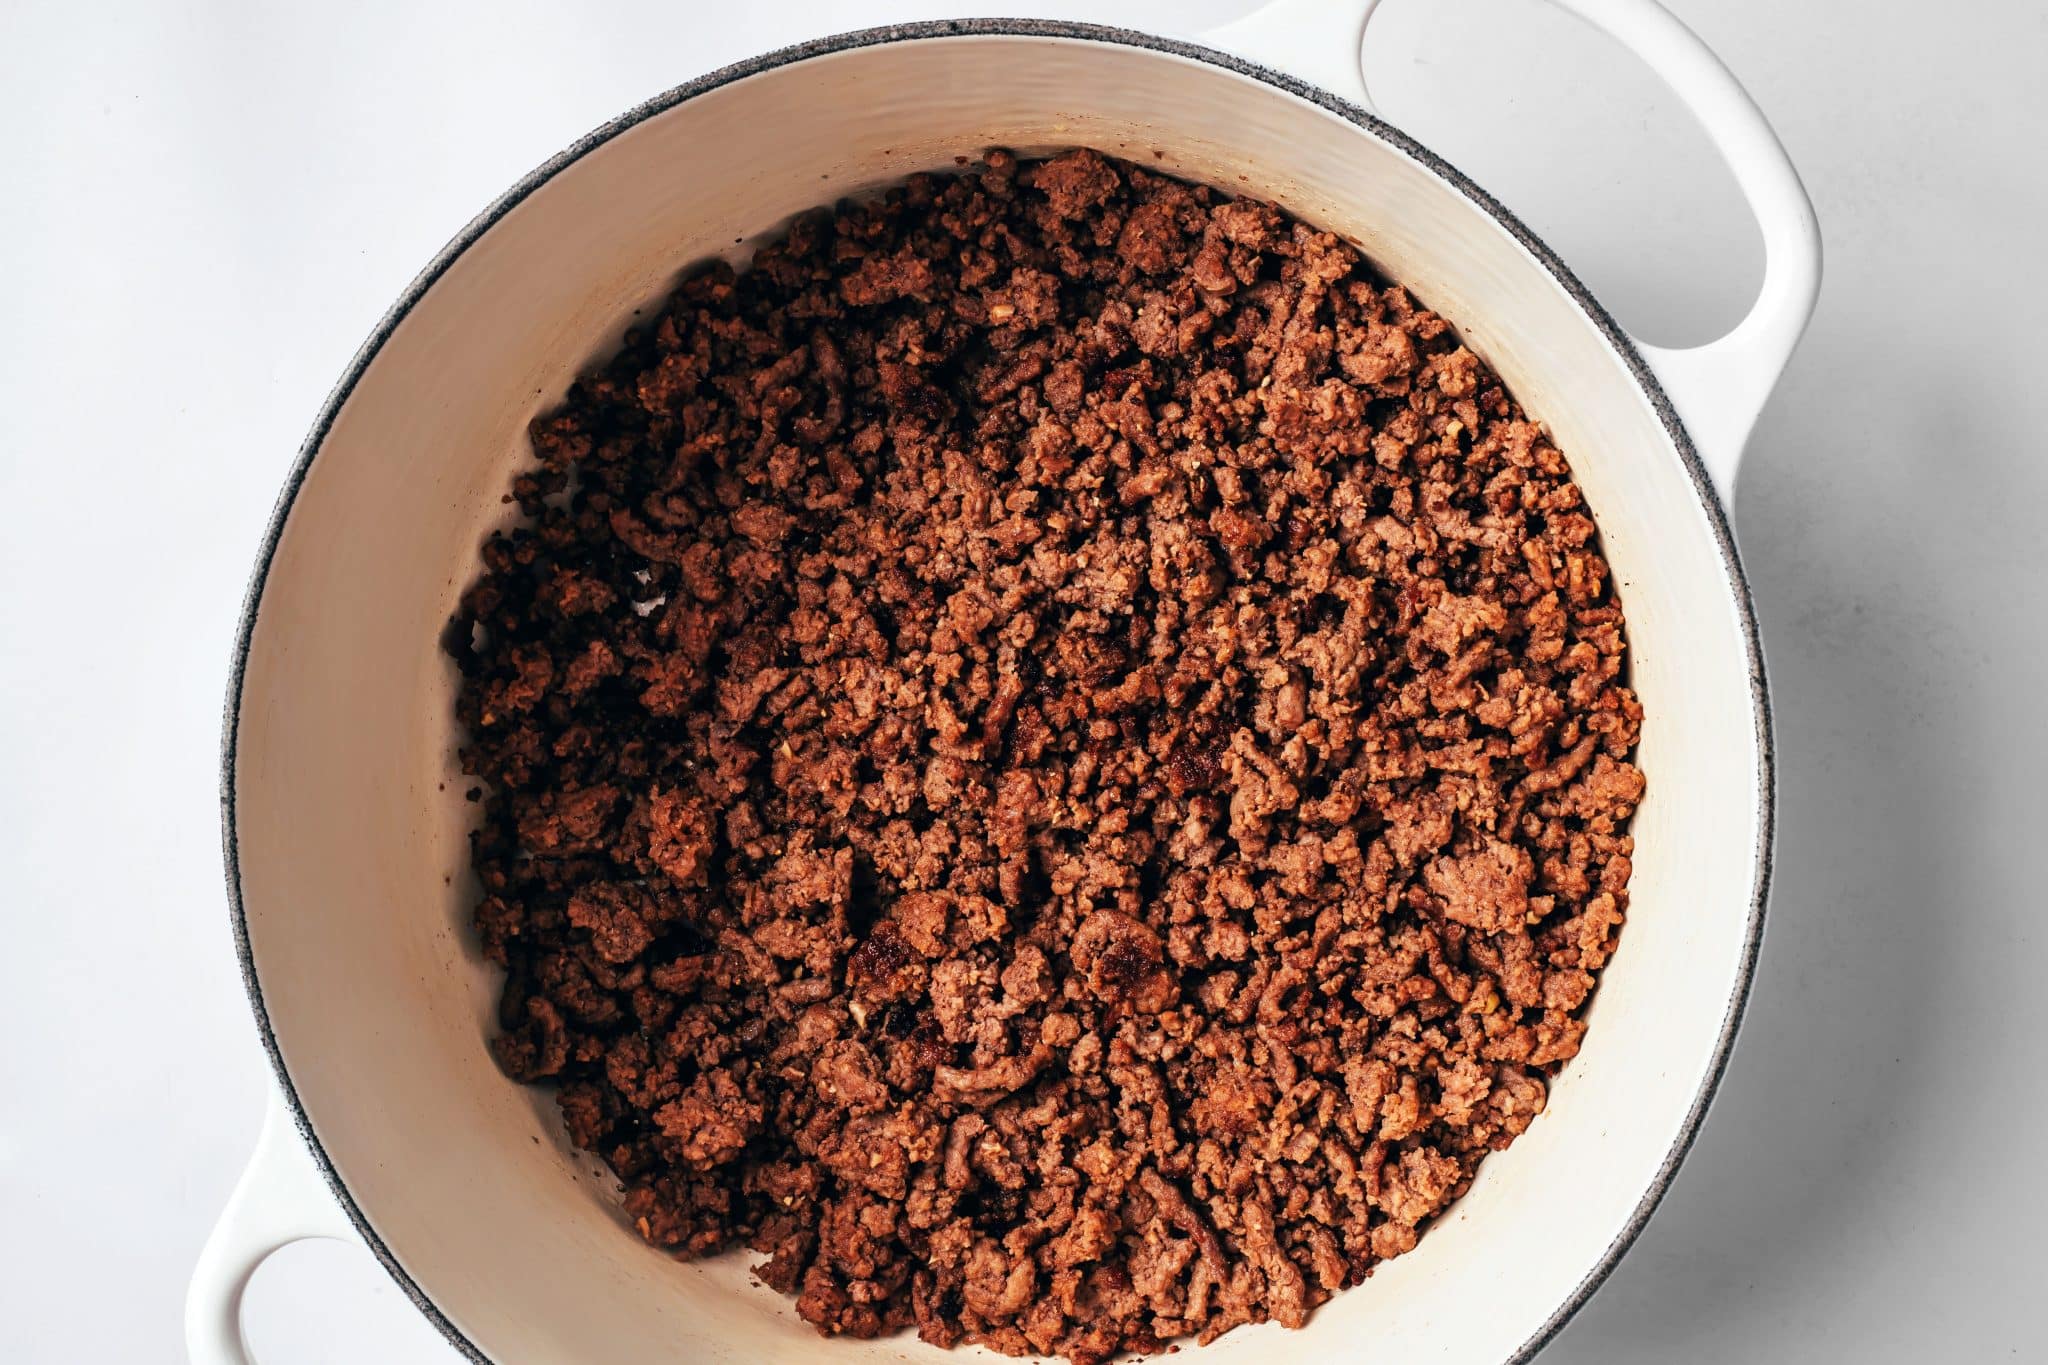
- Brown the ground beef. Add the ground beef to the bacon drippings and cook until nicely browned, breaking it apart with a wooden spoon as it cooks. Season with a little salt, then transfer the beef to a plate with the bacon. If you’re using a higher-fat ground beef, drain off any excess grease before moving on.

- Cook the onions. Add the diced onions to the same pot and cook over medium heat until soft and lightly golden, about 8-10 minutes. As they cook, scrape up all those browned bits stuck to the bottom of the pot. That’s flavor you definitely don’t want to leave behind.
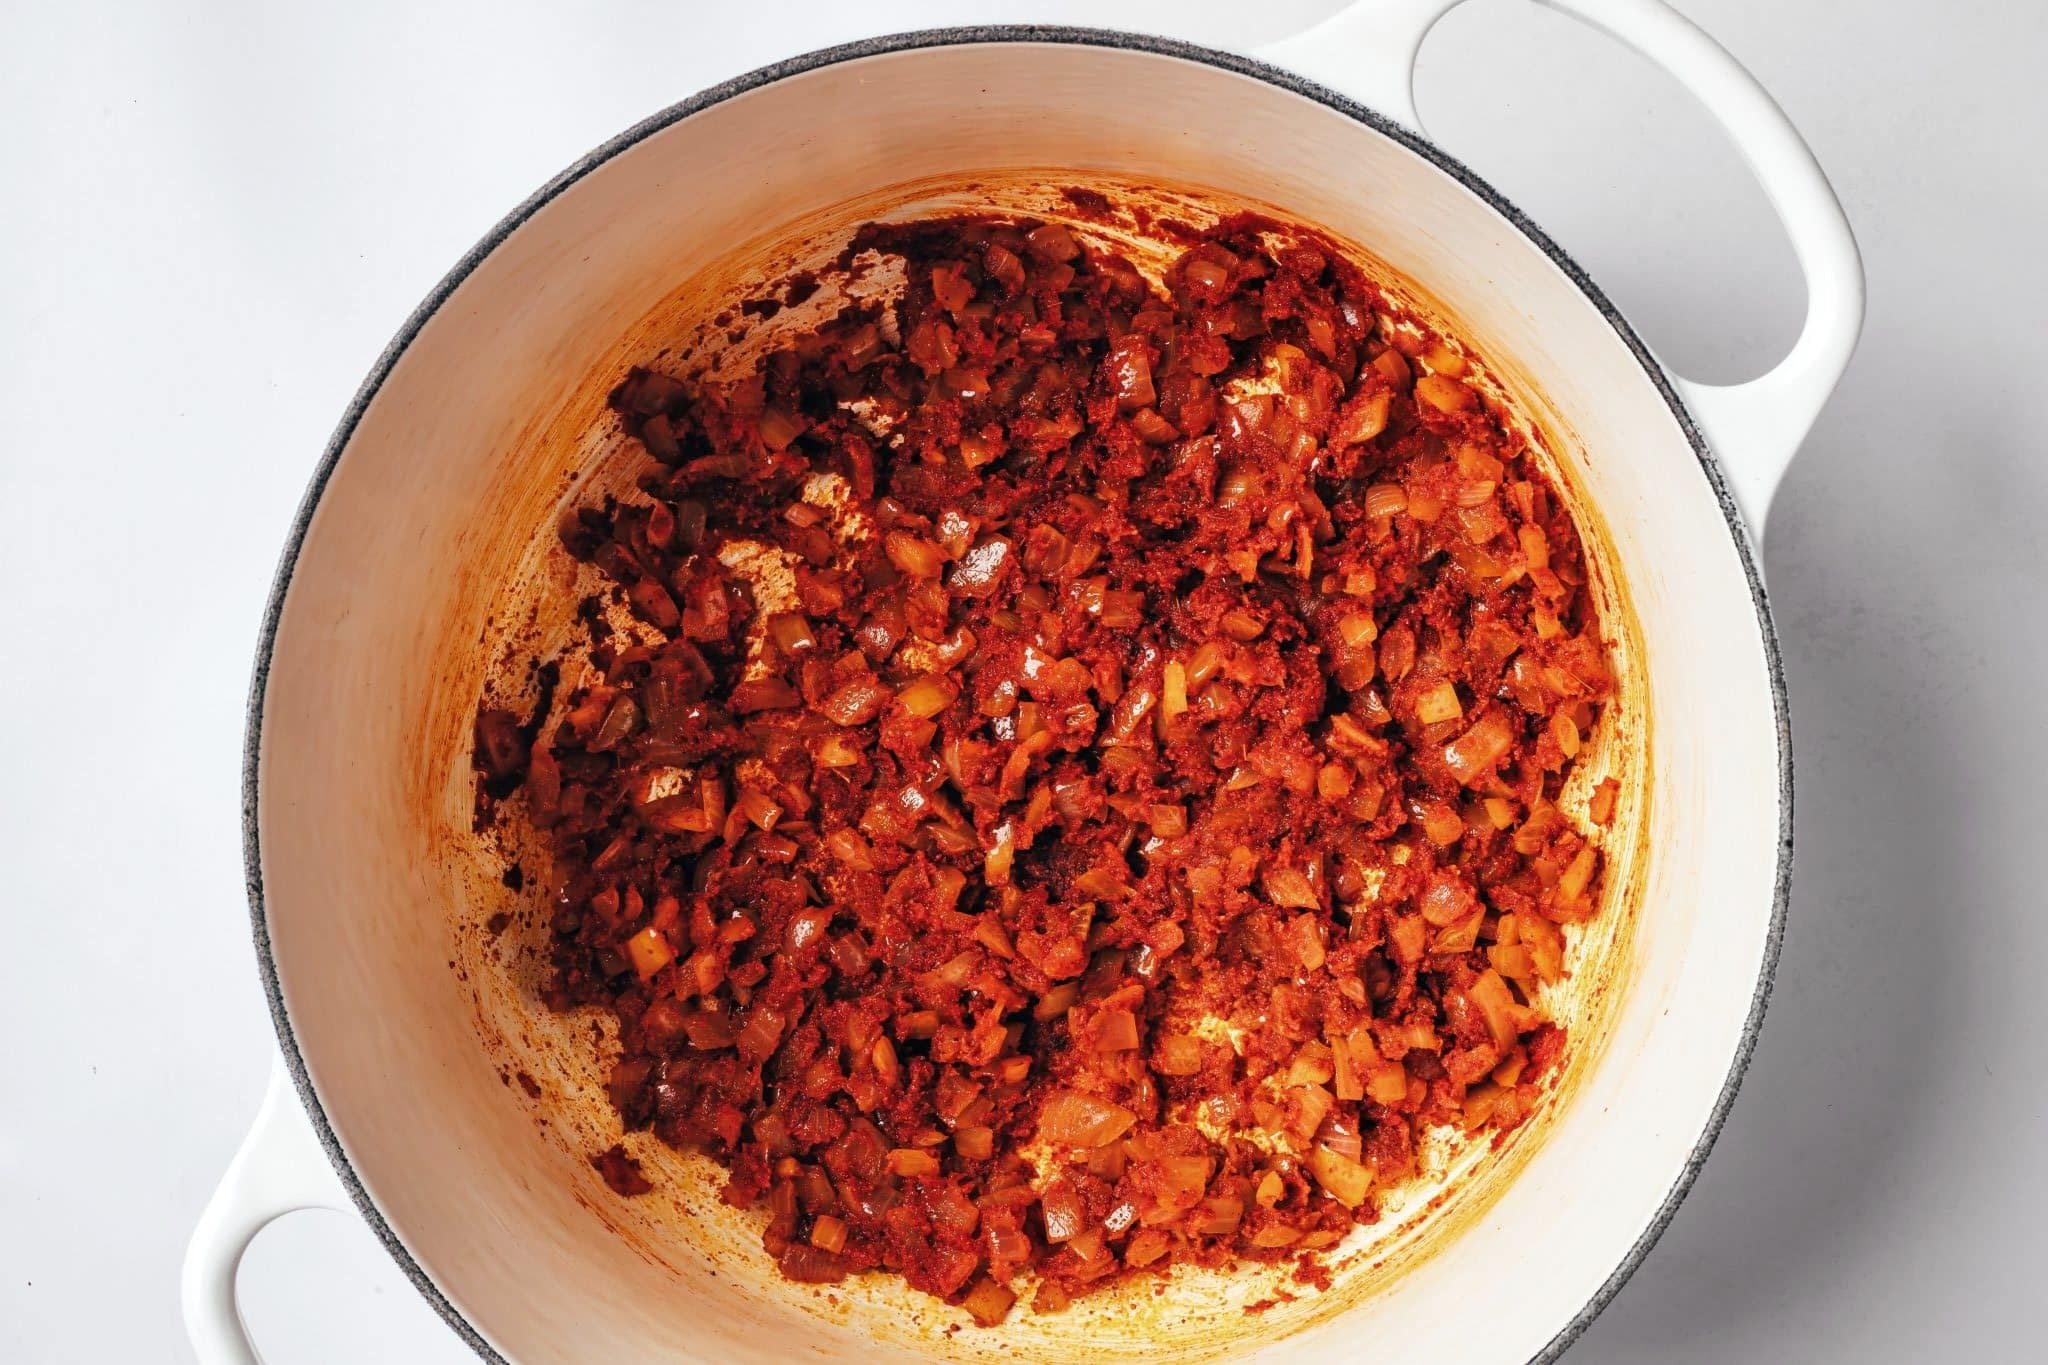
- Add the spices and tomato paste. Stir in the chili powder, cumin, garlic powder, and tomato paste. Cook for 1-2 minutes, stirring frequently, until everything is well combined, fragrant, and a deep brick-red color. Giving the tomato paste a little time to cook here makes the finished chili taste much richer.
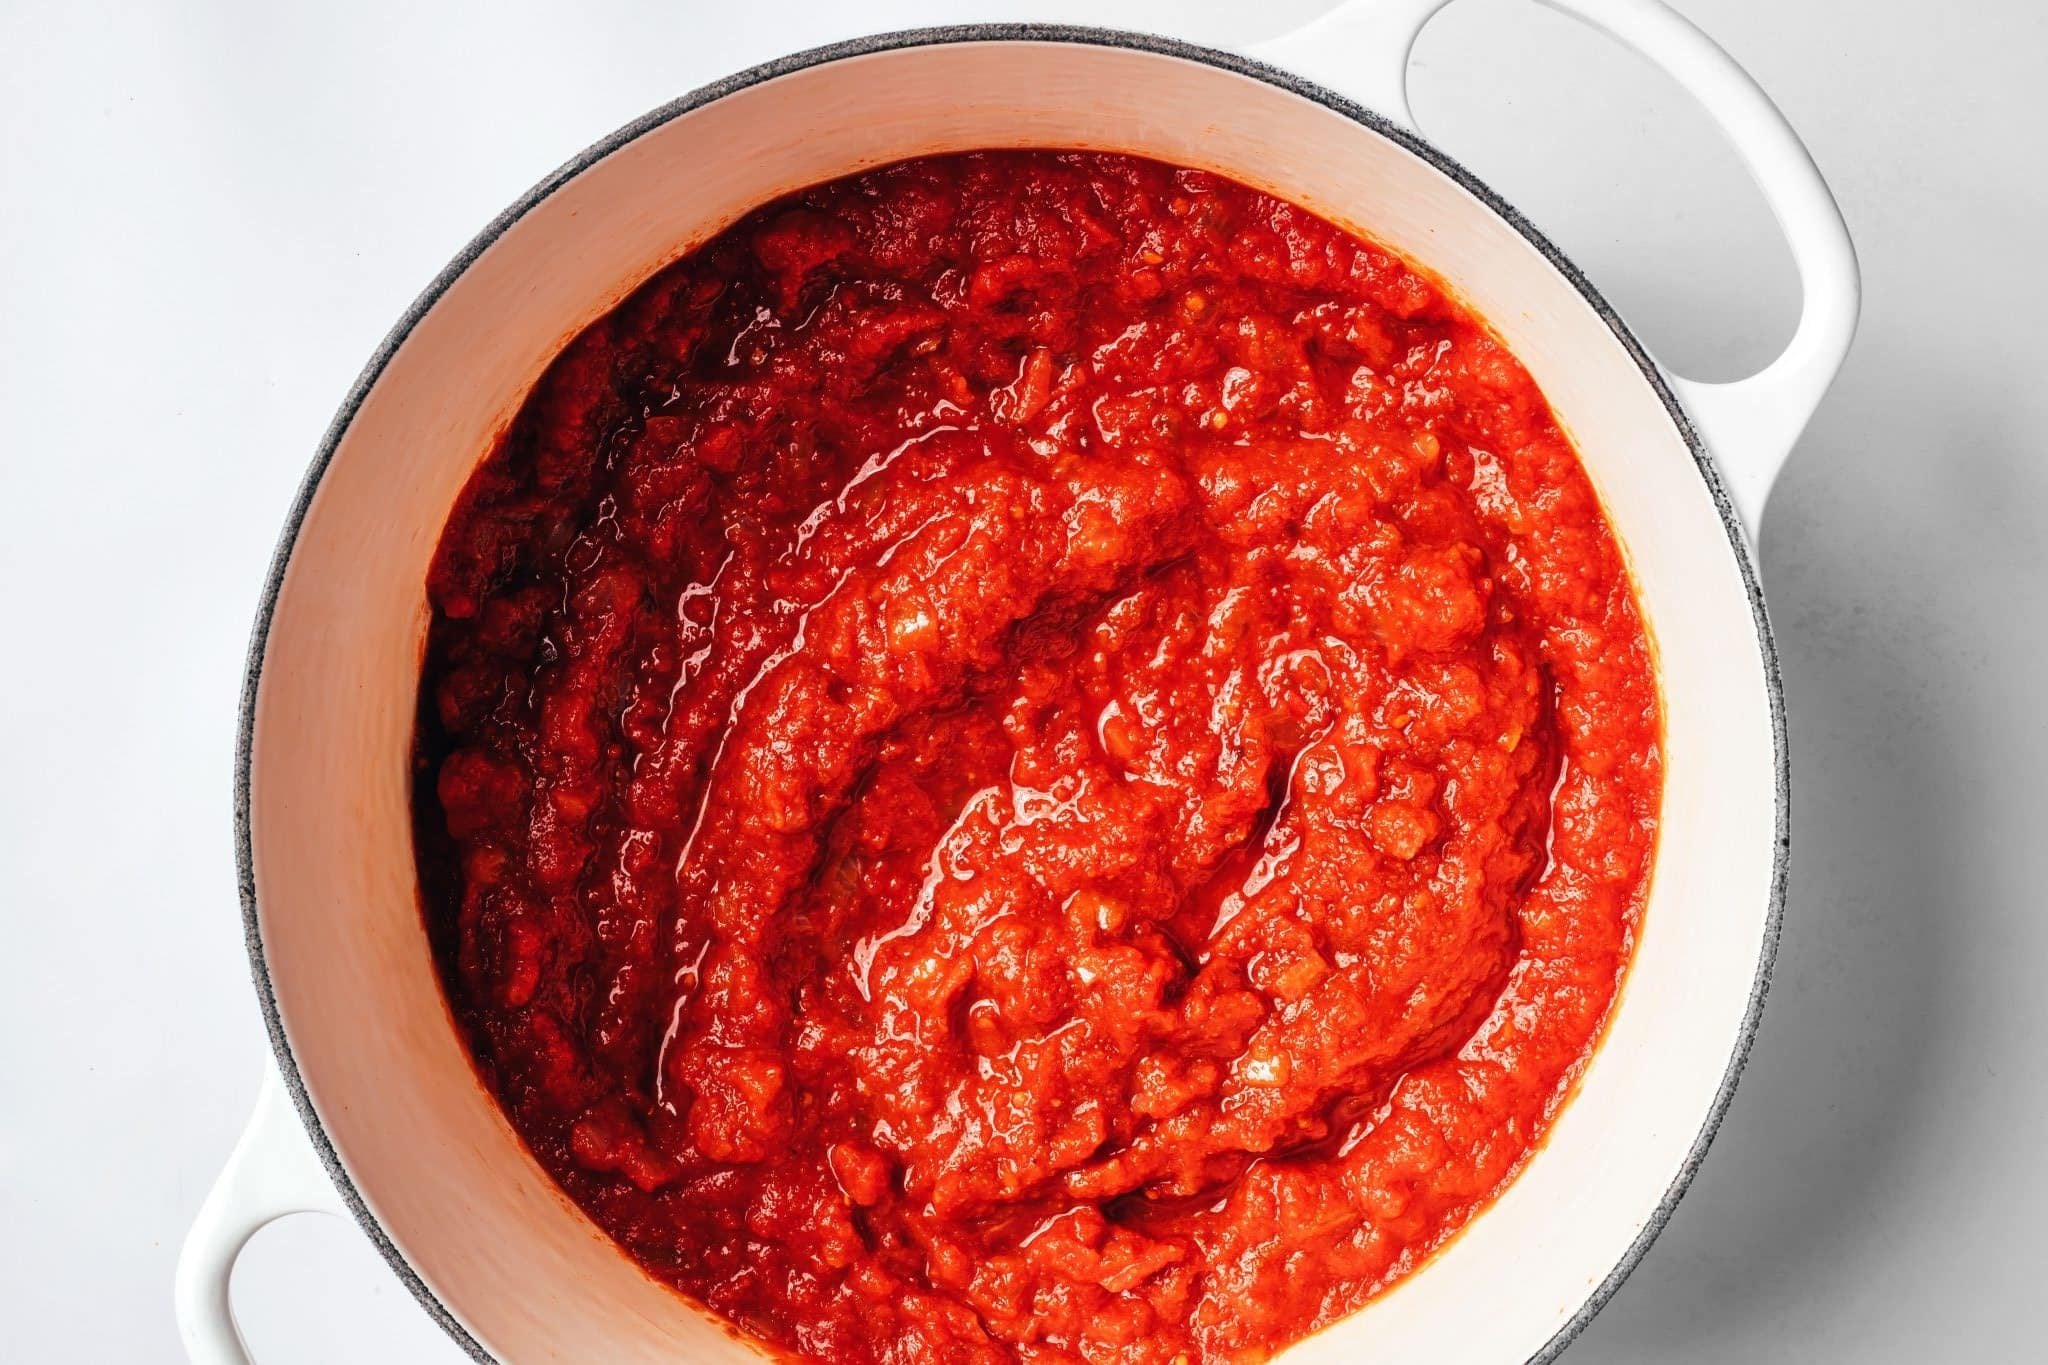
- Build the tomato base. Add the diced tomatoes, tomato sauce, and sugar. Stir everything together, scraping the bottom of the pot once more to make sure none of those flavorful browned bits are left behind. Bring the tomato mixture to a gentle simmer.
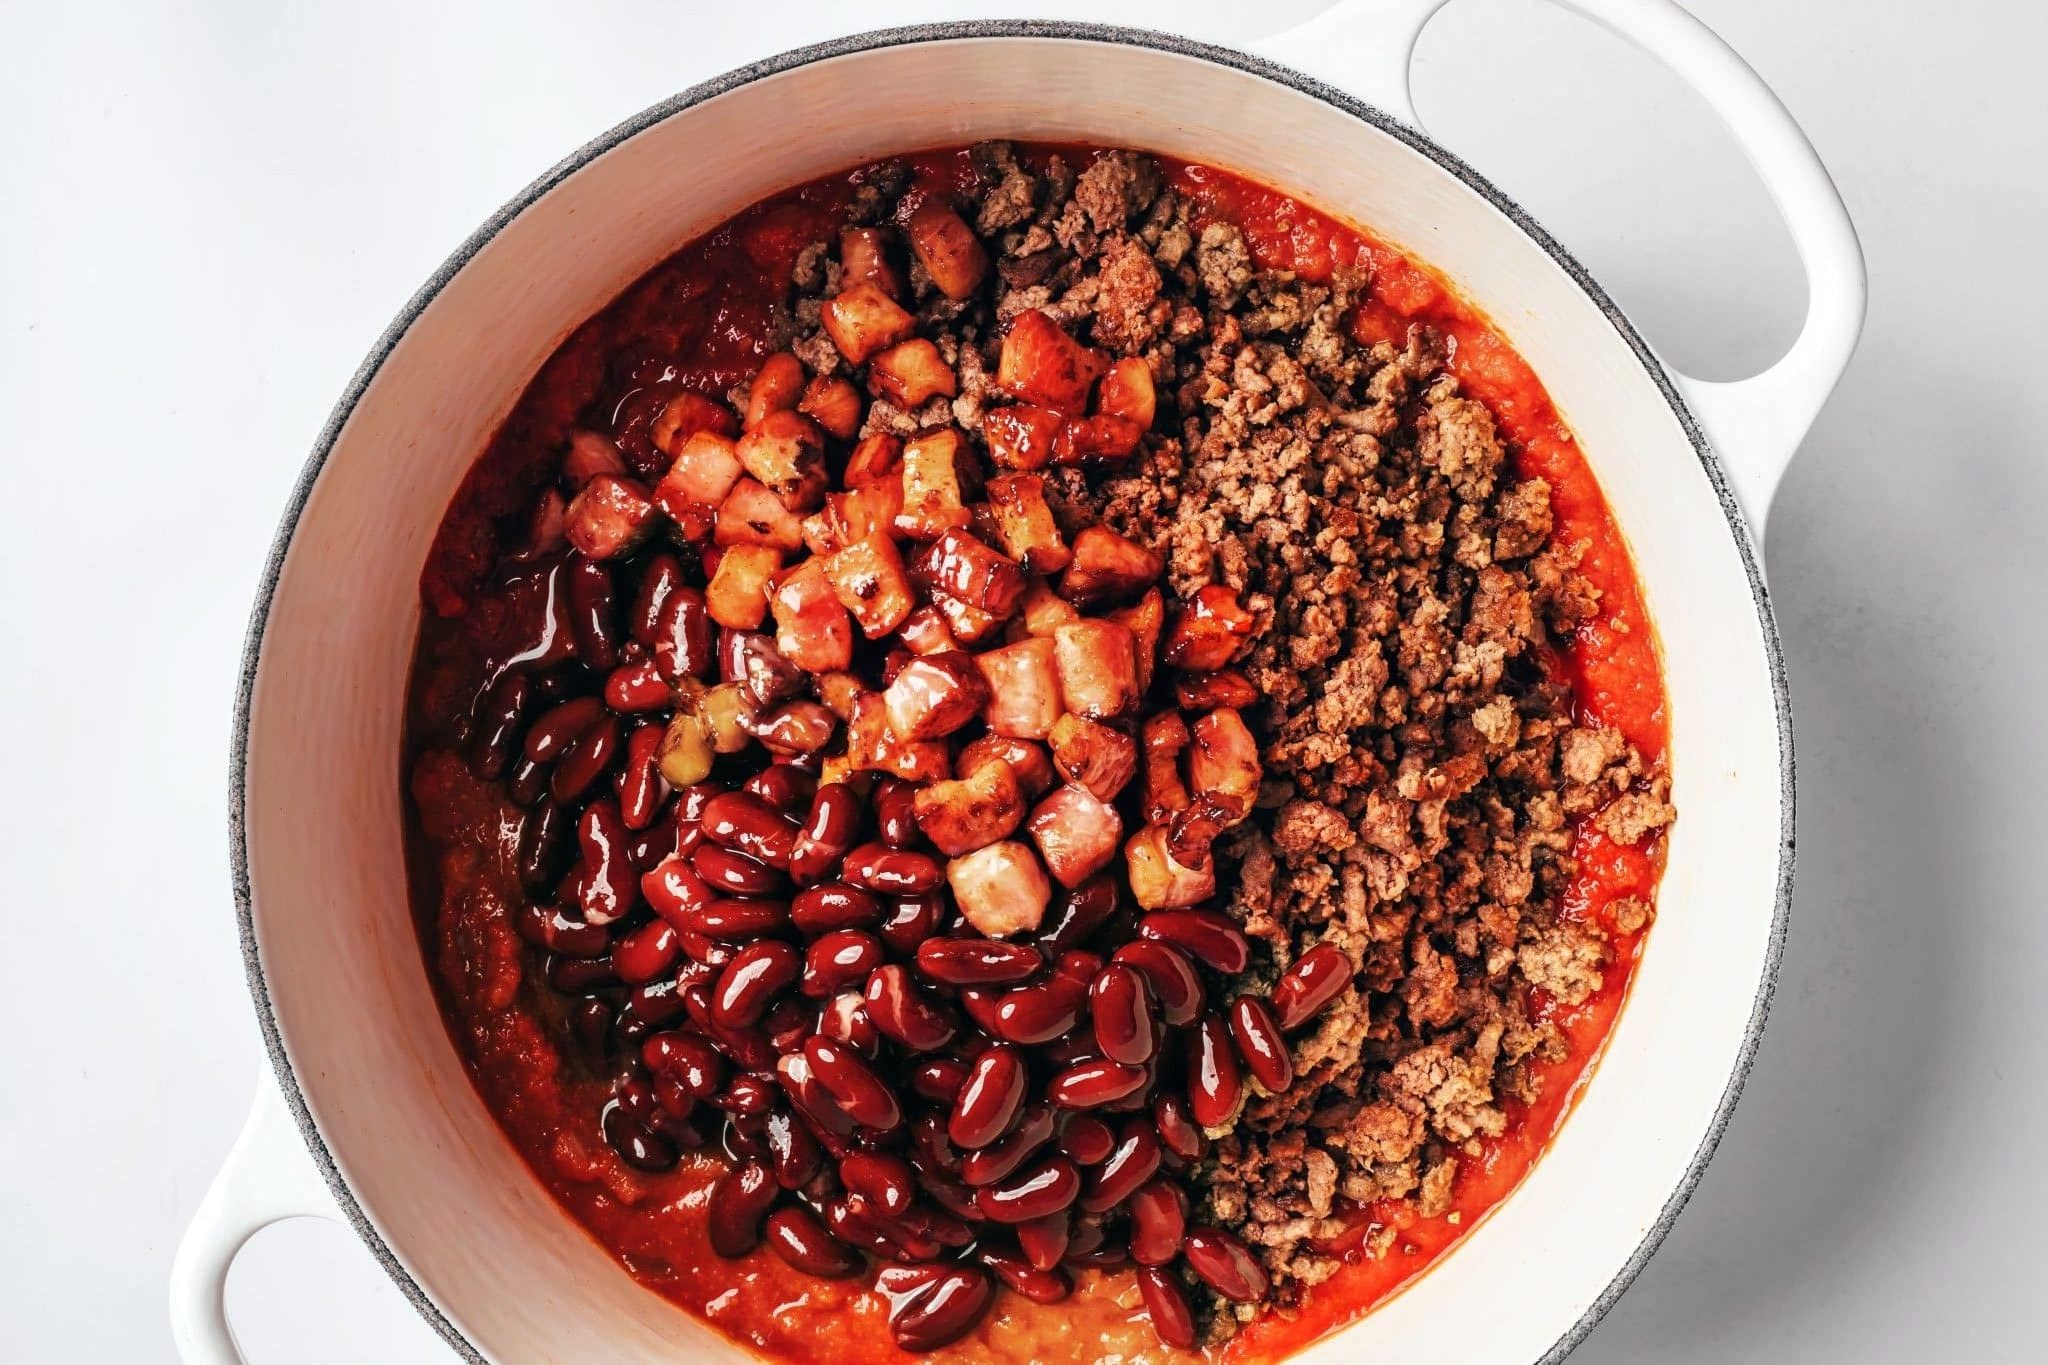
- Add the beef, bacon, and beans. Return the browned ground beef and most of the cooked bacon to the pot, then add the kidney beans. Stir well so all that beef, bacon, and beans gets coated in the tomato base. You can save a little bacon for serving on top if you’d like.
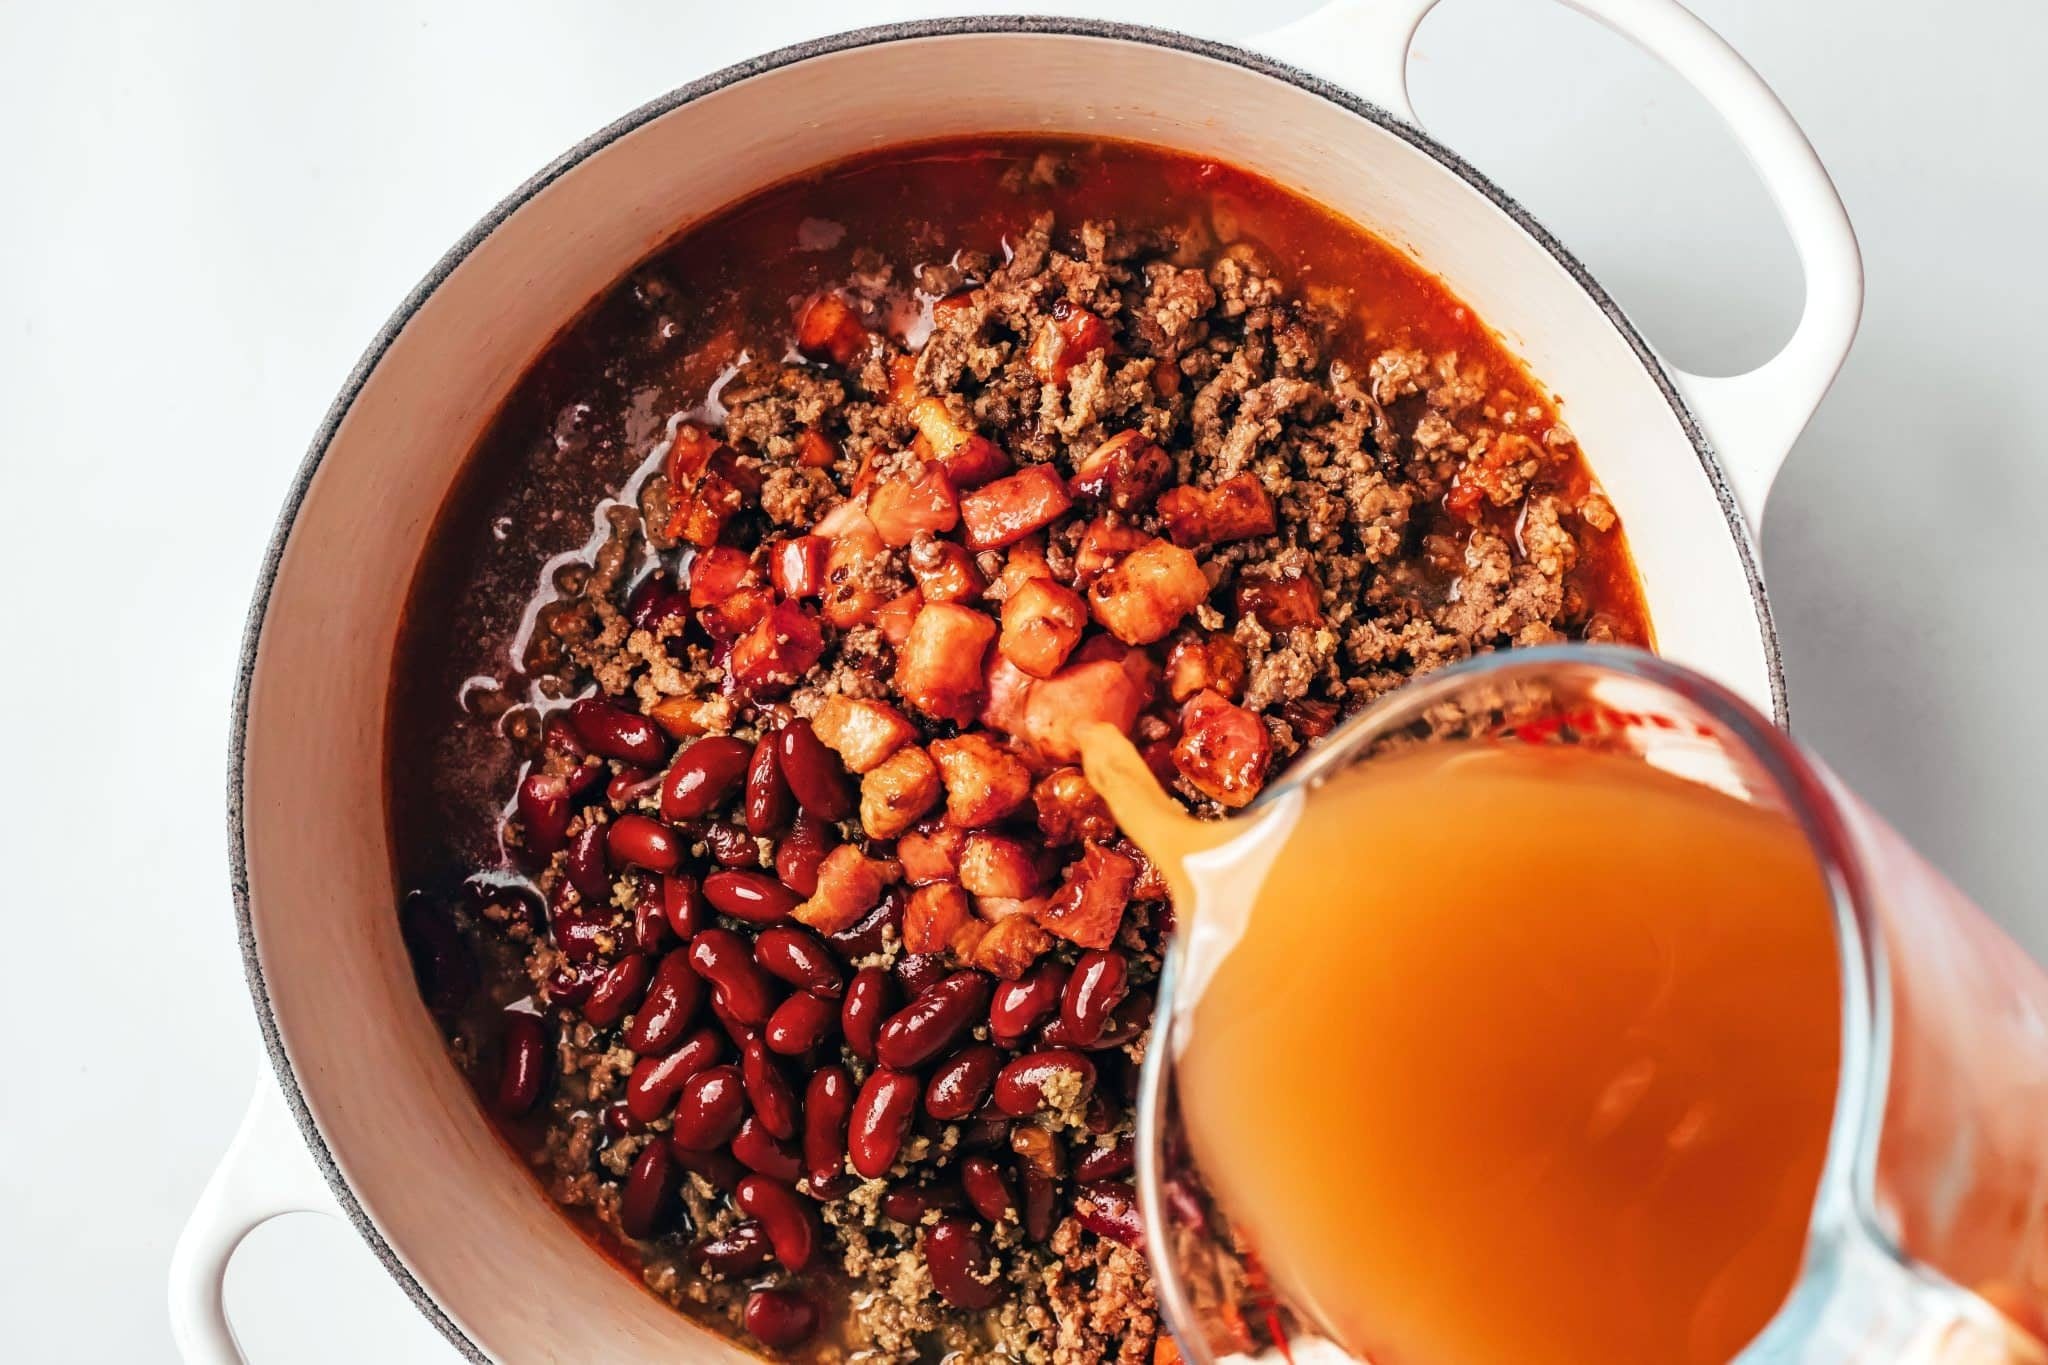
- Add the broth and simmer. Pour in 2 cups of low-sodium beef broth and stir everything together. Bring the chili to a gentle simmer, then reduce the heat and simmer uncovered for about 30-45 minutes, stirring occasionally, until it’s thick, rich, and exactly where you want it. If it gets thicker than you like, add another splash of broth. Taste at the end and adjust the salt and black pepper as needed.
How to Make Chili in the Slow Cooker
Several readers have asked about making this chili in the slow cooker, and yes, you absolutely can! I still recommend a little stovetop prep first for the best flavor.
- Prep the bacon, beef, and onions. Cook the bacon, brown the ground beef in some of the bacon drippings, then cook the onions until softened. Stir in the chili powder, cumin, garlic powder, and tomato paste and cook for another 1-2 minutes.
- Transfer the onion and spice mixture to the slow cooker. Add the cooked beef, most of the bacon, diced tomatoes, tomato sauce, kidney beans, sugar, and 1 cup of beef broth. You need less broth here since very little liquid evaporates in a slow cooker.
- Cook. Cover and cook on LOW for 6-8 hours or HIGH for 3-4 hours. Stir before serving and add a little more broth if the chili is thicker than you like.
Tip: Save a handful of the crispy bacon for serving. The bacon in the slow cooker will soften as it cooks, so sprinkling some on top gives you that smoky flavor plus a little crunch.
How to Make Chili Taste Better
I’ve made a lot of chili over the years, and the biggest difference between a good pot and a great one usually comes down to how you build the flavor. A few simple steps make a huge difference here:
- Cook everything in stages: It takes a few extra minutes, but it is worth it. In this case, we’re cooking the bacon first, browning the beef separately, then softening the onions in the same pot. Each ingredient gets a chance to brown instead of steaming together, and all those browned bits on the bottom of the pot add even more flavor.
- Use the bacon drippings: This is one of my favorite tricks in this recipe. I leave a little of the rendered bacon fat in the pot to brown the beef and cook the onions, which carries that smoky, savory flavor through the entire chili. Bacon isn’t always the answer, though. I intentionally leave it out of my chicken corn chowder so the chicken and sweet corn can shine. Here, however, I want that smoky flavor in every bite.
- Bloom the spices and cook the tomato paste: Add the chili powder, cumin, and garlic powder to the softened onions, then stir in the tomato paste and let everything cook for a minute or two. This wakes up the spices and deepens the tomato flavor before any liquid goes into the pot.
- Give it time to simmer: Once everything is in the pot, let the chili simmer uncovered until it thickens and the flavors come together. You do not need hours, but that final 30-45 minutes makes a noticeable difference.
Chili Variations
This chili is pretty forgiving, so there are plenty of ways to make it your own without messing with what makes the recipe so good in the first place.
- Make it spicier: Add a diced jalapeno with the onions, stir in a pinch of cayenne, or simply pile on the fresh jalapenos when serving. I usually keep the pot itself fairly mild so everyone can adjust the heat at the table.
- Skip the bacon: You can make this chili without bacon, but you’ll lose some of that smoky richness that makes this version special. Use a little olive oil to brown the beef and cook the onions instead, and add 1/2 to 1 teaspoon smoked paprika with the other spices if you want to bring some of that smokiness back.
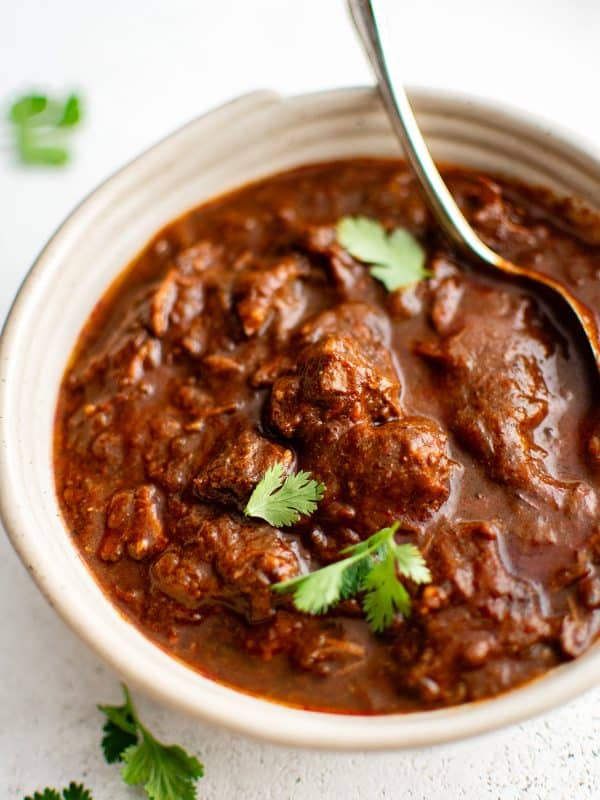
- Make it bean-free: Leave out the kidney beans for a meatier chili, and add the broth gradually since you may not need quite as much. If what you’re really after is a traditional no-bean chili, try my Texas chili recipe instead. It’s a completely different style made with chunks of beef, dried chiles, and no beans or tomatoes.
- Add more vegetables: Diced bell pepper works great in chili. Add it with the onions so it has time to soften and blend into the chili.

Toppings and Serving Ideas
One of the best things about chili is letting everyone load up their bowl however they like. For game days or family dinners, I usually set out a handful of toppings and let everyone help themselves.
- Shredded cheddar, Colby Jack, or Monterey Jack
- Sour cream
- Sliced green onions
- Fresh or pickled jalapenos
- Diced avocado
- Chopped cilantro or chives
- Corn chips or tortilla chips
- Hot sauce
Once I have the toppings sorted, I like to include a warm piece of cornbread on the side. My go-to is my sweet cornbread smeared with butter and drizzled with honey, or this Mexican cornbread for a bit more flavor and texture.
And don’t forget about the leftovers. Spoon chili over a baked potato, pile it onto homemade French fries for chili cheese fries, or use it to make classic chili dogs.
Storage and Reheating Tips
- Refrigerator: Store leftover chili in an airtight container in the fridge for up to 3 or 4 days. The flavors actually deepen over time, so it tastes even better the next day.
- Freezer: Chili freezes beautifully. Once cooled, transfer it to freezer-safe bags or containers and freeze for up to 3 months. I like freezing individual portions for easy meals later. If you’re using freezer bags, lay them flat until frozen, then stack them to save space.
- Reheating: Reheat chili gently on the stovetop, stirring occasionally, until hot throughout. If it’s thickened up in the fridge, just add a splash of broth or water. You can also microwave individual portions in 1-2 minute intervals, stirring between each. Leftovers should reach 165°F when reheated.
Chili FAQs
I like to simmer this chili uncovered for about 30 to 45 minutes. That gives the broth time to reduce and the flavors time to settle into each other without turning the beans to mush. You can simmer it longer if you’d like, just keep an eye on the thickness and add a splash of broth if needed.
The easiest way is simply to let it simmer uncovered. As some of the liquid evaporates, the chili naturally gets thicker and richer. If you’re in a hurry, you can also mash a small spoonful of the kidney beans against the side of the pot and stir them back in. I wouldn’t add flour or cornstarch unless absolutely necessary.
Yes. Several readers have made this chili successfully with fresh tomatoes in place of the canned diced tomatoes. Fresh tomatoes tend to be juicier and less concentrated, so you may need to simmer the chili a little longer to get the same thick, rich consistency.
More Chili Recipes to Try



This chili has been a favorite in my house for years, and it is still one of those recipes my boys ask for again and again. If you make it, I’d love to hear how it turned out. Please leave a comment and rating below and tell me what you topped it with, whether you made any changes, or if you kept it just as written. Thank you so much! 💛

The Best Chili Recipe

Ingredients
- 1 pound bacon, chopped
- 2 pounds lean ground beef
- 2 medium yellow onions, diced
- 1 teaspoon salt, plus more to taste
- 1 tablespoon chili powder
- 1 tablespoon ground cumin
- 1 tablespoon garlic powder
- 3 tablespoons tomato paste
- 1 (28 ounce) can diced tomatoes
- 1 (28 ounce) can tomato sauce
- 2 tablespoons granulated sugar
- 2 (15 ounce) cans red kidney beans, drained but not rinsed
- 2 cups low-sodium beef broth, plus more as needed
- Optional Toppings, sour cream, shredded cheddar cheese, chopped green onions, hot sauce
Instructions
- Cook the bacon. Add the chopped bacon to a large Dutch oven or heavy-bottomed pot over medium heat. Cook, stirring occasionally, until browned and crisp. Using a slotted spoon, transfer the bacon to a plate. Carefully drain the excess bacon grease, reserving about 2 tablespoons in the pot.1 pound bacon
- Brown the ground beef. Add the ground beef to the bacon drippings and cook over medium-high heat, breaking it apart with a wooden spoon, until browned and cooked through. Season with a little salt, then transfer the beef to a clean plate with the bacon. Drain any excess grease if needed.2 pounds lean ground beef
- Cook the onions. Add the diced onions to the same pot and cook over medium heat for 8-10 minutes, stirring occasionally, until soft and lightly golden. Scrape up any browned bits from the bottom of the pot as they cook.2 medium yellow onions
- Add the spices and tomato paste. Stir in the salt, chili powder, cumin, garlic powder, and tomato paste. Cook for 1-2 minutes, stirring frequently, until fragrant and deep red.1 tablespoon chili powder, 1 tablespoon ground cumin, 1 tablespoon garlic powder, 3 tablespoons tomato paste, 1 teaspoon salt
- Build the chili. Add the diced tomatoes, tomato sauce, and sugar. Stir well and bring to a gentle simmer. Return the ground beef and most of the bacon to the pot, then stir in the kidney beans.1 (28 ounce) can diced tomatoes, 1 (28 ounce) can tomato sauce, 2 tablespoons granulated sugar, 2 (15 ounce) cans red kidney beans
- Add the broth and simmer. Stir in 2 cups of beef broth. Bring the chili to a gentle simmer, then reduce the heat and simmer uncovered for 30-45 minutes, stirring occasionally, until thick and rich. Add a splash more broth if the chili gets thicker than you like.2 cups low-sodium beef broth
- Season and serve. Taste and adjust the salt and black pepper as needed. Serve hot with your favorite toppings and any reserved crispy bacon.Optional Toppings
Video
Notes
- Bacon: Thick-cut or regular-cut bacon both work. Thick-cut gives you meatier pieces, while regular bacon cooks faster and gets a little crispier. Save about 2 tablespoons of the rendered fat for cooking the beef and onions.
- Broth: Start with 2 cups. Add more only if needed since the chili will thicken as it simmers. Low-sodium beef broth is my first choice, but chicken or vegetable broth will also work.
- Beans: I drain but don’t rinse the kidney beans. A little of the starchy liquid left clinging to them helps give the chili body. Rinsing them is completely fine if you prefer.
- Sugar: The sugar helps balance the acidity of the tomatoes and should not make the chili taste sweet. Feel free to reduce it or leave it out.
- Spice level: As written, this chili is flavorful but not especially spicy. Add cayenne, diced jalapeno, or your favorite hot sauce if you want more heat.
- Storage: Store leftover chili in an airtight container in the refrigerator for up to 3 to 4 days, or freeze for up to 3 months. Reheat gently on the stovetop or in the microwave, adding a splash of broth or water if the chili has thickened.
Explore More with AI
Nutrition
Nutrition information is automatically calculated, so should only be used as an approximation.













Wow, bacon + chili is a winner in my house!!
My family loved it, and is asking me to make it again. I’m thinking Halloween!
Thank you so much Kyle! Bacon and chili really are a winning combination. I am thrilled your family loved it, and a big pot on Halloween is absolutely perfect, as I usually make this on Halloween too 🙂
Fantastic chili!
Thanks 🙂
My husband has always started with bacon since the 1960’s when he made Chili. I did all of the cooking for the family except for the Chili. My kids would only eat Dad’s Chili.
Thank you for sharing, Petera! Your husband’s chili sounds like such a special family favorite, with bacon adding so much flavor 🙂
I’m making this for the first time! It was hard to choose which chili recipe to use when there are so many online but this one seemed the yummiest! One concern I have is I’m seventy with a lot of health issues and pain and by the time I finished making it I was exhausted. I put it in the slow cooker so I could go have a nap and not worry about burning it. Do you think it will be ok? Just one more thing I only used one cup of beef broth because it looked like that’s all it needed. Thanks in advance and I will for sure comment when it’s done! I’m so looking forward to it!
Hi Kathleen! Yes, the slow cooker will work beautifully, so you can rest without worrying about watching the pot. Cook it on HIGH for 3-4 hours or LOW for 6-8 hours. The recipe calls for 2-3 cups of broth, so with just 1 cup your chili will likely be quite a bit thicker. I would add another cup of broth if you can, then you can always add a little more later if needed. I hope you love it, and please come back and let me know how it turned out! 🙂
Did not like the bacon. Next time will make without. Maybe I didn’t crisp enough?? Did not like bacon fat popping up in chili. Loved using my own spices though. So gooood.
Thank you, Helen! I am so glad you enjoyed the spices. The bacon can definitely be left out next time. Cooking it until crisp and draining the excess fat helps if your not a fan, but it sounds like you may simply prefer the chili without it! 🙂
This is SO good! I’ve never made chili before and picked this one due to the reviews and I had most of the ingredients on hand. I didn’t have canned/diced tomatoes but I did have fresh so I blanched them and they worked great. The flavor is perfect and very satisfying. Thank you!
Thank you so much, Coonellie! I am so glad you chose this chili for your first time making chili and that it turned out so well. Using fresh blanched tomatoes instead of canned diced tomatoes sounds like a great swap. I am so happy you loved the flavor! 🙂
Very good recipe for chili. An all time family favorite and easy to make.
I simmer my sauce for a couple of hours before adding the bean. One can red or black, the other, tri color.
Very small tweaks. Delicious summer or winter!
Thank you so much, Lois! I am so glad the chili is an all-time family favorite. Letting the sauce simmer for a couple of hours before adding the beans sounds like a great way to build even more flavor, and I love your mix of red, black, and tri color beans. Delicious year-round is exactly what I love to hear! 🙂
Excellent chili, I used all homegrown tomatoes run through the blender and since we have venison on hand at all times I used 3/4 ground venison and 1/4 ground beef hamburger. Since my tomatoes end up watery I just added powdered chicken broth flavoring no additional water. Never thought of adding cumin and garlic that really made it over the top!! Making it a second time today
Thank you so much, Leta! I am so glad you loved it. Using homegrown tomatoes and a mix of venison and ground beef sounds fantastic, and that was a great adjustment with the powdered broth since your tomatoes were extra watery. So happy you are making it again! 🙂
made this for the first time to feed a construction group of 45, there was not a single DROP left. used fresh tomatoes instead of canned, omitted sugar, & used pork belly (that i seasoned) instead of bacon for more pure pork flavor.
I see this becoming a go-to for quick, yummy, seasonal dinners! thanks for sharing.
Thank you so much! Feeding 45 people with not a drop left is the best compliment. I love your swaps too, fresh tomatoes and seasoned pork belly sound absolutely delicious, and I am so happy this is becoming one of your go-to dinners! 🙂
You don’t put sugar in chili. What’s wrong with people. I’ve also seen sugar in canned tomatoes. I’m Italian, I or my mother have never put sugar in pasta sauce or any other main dish.
Dianne, I hear you. Sugar in chili is definitely a personal preference, and you can absolutely leave it out. I leave it out of many thing myself.
In this recipe, the small amount of sugar is just there to balance the acidity from the tomatoes and help round out the flavors, especially since tomato products can vary a lot in tartness. If your tomatoes are naturally sweeter or you simply prefer a more savory chili, skip the sugar and season to taste at the end. 🙂
I put sugar in my chili too, and in other recipes too. It balances and enhances the other flavours and makes it extra delicious. And nothing is wrong with me either. This is an excellent recipe!
Thank you so much, Tammy! I am so glad you loved the chili. I agree, a little sugar can really help balance the acidity and spices without making the chili taste sweet. I am happy to know I am not alone on this one! 🙂