This post may contain affiliate links. See my disclosure policy.
Homemade Chicken Stock is incredibly easy to prepare using simple ingredients like leftover vegetable scraps, fresh herbs, and chicken bones (with or without meat). Versatile and delicious, learn how to make homemade chicken stock right at home, and enjoy it in all your favorite soups, stews, or rice dishes.
In this post, learn the difference between chicken stock and chicken broth, how to make chicken stock, and read all my tips and tricks for making a stock that is guaranteed to be rich and flavorful.

I have been making my own chicken stock for nearly a decade. What started as a simple way to save money by using leftover rotisserie chicken carcasses to make the best chicken noodle soup has, over the years, developed into one of my most therapeutic pastimes.
For most of this time, I had no idea that I was actually making homemade chicken stock. I just thought I was saving money.
So, I continued making my own nutritious and comforting chicken stock and used it to flavor everything from jambalaya to cooked rice to creamy casseroles.
In this post, you’ll learn all kinds of interesting tidbits about making your own chicken stock right at home.
Table of Contents
What is Chicken Stock?
At the most basic level, chicken stock is made by simmering chicken bones and cartilage in water for at least 4-6 hours. Chicken stock is always made using bones (unlike chicken broth, which is made with chicken meat and sometimes vegetables – never bones). Sometimes, chicken meat, vegetables including onions, carrots, and celery, and seasoning may be added to make a more flavorful stock. Since stock is made using the bony parts of the animal, it will be thicker and more flavorful due to the gelatin that is released from the bones.
Chicken Stock vs Broth
Chicken stock is always made using the bony parts of the chicken. Sometimes meat, vegetables, and herbs will be added for extra flavor. Chicken broth, on the other hand, is made with meat – never bones – and cooks for a much shorter time. As a result, chicken stock is thicker and has more flavor due to the presence of gelatin, whereas chicken broth is thinner, lighter, and best suited as a base for soup or general cooking liquid.
To make homemade chicken stock, you’ll need the following tools and equipment:
- Large roasting pan (if roasting the vegetables and chicken pieces)
- Rimmed baking sheet
- Large stockpot (ideally 12-16 quarts)
- Cooking tongs
- Cheesecloth or fine mesh strainer.
For the full list and amounts of ingredients, scroll down to the recipe card at the bottom of the page.
How to Make Chicken Stock
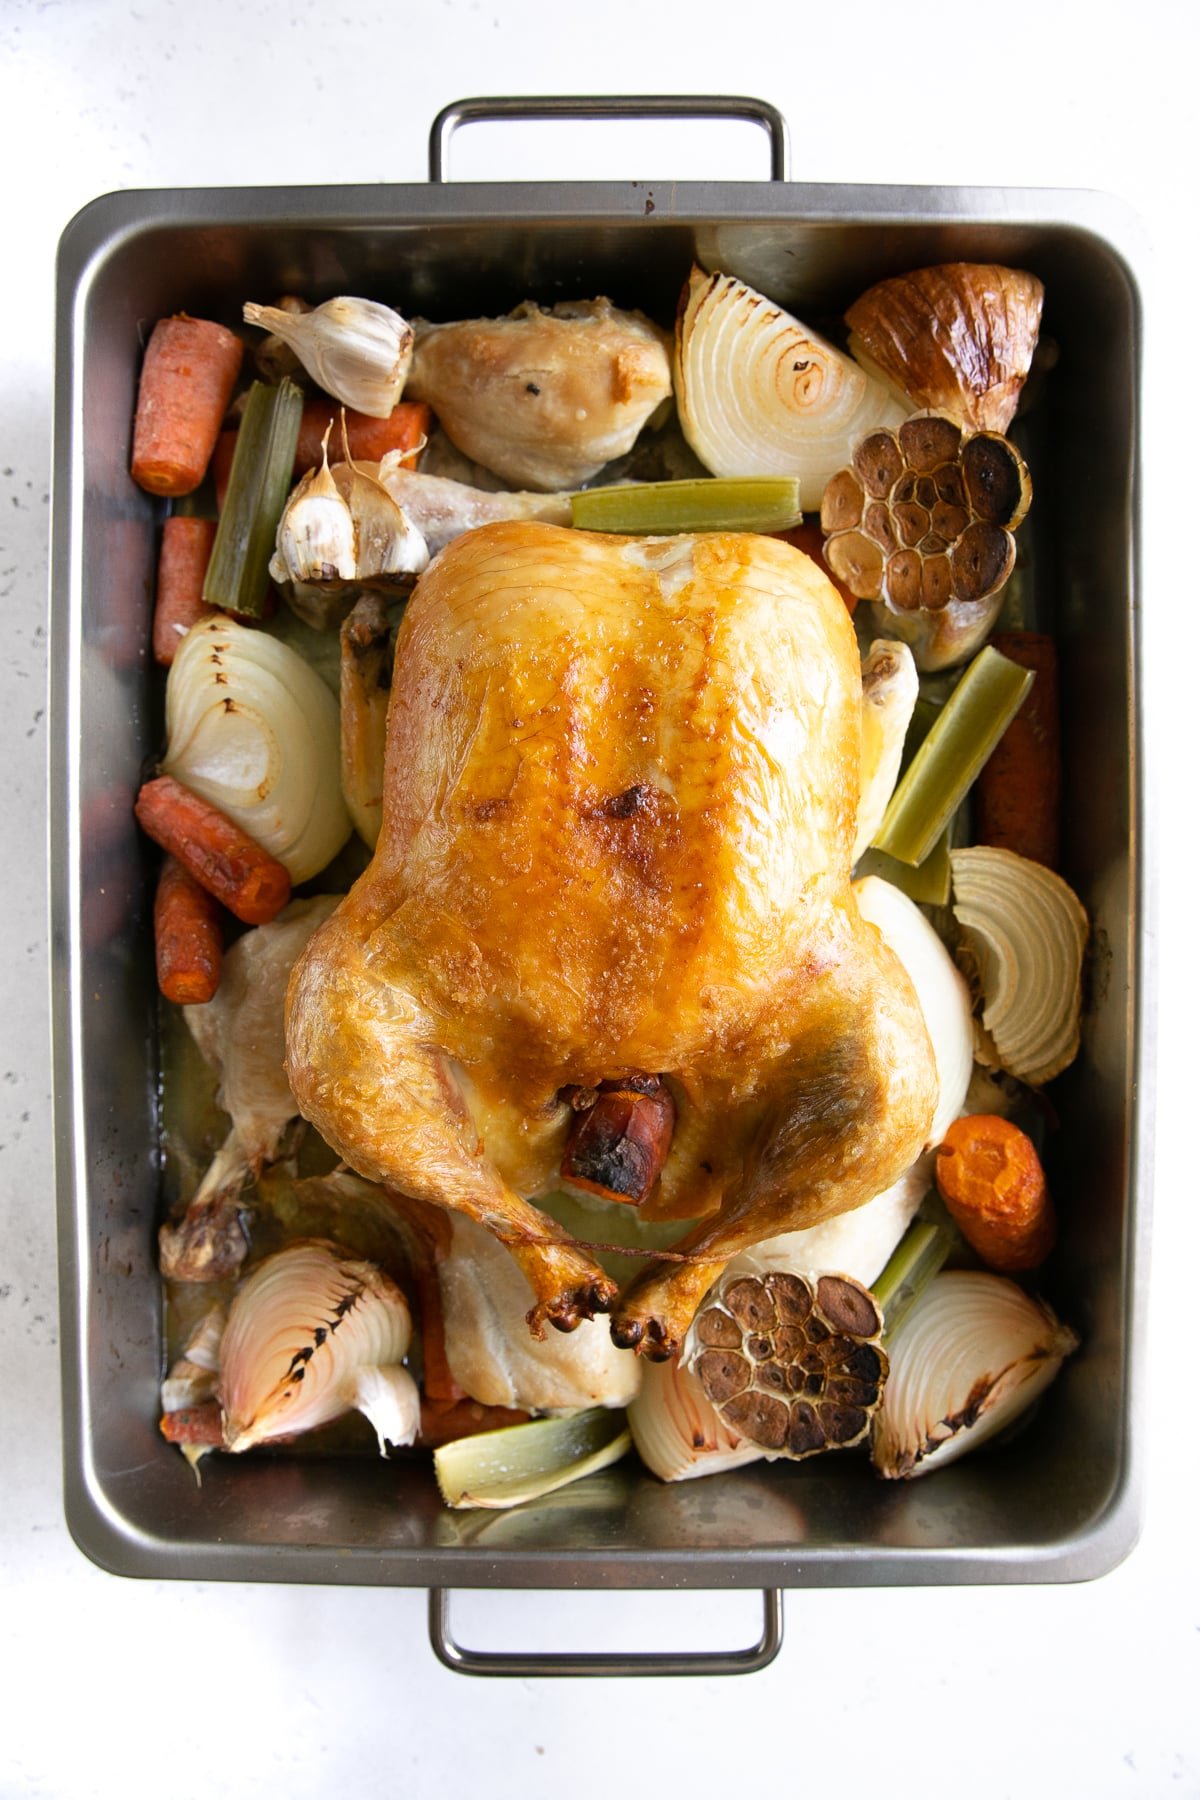
1. Roast the chicken and vegetables (optional)
Roasting the vegetables and bones/meat is optional, but it does add some extra flavor. To do so, preheat the oven to 450°F. Spread the chicken bones and vegetables over a large roasting pan. If you’re using a whole chicken (as I did here) start by roasting breast-side-up. After 20-30 minutes, flip and roast on the other side for about 15 minutes. If things start to look like they’re burning, not pleasantly browning, that’s a good indication that it’s time to flip the chicken or remove it from the oven.
Chicken Feet?
You may make chicken broth using a whole chicken, a picked-apart chicken carcass, or a combination of the two. But what about chicken feet? Available at many grocery stores, chicken feet consist mostly of connective tissue -skin, cartilage, tendons, and bones. This collagen goldmine is thought to have many health benefits including:
- Improvements in skin appearance
- May help with joint pain
- And bone health – especially in postmenopausal women
- Improve blood sugar levels
- Promote heart health
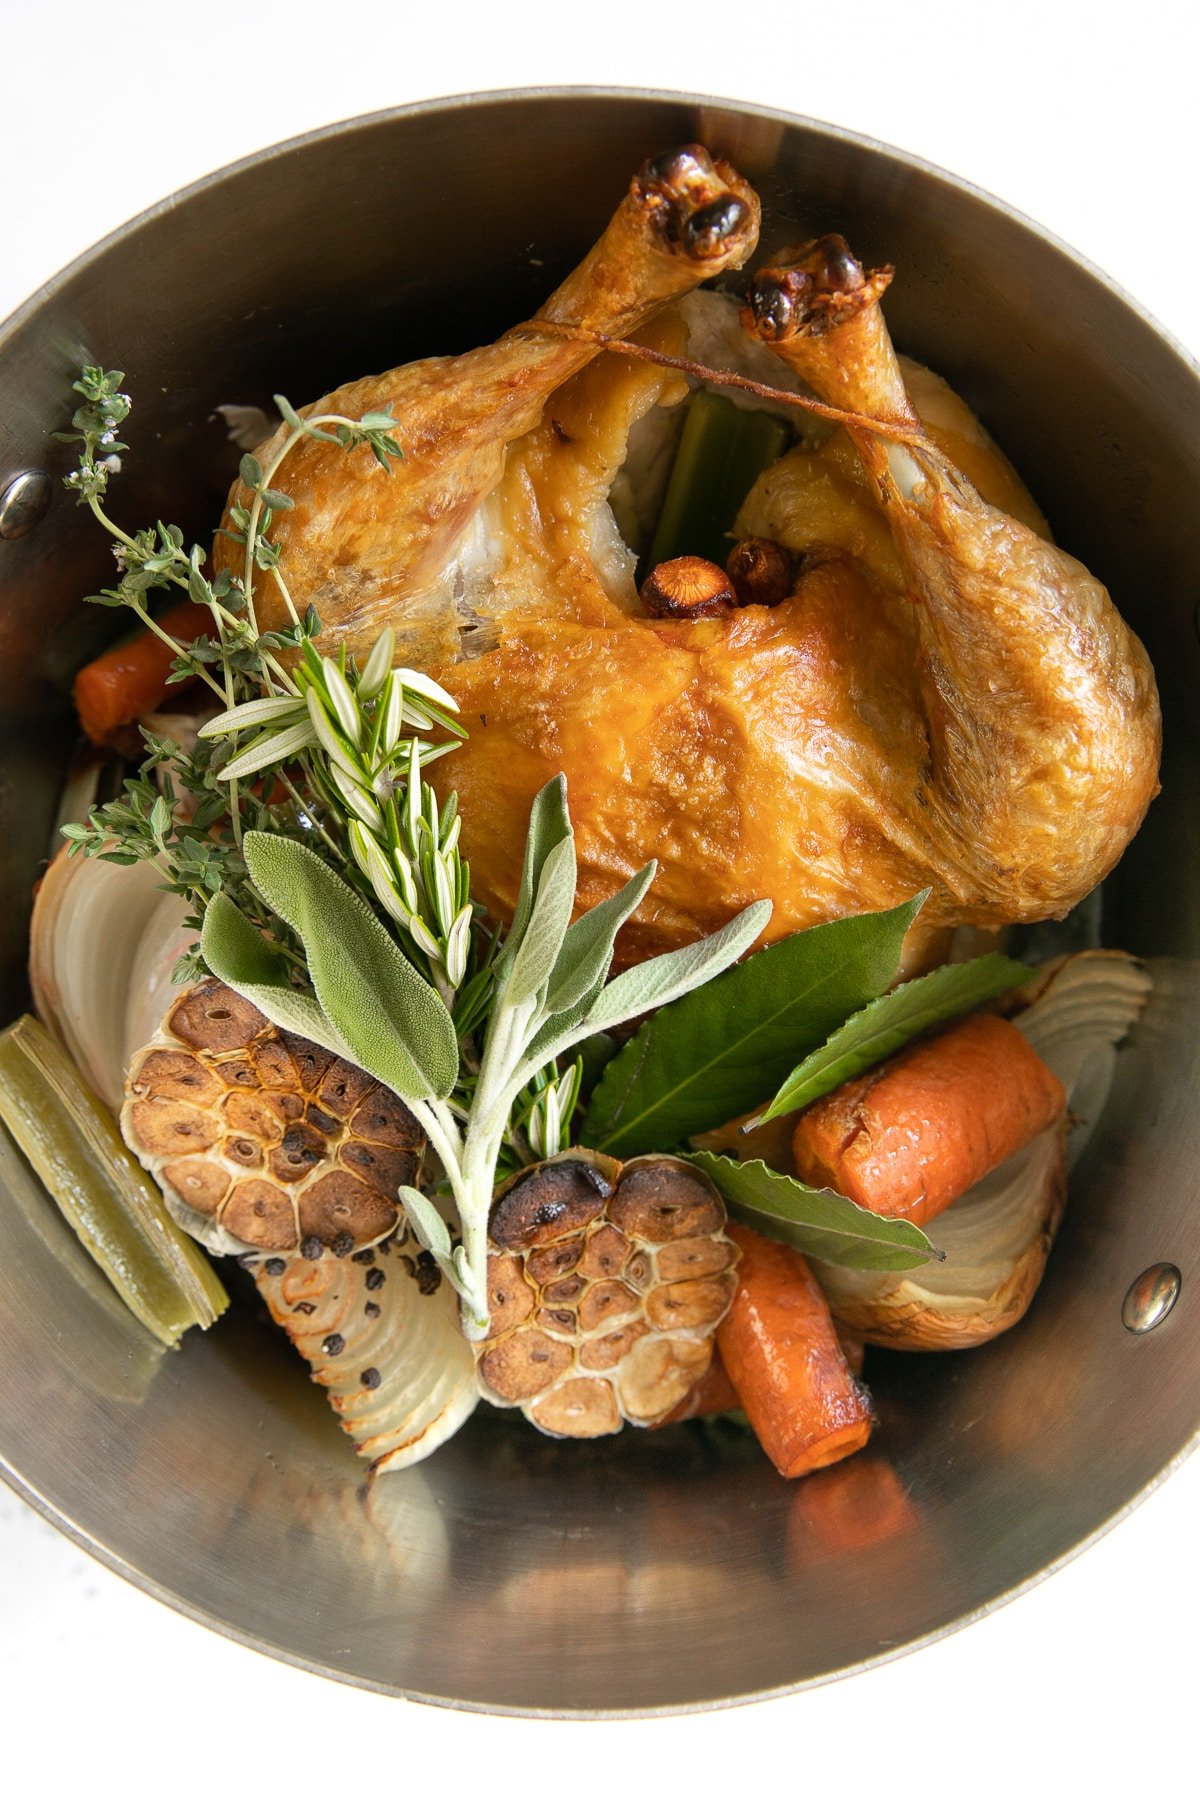
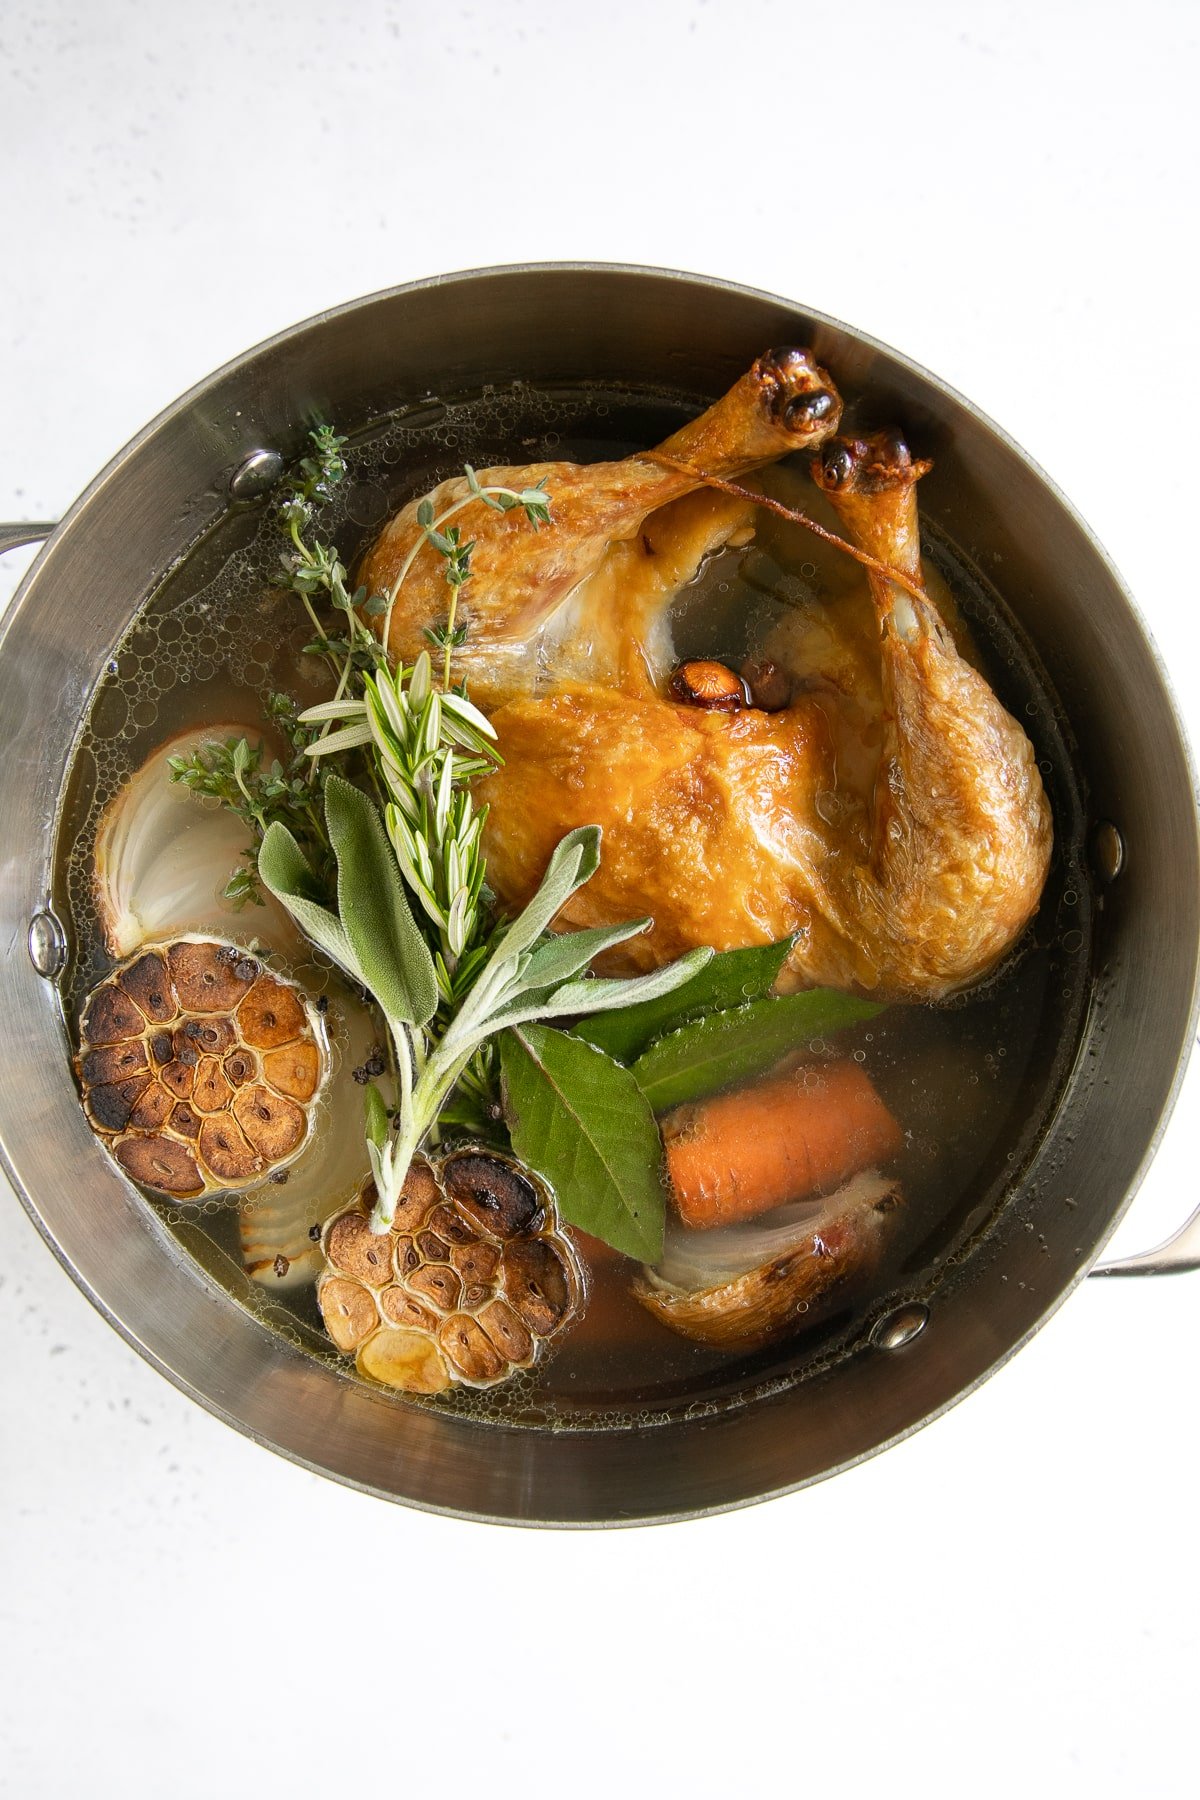
2. Transfer the chicken and vegetables to a large stockpot
Transfer your chicken and vegetables (the mirepoix) to a large stockpot (ideally 12-16 quarts). Scrape out any stuck-on brown bits stuck on the bottom of your roasting pan and add to the stockpot (flavor, remember). Add the fresh parsley, rosemary, bay leaves, thyme, sage, sea salt, and black peppercorns to your pot. Fill your pot with enough cold water so that your chicken and vegetables are completely submerged.
3. Bring to a boil and simmer
Cover with a tight-fitting lid and set over high heat. Bring to a gentle boil. Immediately reduce the heat to low and simmer, with the lid slightly ajar, occasionally skimming any foam or excess fat from the surface.
It’s important to note here that you don’t want to aggressively boil your stock. A gentle simmer is all you need.
4. Remove the meat and return the carcass to the pot
After approximately one hour, remove your chicken from the pot (be very careful here!) and set it aside to cool on a large rimmed baking sheet or jelly-roll pan. Once it is cool enough to touch, use your fingers to pick the meat from the bones. Reserve the meat to use for soup, sandwiches, or salads. Return the bones and cartilage back to the pot to continue boiling.
5. Continue cooking
Allow your stock to boil for at least an additional 1-3 hours. Add more water if needed to make sure bones and vegetables remain fully submerged.

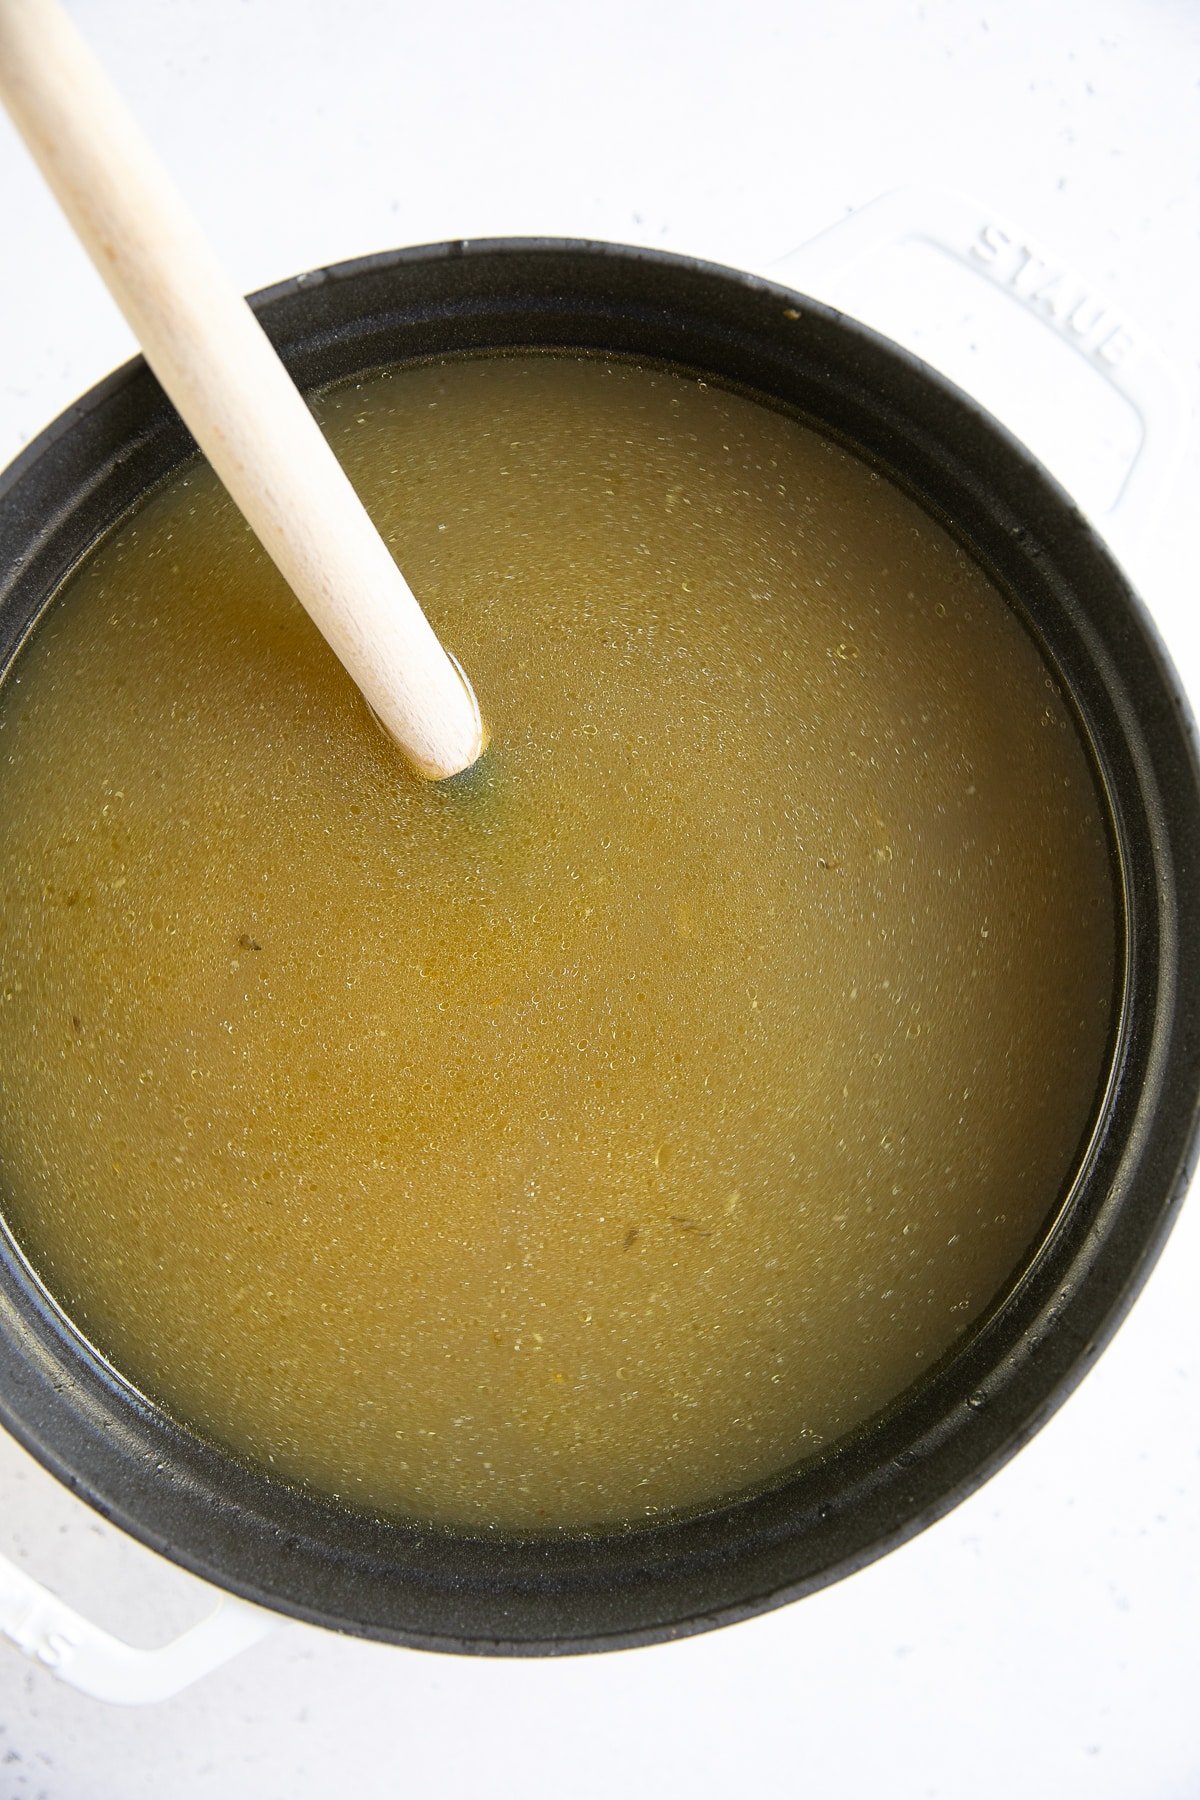
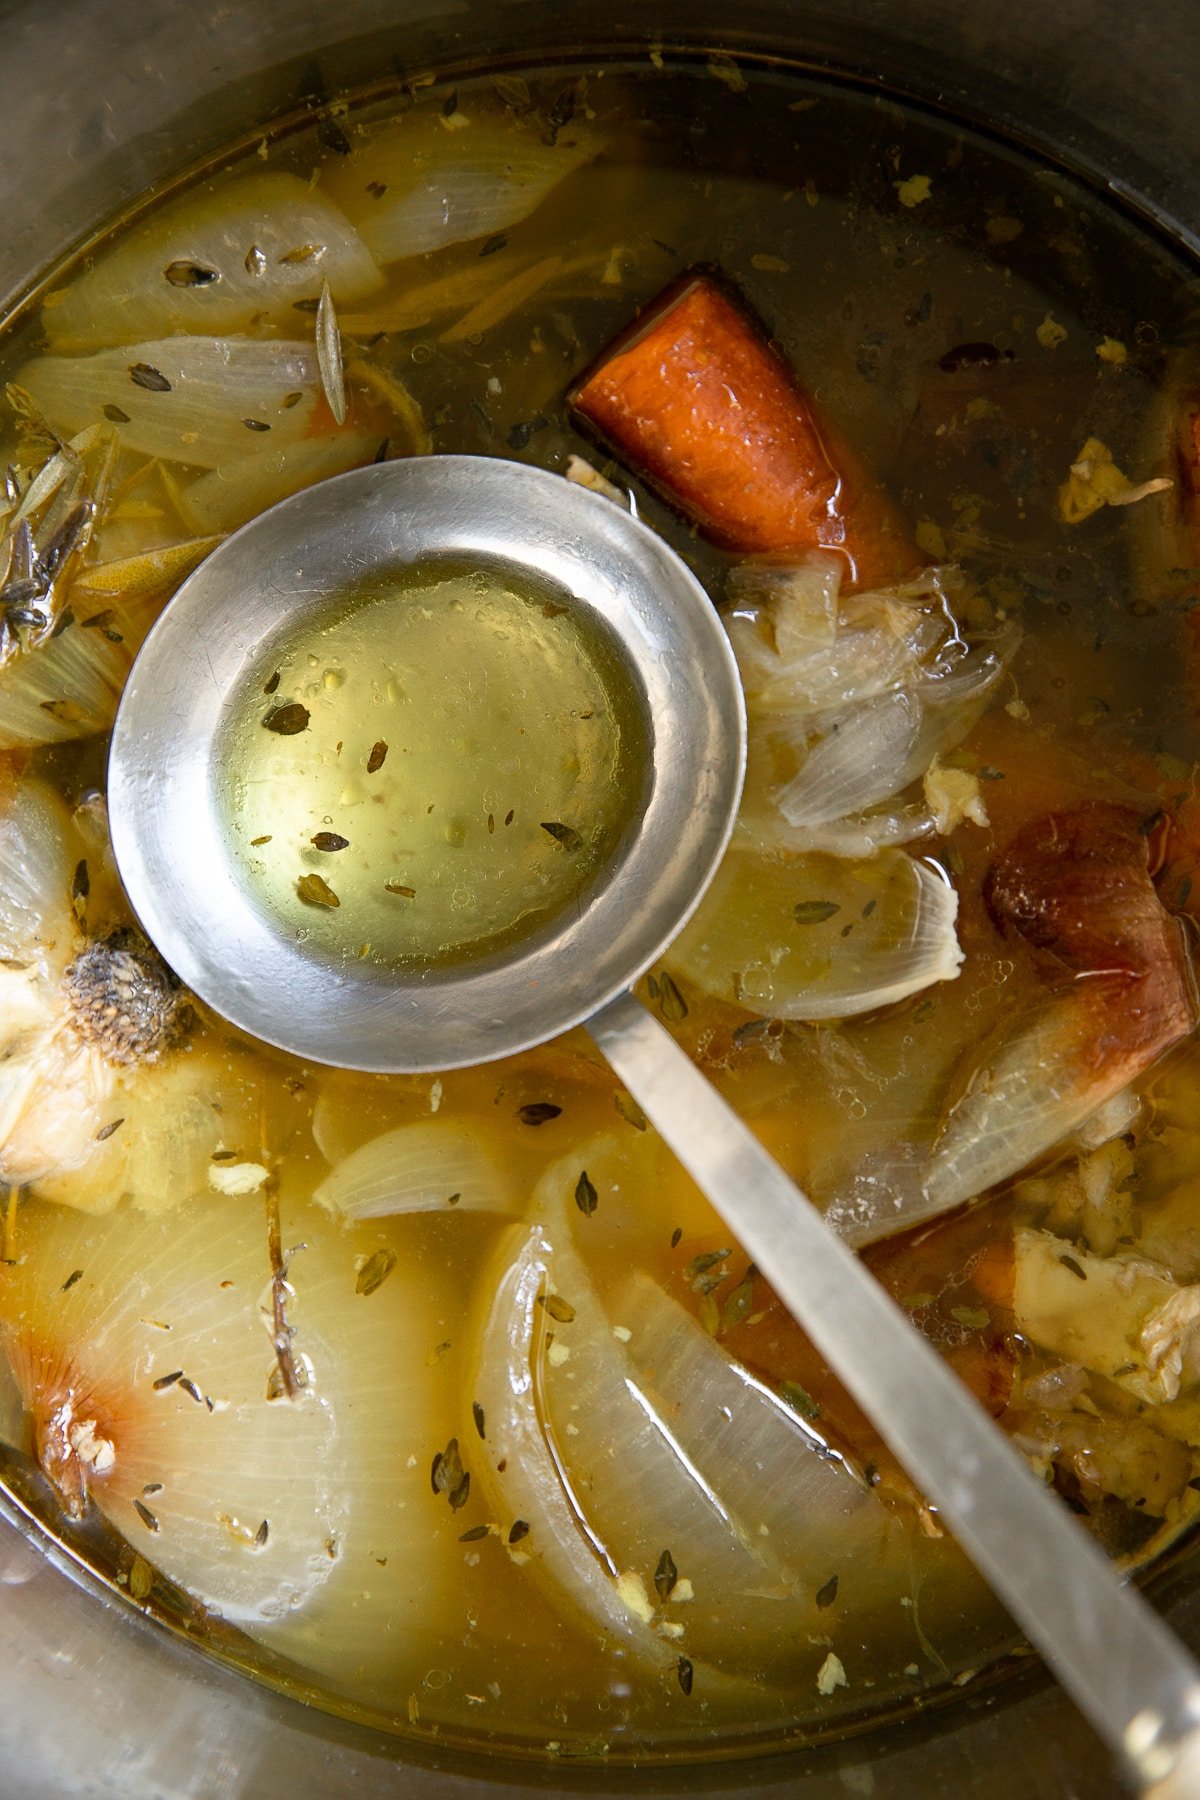
6. Strain the cooked chicken stock
Carefully strain your cooked stock through a cheesecloth (recommended) or fine mesh strainer into a clean pot. Serve plain or use in your favorite recipes.
How to Store
To store chicken stock in the refrigerator or freezer, you first need to bring it down to room temperature. The easiest (and fastest) way to do this is by adding a couple of handfuls of ice to your stock or by adding your pot to an ice water bath in your sink.
Once cool, you may either transfer your pot directly to the refrigerator (the easiest option if you plan to enjoy your stock within 5 days) or divide the stock into containers of various increments. For example, ice cube trays are great when needing only a few tablespoons, whereas small jars are perfect for recipes that call for between 1/2 cup and 2 cups of stock or broth.
- To store chicken stock in glass jars: Never place a hot liquid in a glass jar and then place it in the freezer. Any fault in the glass and it will break. Also, avoid filling it to the top. Liquid expands when frozen. I love Ball Mason Jars with reusable lids.
- To store chicken stock in freezer bags: For best results, always measure and label how much stock you’re placing in each bag. Remove as much air as possible and freeze flat on a baking sheet. Once frozen, double bag to help protect against leaks.
Chicken stock can be stored in the refrigerator for up to 5 days or in the freezer for up to 6-9 months.

Tips and Tricks
Extract more collagen with 2 simple tips:
- Always start with cold water. Less work for us, adding cold water also helps extract more collagen from your bones.
- You can also add a tablespoon or two of apple cider vinegar to your stock, which is also thought to help draw out some of that collagen without affecting the overall flavor.
To make a good stock, you need bones. More specifically, however, you want to use the neck, back, ribs, and wings. If you want an extra rich, high-collagen stock, add some chicken feet.
5 Ways to Use Chicken Stock
- Use this chicken stock as a base in all your favorite soups and stews. Highly nutritious and flavorful, it’s an easy way to infuse more flavor into all your favorite winter essentials, like this carrot ginger soup or this Norwegian salt cod stew (Bacalao).
- Replace water with homemade chicken stock when making rice, beans, couscous, quinoa, and all your other favorite liquid-absorbing sides.
- Keep your favorite mashed potato recipe creamy, flavorful, and fluffy while saving on fat and calories by replacing part of the butter or cream with stock.
- Swap chicken broth for chicken stock in family classics like chicken pot pie, chicken and rice, chicken broccoli rice casserole, or creamy beef stroganoff.
- Try cooking dumplings (or meatballs) in chicken stock rather than water for savory, flavor-filled, pillowy dumplings perfect for your favorite chicken and dumplings recipe.

Have you tried making this Chicken Stock Recipe?
Tell me about it in the comments below! I always love to hear your thoughts. And tag me #theforkedspoon on Instagram if you’ve made any of my recipes. I always love to see what you are cooking in the kitchen.

Homemade Chicken Stock Recipe
Ingredients
- 1 whole chicken, (approx. 4-5 pounds)
- 1 pound chicken feet or chicken necks, (optional)
- 2 medium yellow onions, quartered
- 3 large carrots, unpeeled and chopped into 2-inch pieces
- 3 ribs celery, chopped into 2-inch pieces
- 1 head garlic, unpeeled and cut in half crosswise
- 1 small bunch fresh parsley
- 2 sprigs fresh rosemary
- 3 bay leaves
- 8 sprigs fresh thyme
- 10 leaves fresh sage
- 1 tablespoon salt, plus more to taste
- 1 tablespoon black peppercorns
Instructions
- Roast the chicken and vegetables: Preheat oven to 450°F. Remove the neck and gizzards from the inside of your chicken and stuff with 4-5 pieces of chopped vegetables. Transfer your chicken to a large roasting pan, breast-side-up. Scatter the remaining vegetables and garlic around your chicken, trying not to overcrowd your pan (use two roasting pans or a baking sheet if necessary). Transfer to the oven and roast for 30 minutes before very carefully flipping your chicken over to roast the other side for an additional 15-30 minutes.
- Transfer the chicken and vegetables to a large stockpot: If your chicken is not cooked completely, that's ok. Transfer your chicken and vegetables to a large stockpot (ideally 12-16-quarts). Scrape out any bits that may be stuck to the roasting pan and transfer to your pot (flavor, remember). Add the fresh parsley, rosemary, bay leaves, thyme, sage, salt, and black peppercorns to your pot. Fill your pot with cold water so that your chicken and vegetables are completely submerged.
- Bring to a boil and simmer: Cover with a tight-fitting lid and place on the stovetop set over high heat. Bring to a gentle boil. Immediately reduce heat to low and simmer, with the lid slightly ajar, skimming any foam or excess fat, occasionally.
- Remove meat and return the carcass to the pot: After approximately one hour, remove your chicken from the pot (be very careful here!) and set aside to cool on a large rimmed baking sheet or jelly-roll pan. Once it is cool enough to touch, use your fingers to pick the meat from the bones, reserving the meat to use for soup, sandwiches, or salads, and the bones to toss back in the pot to continue boiling.
- Continue cooking: Allow your stock to boil for at least an additional 1-3 hours. Add more water if needed to make sure bones and vegetables remain fully submerged.
- Strain. Carefully strain your cooked stock through a cheesecloth (recommended) or fine mesh strainer and add a couple of handfuls of ice to expedite cooling and bring to room temperature (which is needed for storage).
- Skim the fat from your stock (optional): I do not recommend skimming all the fat from your stock. Fat is flavor, so leave a little. However, if you'd like to skim off part of the fat, transfer your pot to the refrigerator and allow it to cool fully. The result will be a hard layer of fat on the top. Use a fork or spoon to scoop off as much fat as you'd like.
- Storage: This chicken stock stores well in the refrigerator for approximately 5 days. Or, for larger batches, store leftovers in the freezer for up to 6 months.
Notes
- I wanted the meat for soup (and quesadillas).
- I really wanted an extra rich, concentrated stock with loads of flavor.
- If you are using chicken bones or a chicken carcass, you may choose to skip this step altogether or just roast the vegetables- entirely up to you.
- Alternatively, if you are using chicken pieces (legs, wings, necks, bone-in skin-on thighs, you may also brown your chicken and veggies directly in your stockpot (as I did with this Instant Pot Bone Broth Recipe). It will take about the same time.
Nutrition
Nutrition information is automatically calculated, so should only be used as an approximation.


As a life-long healthy eater, I’ve been making chicken stock for a LONG time. BUT, I’ve always been an insecure cook … and now, as a senior citizen, even more so! I find that every time I make stock, I want to check myself by looking up recipes.
Well … THIS recipe, while confirming that I actually do know what I’m doing, answered 60 years of chicken stock questions for me! All of your in-depth explanations of ‘why’ this and not that, are part of what makes this the BEST recipe ever!!! Keeping this recipe at-the-ready, I will go forward with confidence as a maker of stock! THANK YOU!
Thank you so much, Jeanette! Your comment truly made my day. I am so happy the explanations helped answer your chicken stock questions and gave you more confidence in the kitchen. It sounds like you already know exactly what you are doing, and I am honored this recipe can be a helpful reference for you going forward! 🙂