Here’s how you can start your very own food blog. This step-by-step guide will show you the basic steps you should take and give some helpful advice and tips along the way to a successful food blog.
Before embarking on this how-to guide for your new food blog, it’s essential to be clear that passion is the critical factor in starting a food blog. You can’t force yourself to want it if you’re not interested or don’t have time for it.
If you’re thinking of starting a blog as a business, then there are ways and means of making money blogging, but that’s a whole different story. Some ways to monetize your food blog are affiliate marketing, affiliate programs like Amazon, earning sponsors, and monetization through display ads with companies like Mediavine or Google Adsense.

However, be aware that most food bloggers do not make much money. Generally, it takes a new blog many years, lots of hard work, and a bit of good luck to drive traffic in amounts significant enough to get to a full-time level salary.
How do you start a Food Blog Website?
After deciding the time and investment are worth it, picking a domain name is the first thing that needs to be figured out. This is a big decision. I recommend choosing one you can grow old with, as rebranding can be a pain. Namecheckr was invaluable in helping me choose The Forked Spoon as my blog name, as all of the social media handles were wide open.
Web Hosting
SiteGround is the hosting company we use here at The Forked Spoon. Stay away from Bluehost, as while they have a terrific affiliate marketing program that many food bloggers love to monetize with, their service is terrible.
SiteGround web hosting has made it very easy to start a WordPress blog, and SiteGround’s outstanding customer service makes them my choice of web host. Siteground even has an excellent tutorial to help you register your domain name and set up server.

As I already had existing traffic from my old Coffee & Crayons blog, I started with the GoGeek Package and have moved on to one of their custom Cloud packages.
Siteground’s customer service is the best – they pick up the phone when you call them 24/7. Also, they include a tremendous, easy-to-use backup tool that allows you to roll back WordPress Plugins if you encounter issues with new releases. Siteground will install WordPress as your blogging platform, so you don’t have to worry about all that backend tech stuff.
WordPress Theme
The Forked Spoon is run on the Genisis Framework Parent WordPress Theme and has a Premium Theme(Child Theme) made by Ready to Blog Designs. Ready to Blog Designs migrated me from Square Space to wordpress.org in January 2018.
My only regret is not moving to wordpress.org sooner because of its Search Engine Optimization(SEO) features. Stay away from wordpress.com, as wordpress.org gives much more functionality and flexibility.

If a custom WordPress theme is out of budget, I have heard great things about the SEO abilities of the Foodie Pro theme, but I do not personally use it. I would opt to stay away from free themes.
Essential Recipe Plugins
- Yoast SEO – the free version is fine to start with
- WP Recipe Maker – the free version is fine to begin with
- Google Analytics – ideally installed via the Header or a plugin to start with if need be.
How do you Shoot Images with your hands in the photographs?
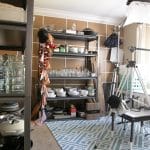
Most of the time, I do food photography alone in my office. Creating food photos with hands, modeling the food, or forking the subject can add to the image’s presence.
Yet another reason why having my Canon 5D Mark IV with its Cannon iPhone App is so crucial. I can set up the shot on my tripod, put one hand in the image, and focus/shoot from my iPhone with my other hand (or toe).
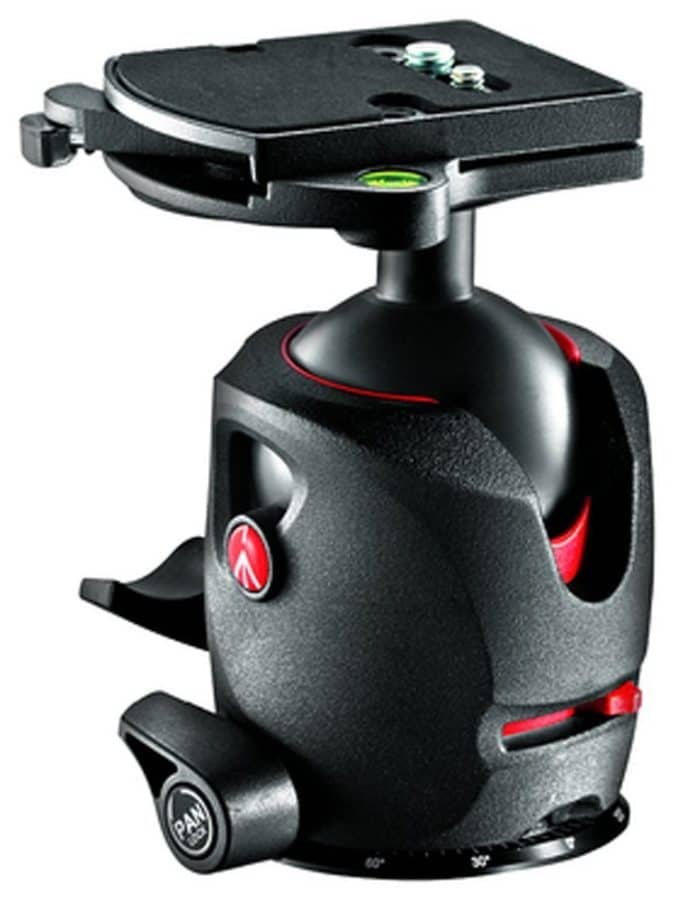
Manfrotto Magnesium Ball Head with RC4 Quick Release: A Ball head is essential for Tripod food photography. I try only to use natural light, so having a tripod allows me to take longer exposures when I lose light near sunset. This Head has the same quick-release plate as the Manfrotto 410 I use for overhead shots.
Having the same quick-release plate is crucial while I am in the middle of a photo shoot, as I can seamlessly go from shooting overhead style to shots where I am holding the camera, to tripod shooting with one hand in the photo, without having to screw in a new quick-release plate on the camera. The RC4 quick-release plate is always on my camera – I have never taken it off since I bought my overhead setup.

Manfrotto MT190XPRO Section Aluminum Tripod Legs: I am a firm believer that you get what you pay for. As you can tell, I tend to go for quality items over cheap. Manfrotto makes high-quality equipment in Italy and has been widely trusted in the photography industry for decades.
While you can get a much cheaper tripod, I use what I use with my ball head above, so I recommend it from experience. As this mostly stays in my studio, I did not need more expensive Carbon Fiber models, which only cut down on weight and help with stability in windy outdoor conditions.
What are the Essential Food Blogging Photography Equipment?
Canon 5D Mark IV: I upgraded to the Canon 5D Mark IV when it first came out after using a Pentax K5IIs for years. OMG, the 5D Mark IV not only shoots phenomenal photos and 4k video, but you can also shoot remotely from your smartphone, tablet, or desktop computer via the Cannon App – which is very handy for Over Head Photography.
However, it is a costly camera, so if you’re starting, consider purchasing something like the Canon Rebel SL2 or even using the camera on your iPhone.
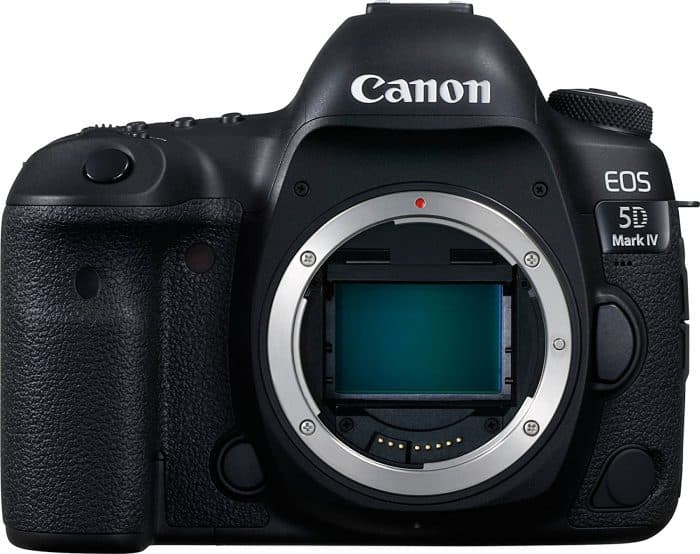
Don’t forget a fast CF card or SD card for 4k – I have both of those in mine, as the Canon 5D Mark IV has one of each type of slot.
Canon EF 24-70mm f/2.8L II: This is the only lens I own – it is really that good at everything. I have owned lower F-stop lenses in the f/1.7 and f/1.8 range with my old Pentax setup, and they were not necessary for food blogging.

Like my camera body, this lens is costly if you are starting. I am sure other lenses can do a good job; however, I only recommend what I own, which I know works well for this page.
ExpoDisc 82 mm 2.0 Professional White Balance Filter: This helps me get the perfect white balance in less than 30 seconds. I use it on every photoshoot – it’s the first thing I do when I pull out my camera.
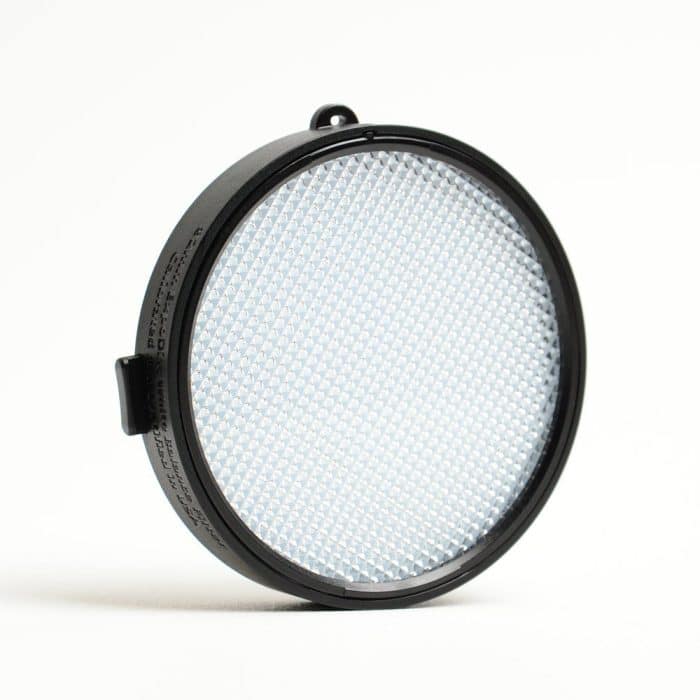
See how you can make out the white of the Expo Disk picture’s image to the left; the white balance is off on the yellow side compared to the white outside the image – that image of the Expo Disk was shot not using the Expo Disk…
How to Shoot Overhead Food Photography?
I used to have a simple and dangerous ladder set up in my office for overhead shots. With one foot on the ladder and my other foot on my window sill, I would precariously balance over my food photography subject in some very odd poses – I now look back and laugh.
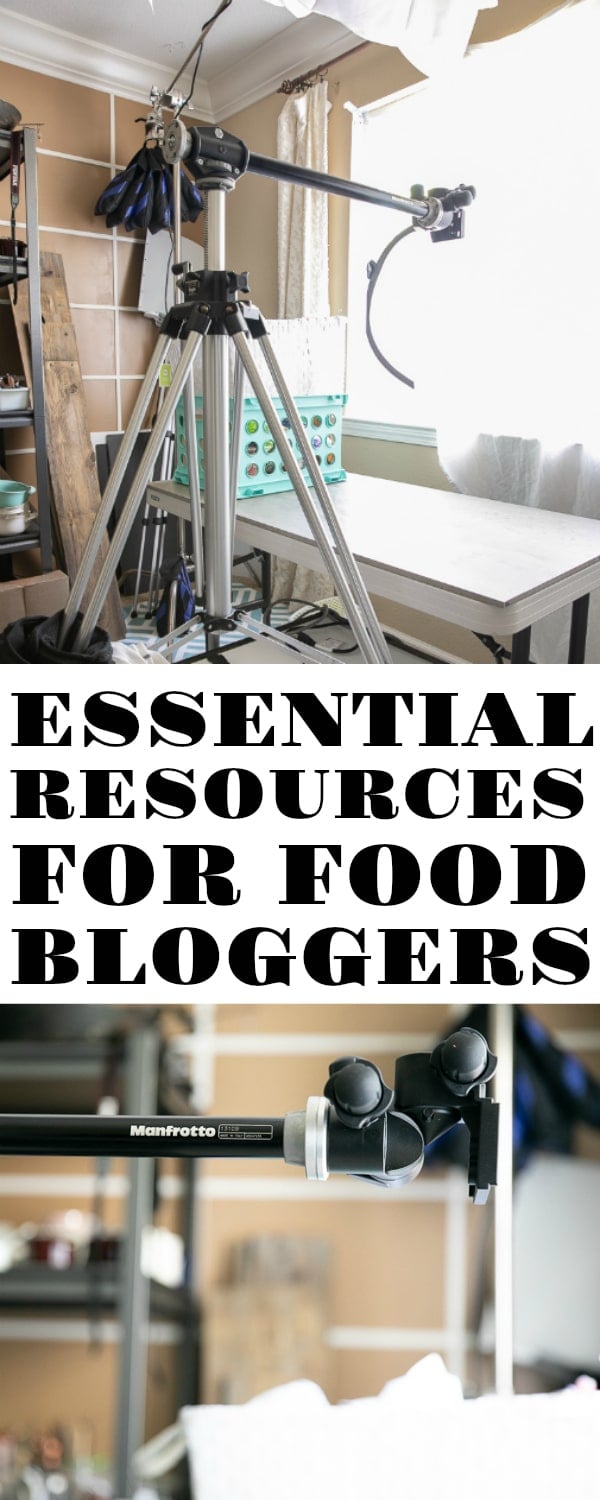
My husband assembled quite the overhead camera rig with professional Manfrotto gear, which is very easy to use, as shown in the picture below.
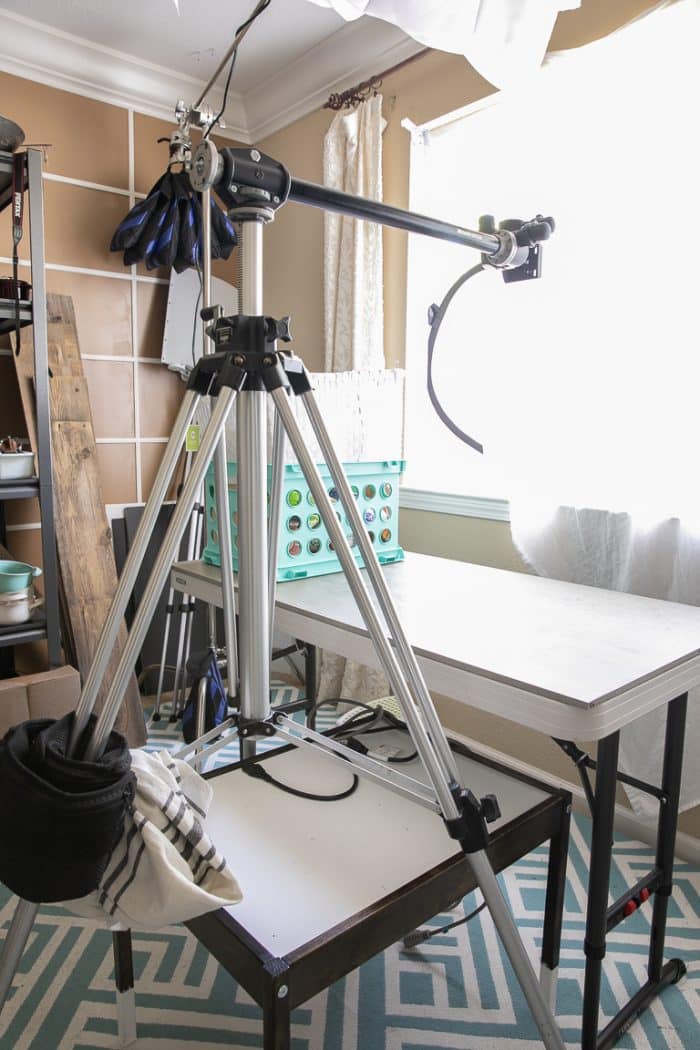
Complete Step-by-step instructions on creating this DIY overhead photography setup are at the bottom of this post.
Having the Canon 5D Mark IV, I can use the Cannon App on my iPhone with my overhead set up so that I do not have to click the button on the camera body physically and put my free hand in the photo. This is also an excellent setup for shooting the “Tasty” style videos. Here is what I use:
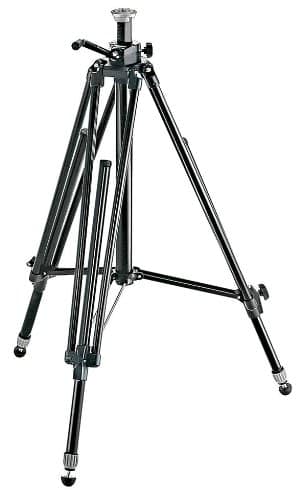
Manfrotto 028B Studio Pro Triman Tripod with Geared Column: This is a hefty duty studio-quality tripod – I only use it for overhead shots as it is incredibly robust. While I have the older Bogen 3046 version made by Manfrotto, they have changed very little over the years as it is a quality piece of engineering.
It stays parked next to my photography table, ready to go, with the below sidearm mounted on top and extending over the table. Two of my old ankle sandbag weights are weighed down on the opposite horizontal double columns from the sidearm listed next, as I have two legs touching my food photography table.
The last thing you want is for your overhead setup to topple over with your expensive DSLR setup – please use the counterweights!
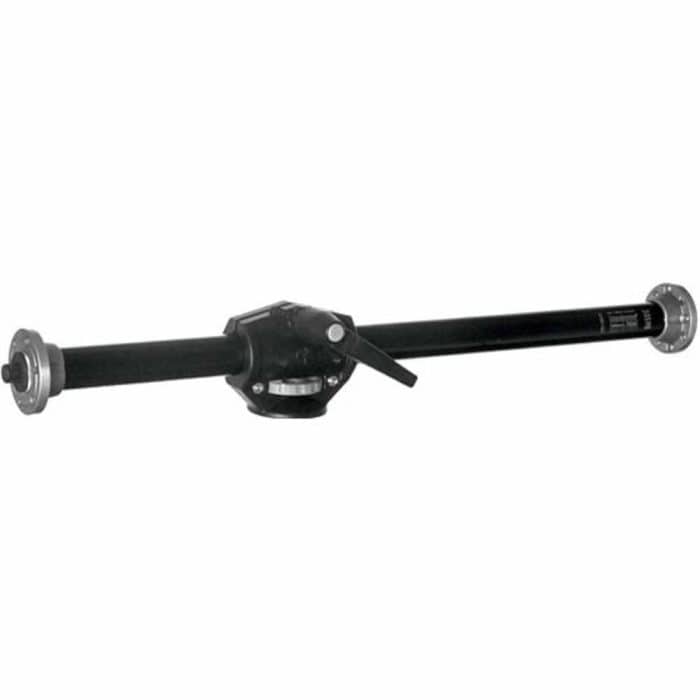
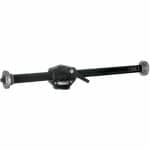
Manfrotto 131D Side Arm: This attaches to the tripod’s top and allows the overhead shot with the geared head. This allows you to directly line up the camera over the food photography table with a heavy-duty tripod and geared head.
Again, please use about 10 lbs of counterweight, such as ankle sandbag weights, to prevent your precious camera from falling over.
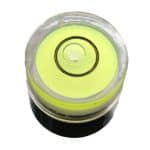
Manfrotto 410 Junior Geared Head: This geared head makes overhead photography simple. I keep the camera quick-release plate on my camera at all times, so I can clip in my camera to my setup while in the middle of a shoot. The three knobs make minor adjustments if the camera is not entirely level – a bubble level is convenient.

This head is essential for the overhead experience, as once you have it dialed in with the bubble, very few changes need to be made. Again, please make sure to use about 10 lbs of counterweight on the tripod, such as both of these ankle sandbag weights, to prevent your precious camera from falling over.

How to Shoot Overhead Photography
Equipment
Materials
- 1 set Ankle Sandbag Weight
Instructions
- Order/Gather Equipment listed.

- When equipment is fully gathered, stand the tripod up.
- Secure the sidearm to the Tripod, with the arm directly centered between two legs, to ensure the arm will go far over the photography table when those two legs are moved right next to the table.
- Add both Ankle Sandbags(all 10 lbs) to the Tripod Leg on the opposite side of the Tripod arm, to counterbalance the tripod.
- Secure the Geared Head to the Sidearm, tightening the three screws below the sidearm head. The Manfrotto logo should be pointing up.
- Secure the RC4 base-plate to your camera. Make sure the base plate is as close to parallel with the camera as possible.
- Double-check the 10 lbs of Ankle Sandbags Weights are counterbalancing the Side Arm/Geared Head.
- Connect the Camera to the Geared Head using the plate.
- Move the large adjustment knobs of the geared head until the Camera looks to be pointed perfectly downward at the photography table or subject.
- Place Bubble Level on the LCD screen on the camera, and adjust the fine-tune knobs until the bubble is in the middle. Once the bubble is perfectly in the middle, you are ready to shoot overhead safely.


Jessica, I want to thank you for giving me the courage to attempt to cook a pumpkin giving me by the neighbor.
I have not been well since I fell with the big bang on July 4th and had twelve back fractures and two in front. Now I am having difficulty getting back in shape, but I work at taking care of my wife Hedy who is suffering from a heart problem.
I loved the way you reached out to me and helped me cook a large pumpkin my neighbor gave me.
I greatly appreciate your contact and support in my cooking endeavors. My pumpkin came out fine with lots of taste. We are now enjoying it with several meals.
Thanks for your contact.
Thank you so much for the kind words James 🙂
I am glad my recipe helped.
Good luck with you continued recovery!
Came Here to Watch MJ