This post may contain affiliate links. See my disclosure policy.
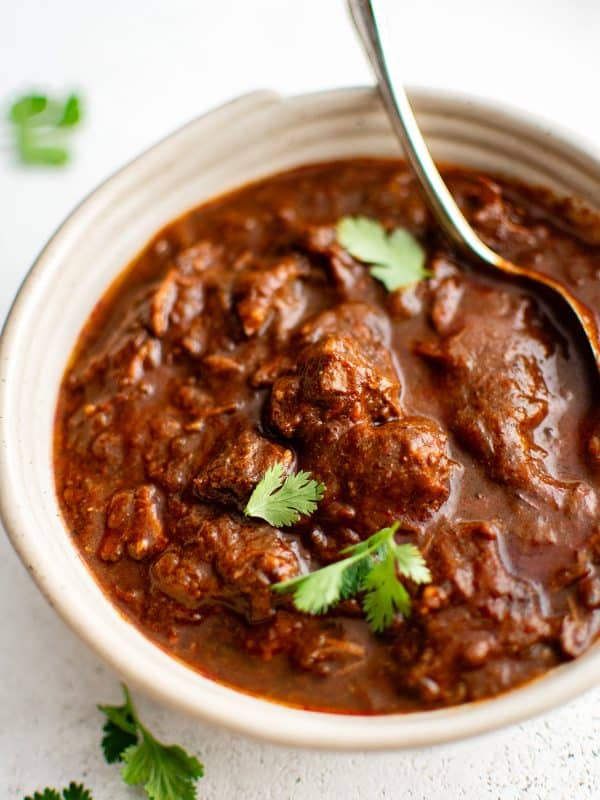
This Instant Pot Bone Broth Recipe is delicious, packed full of natural collagen and nutrients, and is so easy to make. Made with both chicken and beef bones, learn how to make this easy homemade Instant Pot Bone Broth and enjoy all the amazing health benefits of traditional bone broth in a fraction of the time.
Instant Pot bone broth! You guys, finally. Finally! It’s here. After so many comments and requests (thank you for those, by the way, I always love to hear from you), wondering how to make this stove-top bone broth recipe in the Instant Pot, it’s here!
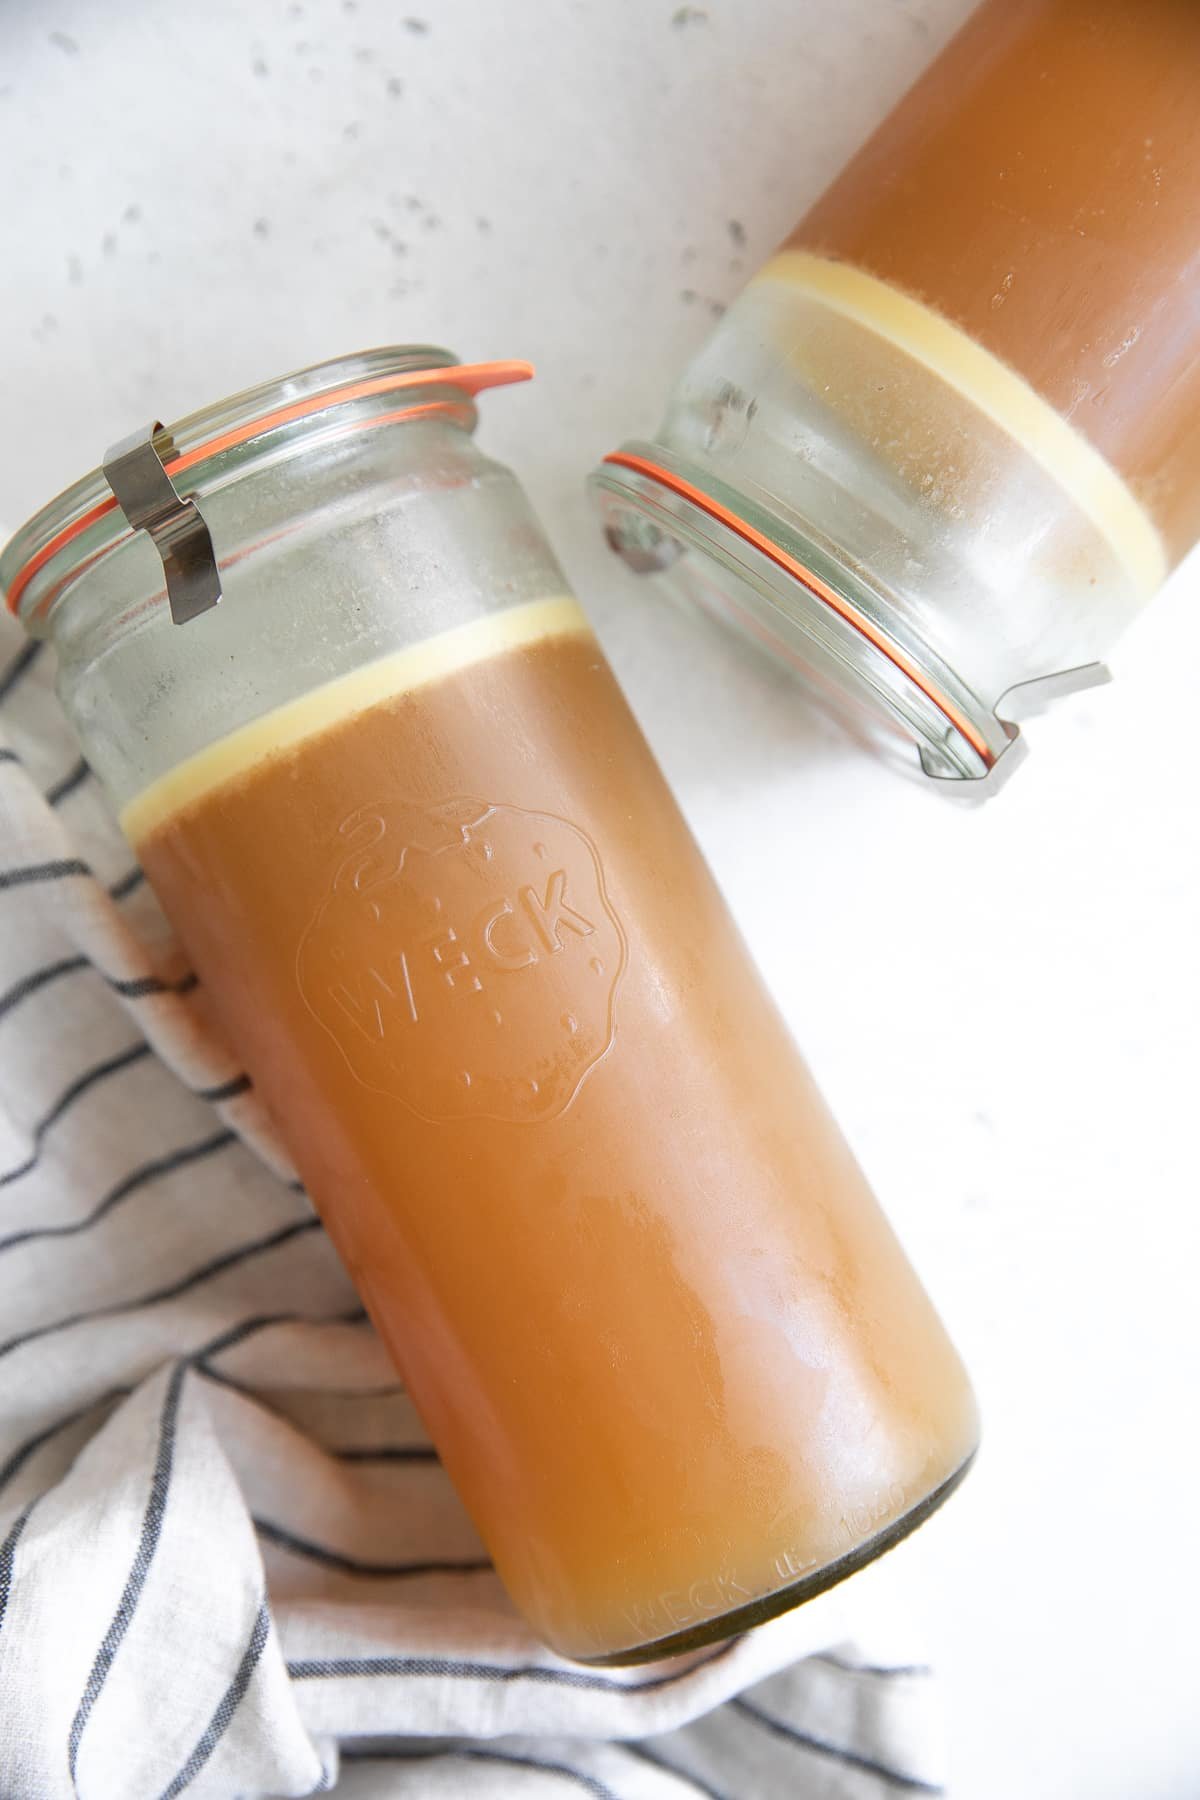
Just like my stovetop version, this Instant Pot bone broth recipe is wiggly giggly gelatin gold cooked and ready to enjoy in less than 4 hours!
Some things you should know before diving headfirst into making this recipe:
- First, and most importantly, read this post. Or, at the very least, the key points. I’ve spent many hours testing and researching bone broth so that I may share all that I learn with all of you.
- You’ll need an Instant Pot (or pressure cooker). After all, we are pressure cooking bone broth, right? Anyway, I made this recipe in my 6-quart Instant Pot, but use your 8-quart pot if you have one. Better yet, have two Instant Pots? Double the recipe (bone broth freezes extremely well).
- Blanching and browning the bones is completely optional…though highly recommended. Read more about why I always blanch and brown my bones below.
Table of Contents
What are the Benefits of Bone Broth?
Bone broth is a savory, nutrient-rich liquid made by simmering animal bones (cow, chicken, pork bones, and sometimes fish bones) and connective tissue in water over a long period of time. Drinking bone broth is believed to be beneficial to our joints, digestive system, and skin as it contains many important minerals and nutrients.
5 benefits of drinking bone broth
- Bone broth is highly nutritious. As a total package, bone broth is rich with vitamins and nutrients such as calcium, magnesium, and phosphorus. The total amount will vary depending on the type of animal source and bones you use, but in general, you’ll find loads of calcium, magnesium, potassium, and phosphorus, Vitamin A, K2, and minerals like zinc, iron, boron, manganese, and selenium in any given batch of quality bone broth recipe.
- It may protect the joints. Tissues and bones contain collagen. When cooked, collagen turns into gelatin. This gelatin – liquid gold (when heated), jelly gold (when chilled) – is filled with amino acids, the building blocks of proteins. According to Medical News Today, gelatin is believed to do more than just support your joints, it’s also thought to improve gut health and digestion (Gelatin binds to the water in your digestive tract, helping food move through your gut easier), improve sleep, improve mood, help skin health, heart health, bone health, and may even help you feel full, longer.
- It may aid in digestion. Especially for people with inflammatory bowel disease or leaky gut syndrome, according to this article, which explains that specific amino acids may decrease the duration of active disease and contribute to the maintenance of IBD remission.
- May lead to a better night’s sleep. According to Neuropsychopharmacology, Glycine, a nonessential amino acid found in bone broth, like this Instant Pot bone broth recipe, may improve sleep quality. Of course, more research is needed.
- Claims that it may help you lose weight. Since bone broth is a rich source of protein, some like to claim that it will help you feel fuller, longer, and therefore help you lose weight. I know that for me personally, a cup of bone broth would never fill me up, so I’m highly suspicious about this one.
How to Make Instant Pot Bone Broth
For the full list of ingredients and amounts, scroll down to the recipe card at the bottom of the page.
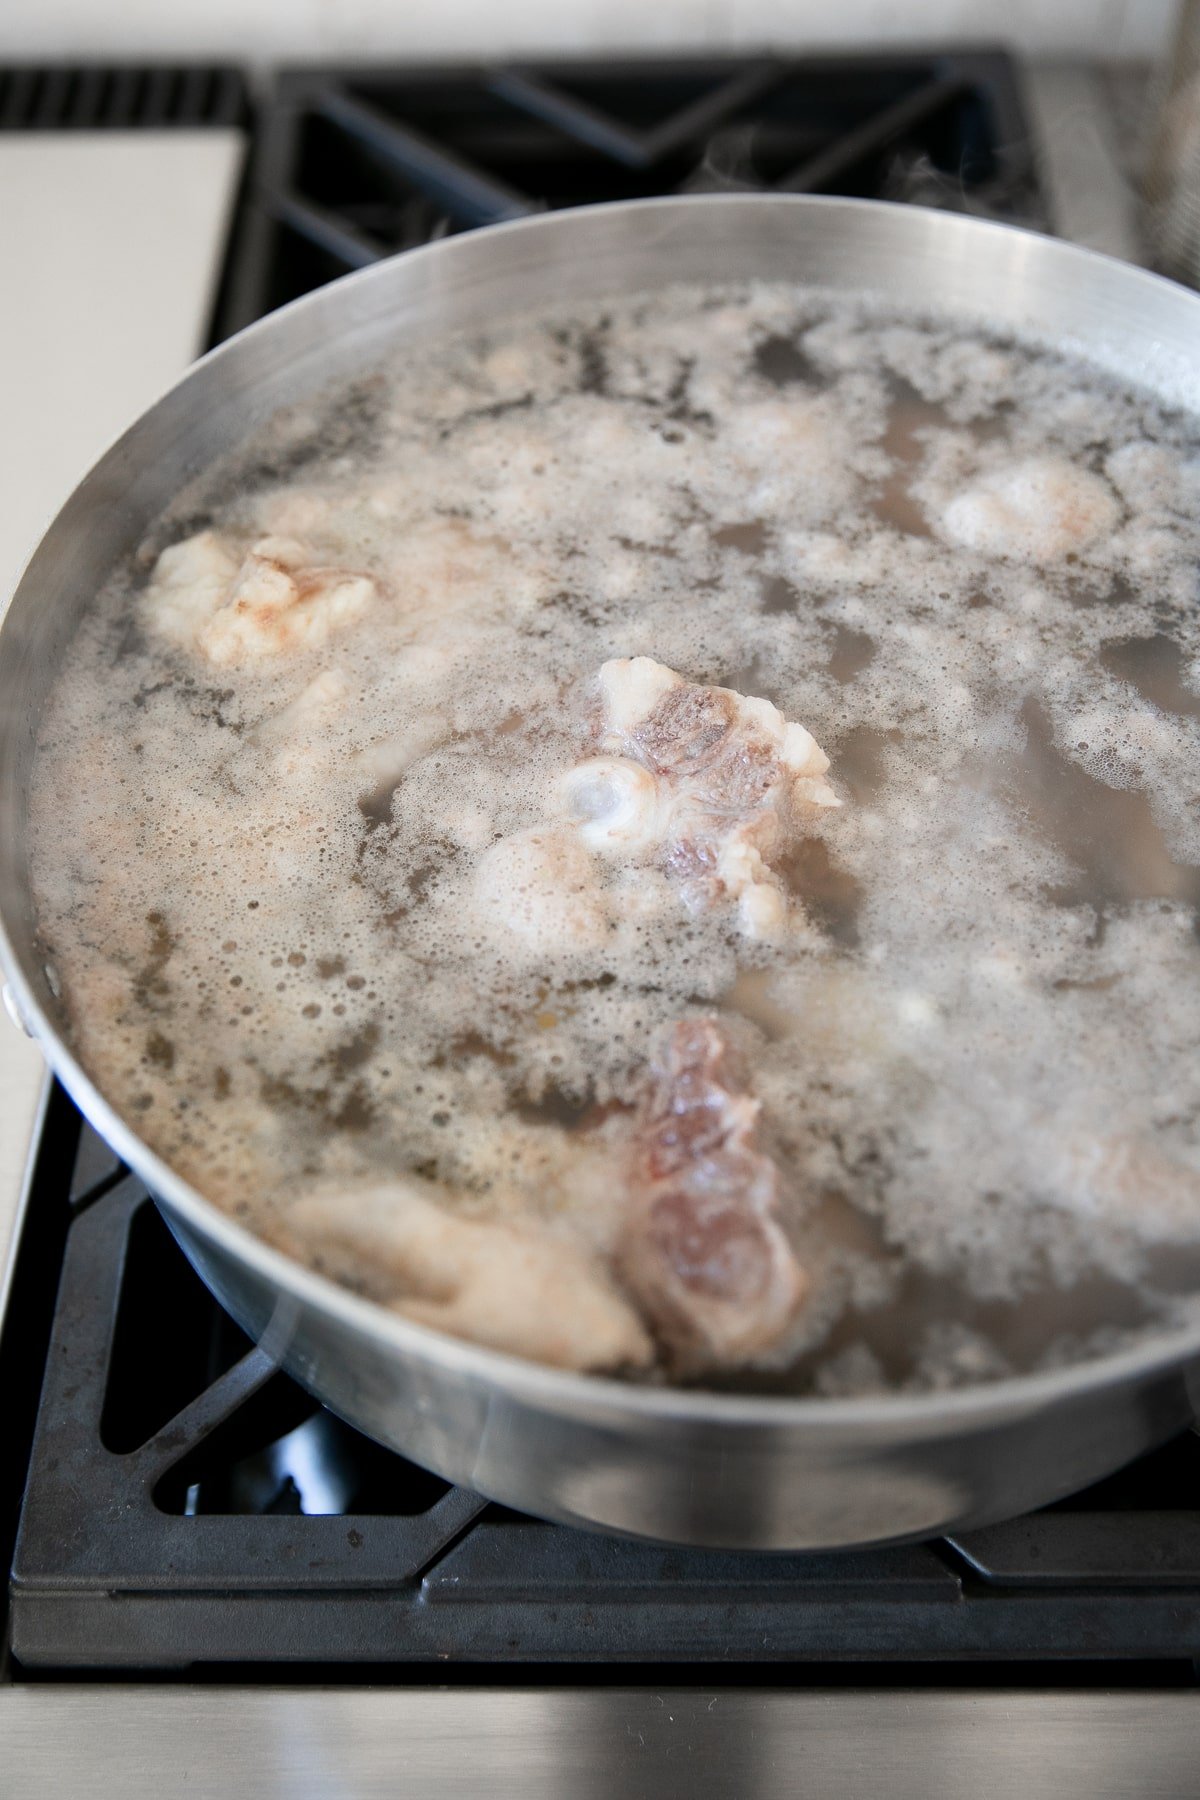
Step 1. Blanch the bones (optional). You guys, this step is completely optional. If you like a nice, clear broth, however, it comes highly recommended. Add your bones to a large stockpot and cover with cold water. Bring to a boil over high heat and simmer for 10-15 minutes before draining and rinsing with water.
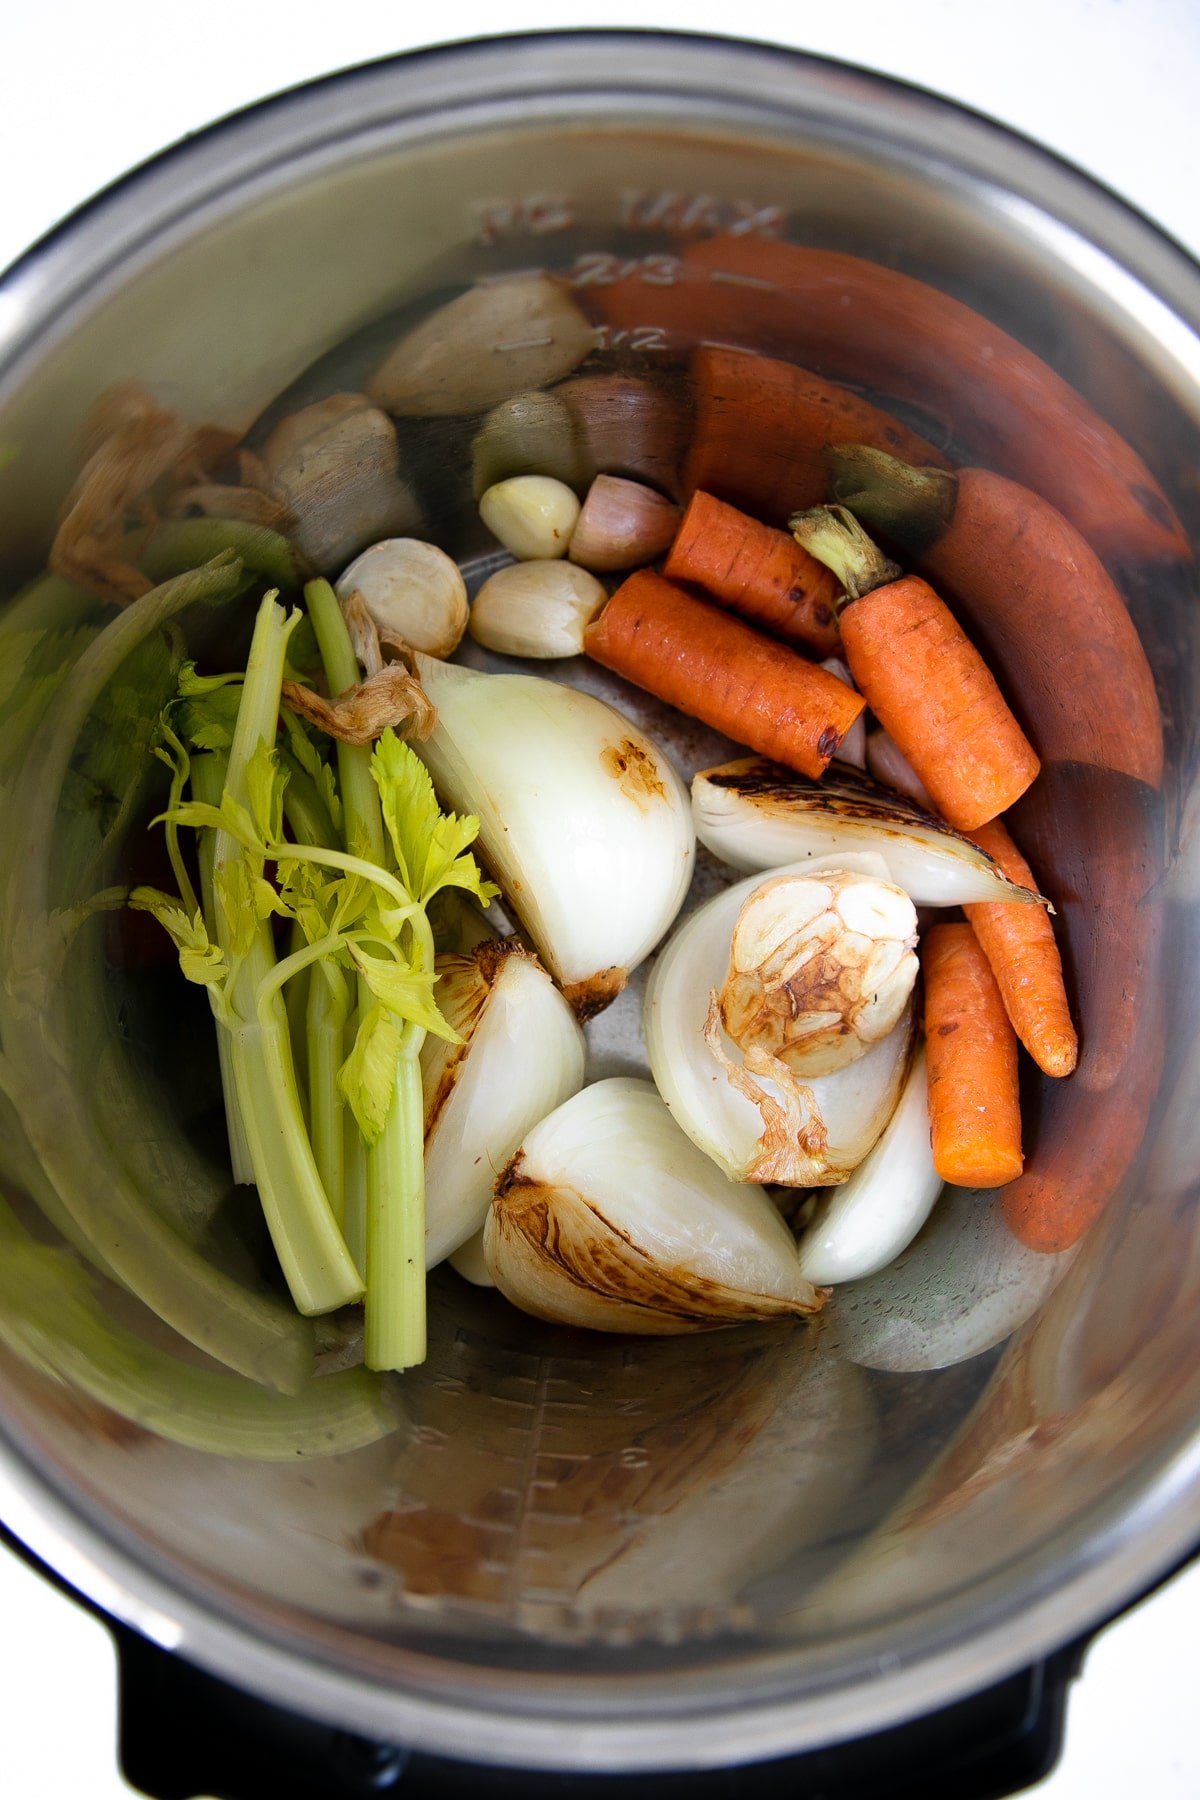
Step 2. Sauté vegetables (optional). As the bones are blanching, set your Instant Pot to Sauté Mode on HIGH heat. Once your pot is hot, add 1 tablespoon of olive oil and add the veggies. Brown approximately 3-4 minutes on each side. Remove and set aside.
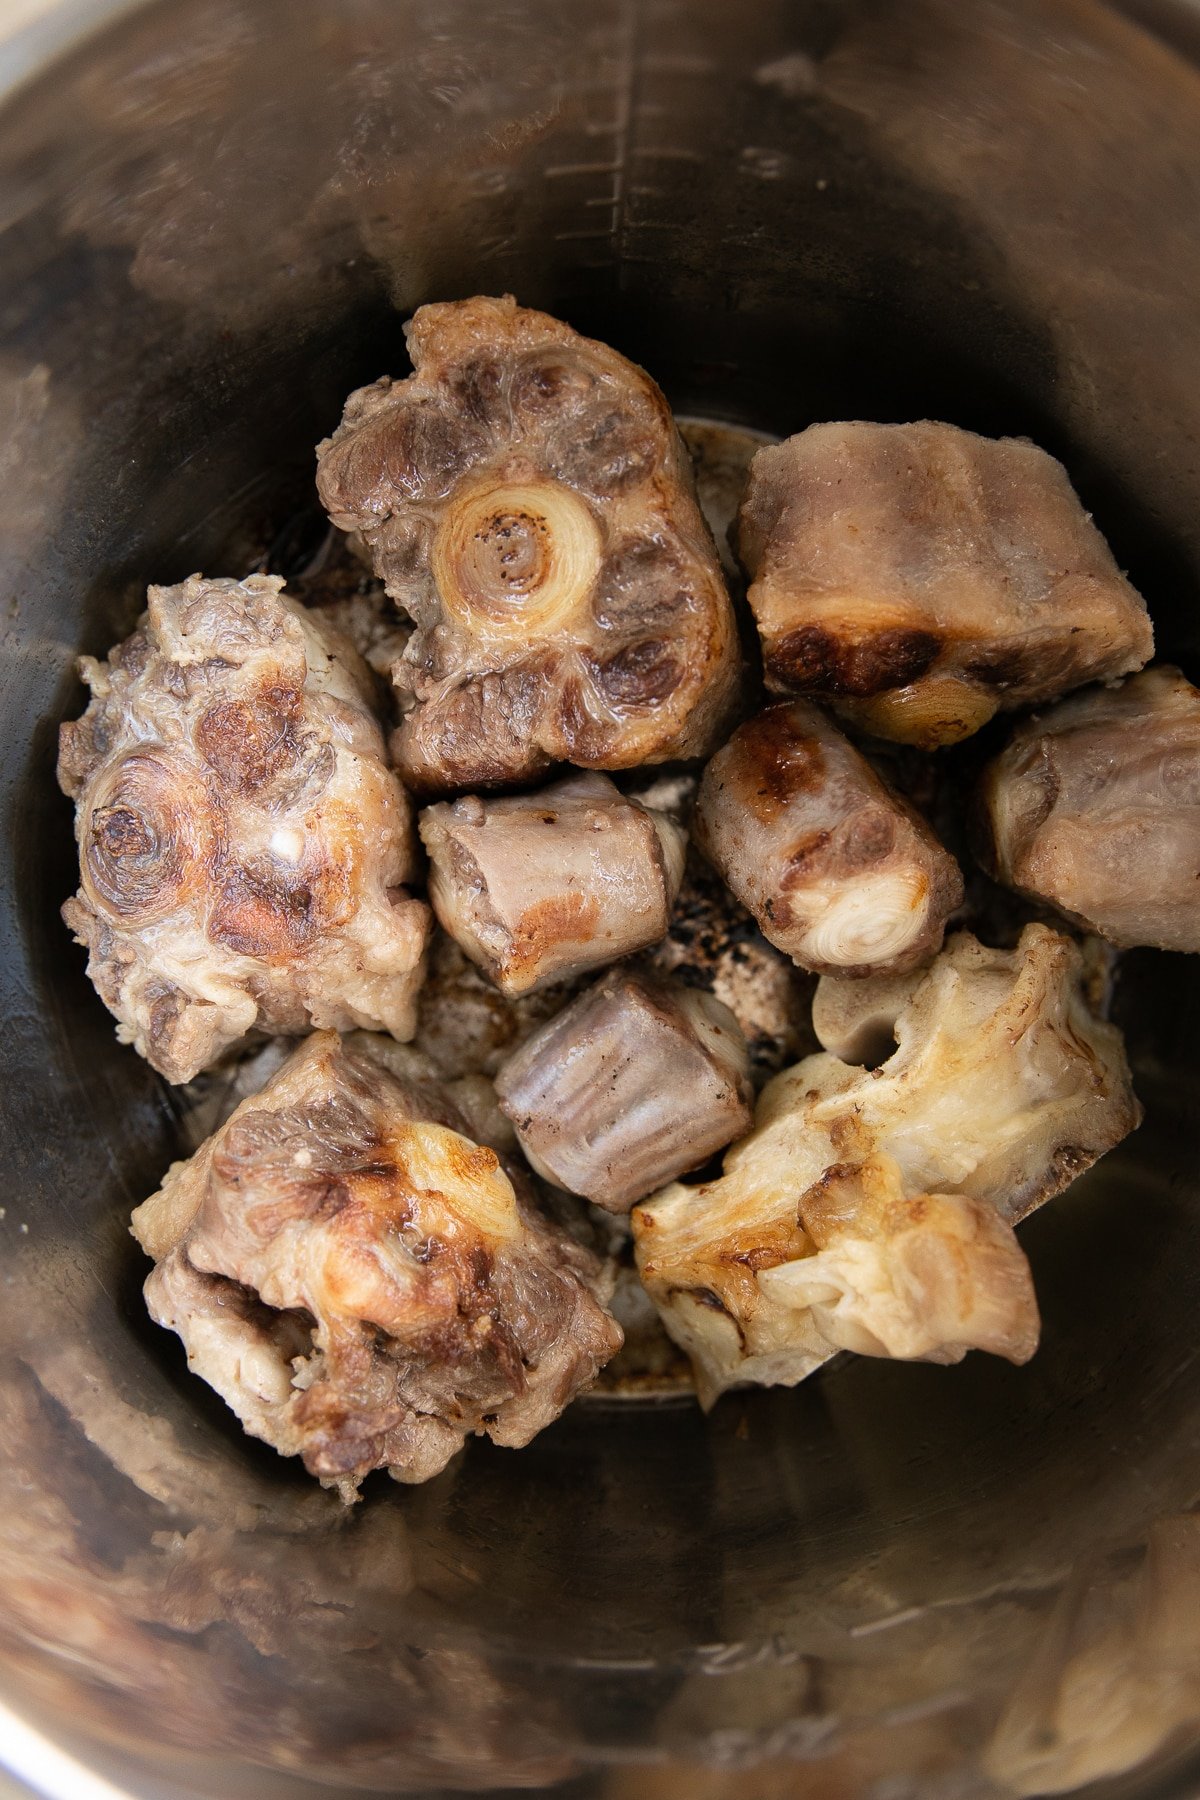
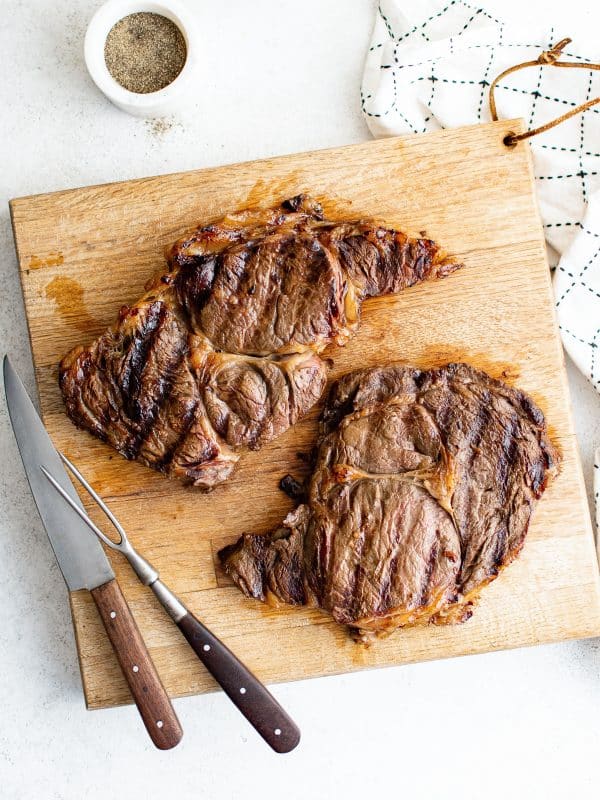
Step 3. Sauté blanched bones (optional). Set your Instant Pot to Sauté Mode on HIGH heat. Once hot, add an additional tablespoon of olive oil and transfer beef bones in a single layer (you may need to do this in 2 batches) to the Instant Pot. Cook each side for 3-4 minutes or until brown.
- Note– you may also brown your bones and veggies on a baking sheet or roasting pan in a preheated oven set at 425 degrees F.
Step 4. Turn off sauté mode.
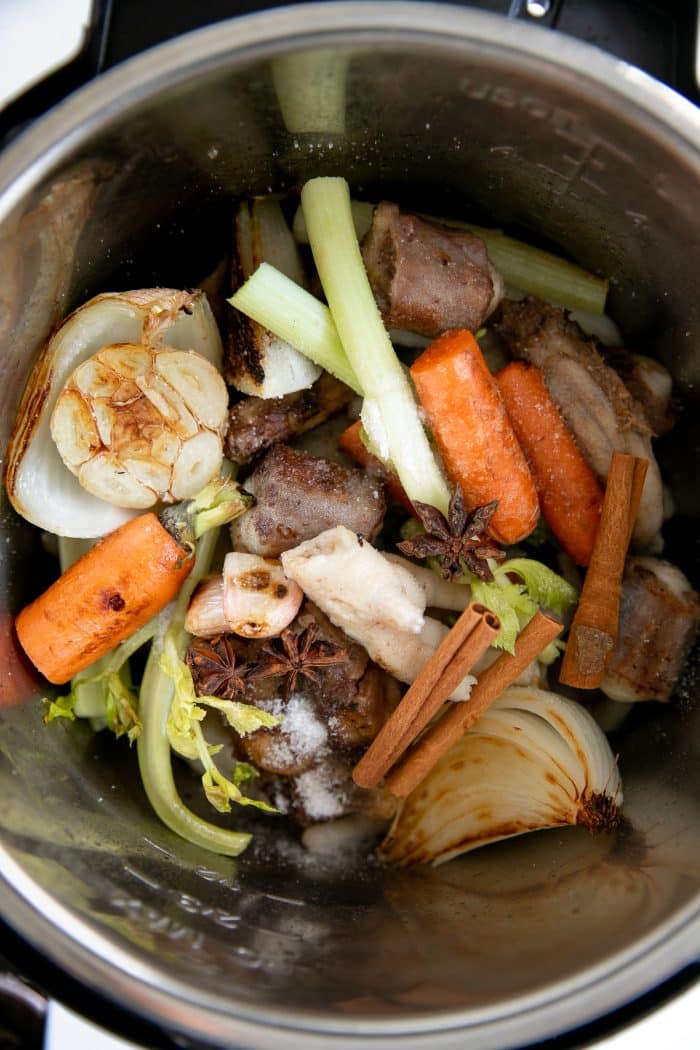
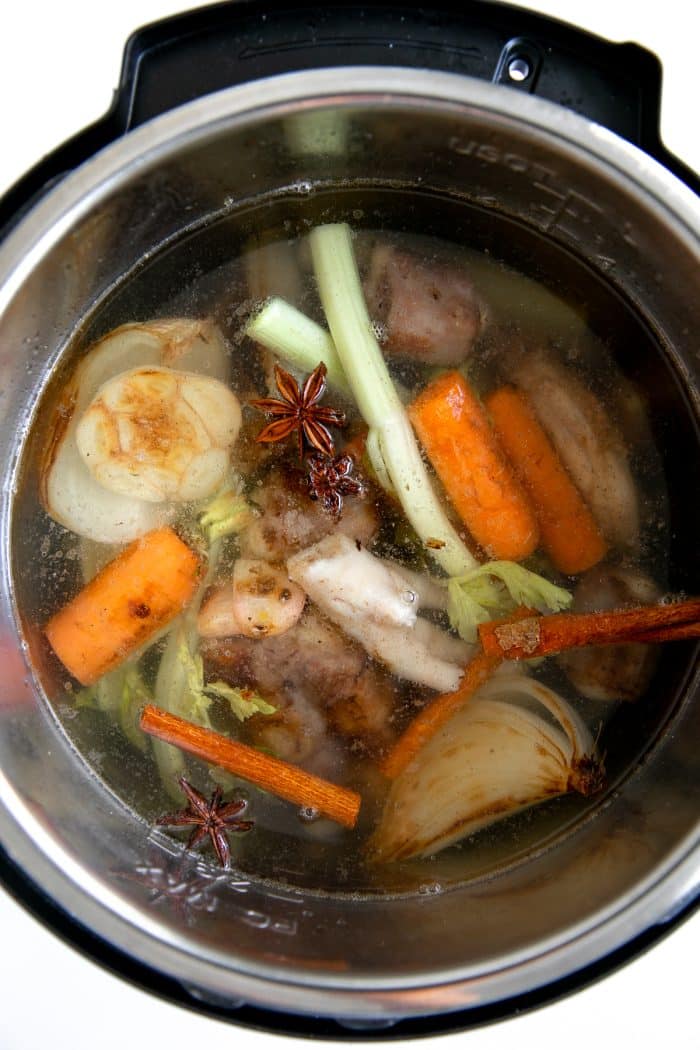
Step 5. Add all ingredients to the Instant Pot. Transfer all bones and vegetables back to the Instant Pot. Add the cinnamon sticks, star anise, bay leaves, black peppercorns, salt, and apple cider vinegar. Fill your Instant Pot with water so that it reaches approximately 1 inch below the MAX fill line.
Step 6. Pressure cook bone broth. Lock the lid onto your Instant Pot and set the steam release knob to the “sealing” position. Select “manual” HIGH PRESSURE for 3 hours (180 minutes). It takes approximately 20 minutes for the Instant Pot to come to full pressure, at which point the timer will start to count down.
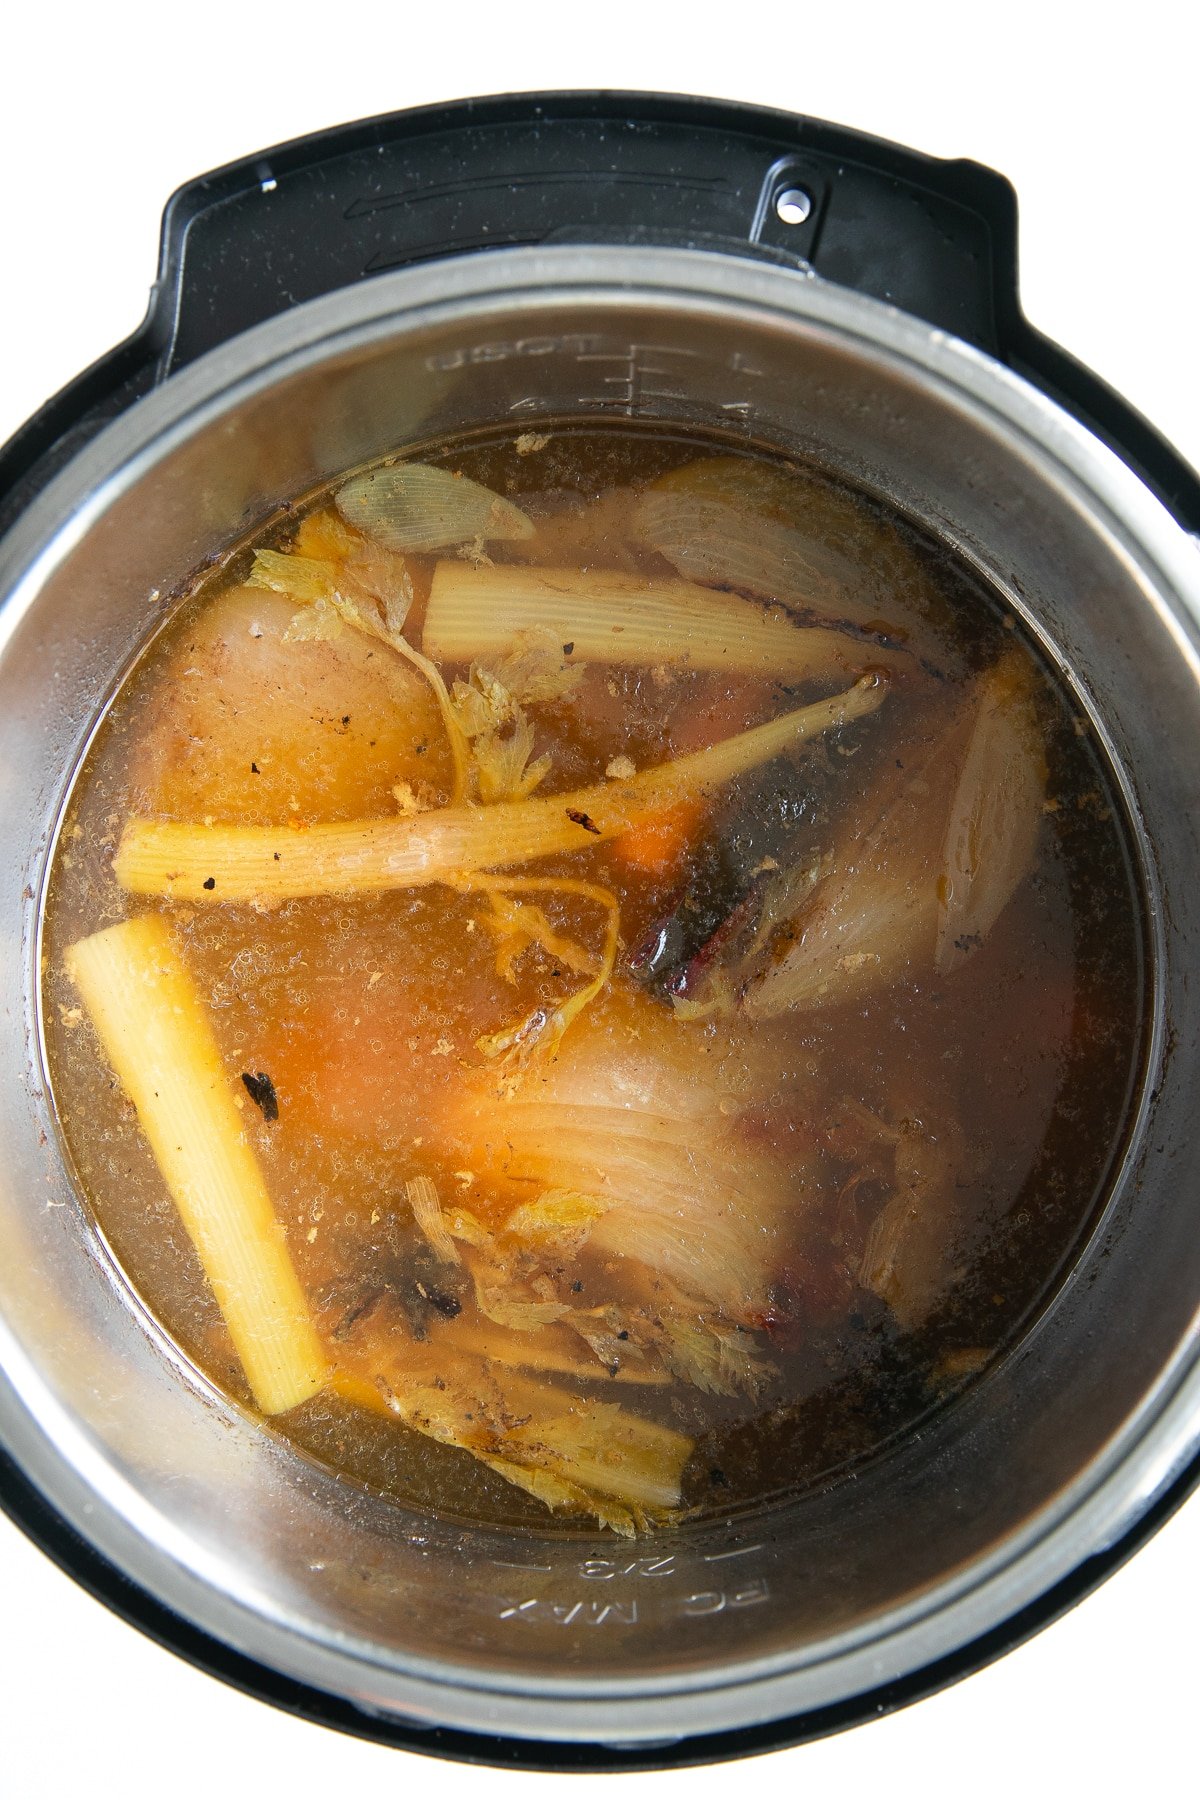
Step 7. Natural release. Once the three hours are complete, allow the pressure to release naturally (this will take approximately 20-30 minutes).
Step 8. Strain. Carefully strain your cooked broth through a cheesecloth or fine mesh strainer and add a couple of handfuls of ice to your beef broth to expedite cooling, if needed.
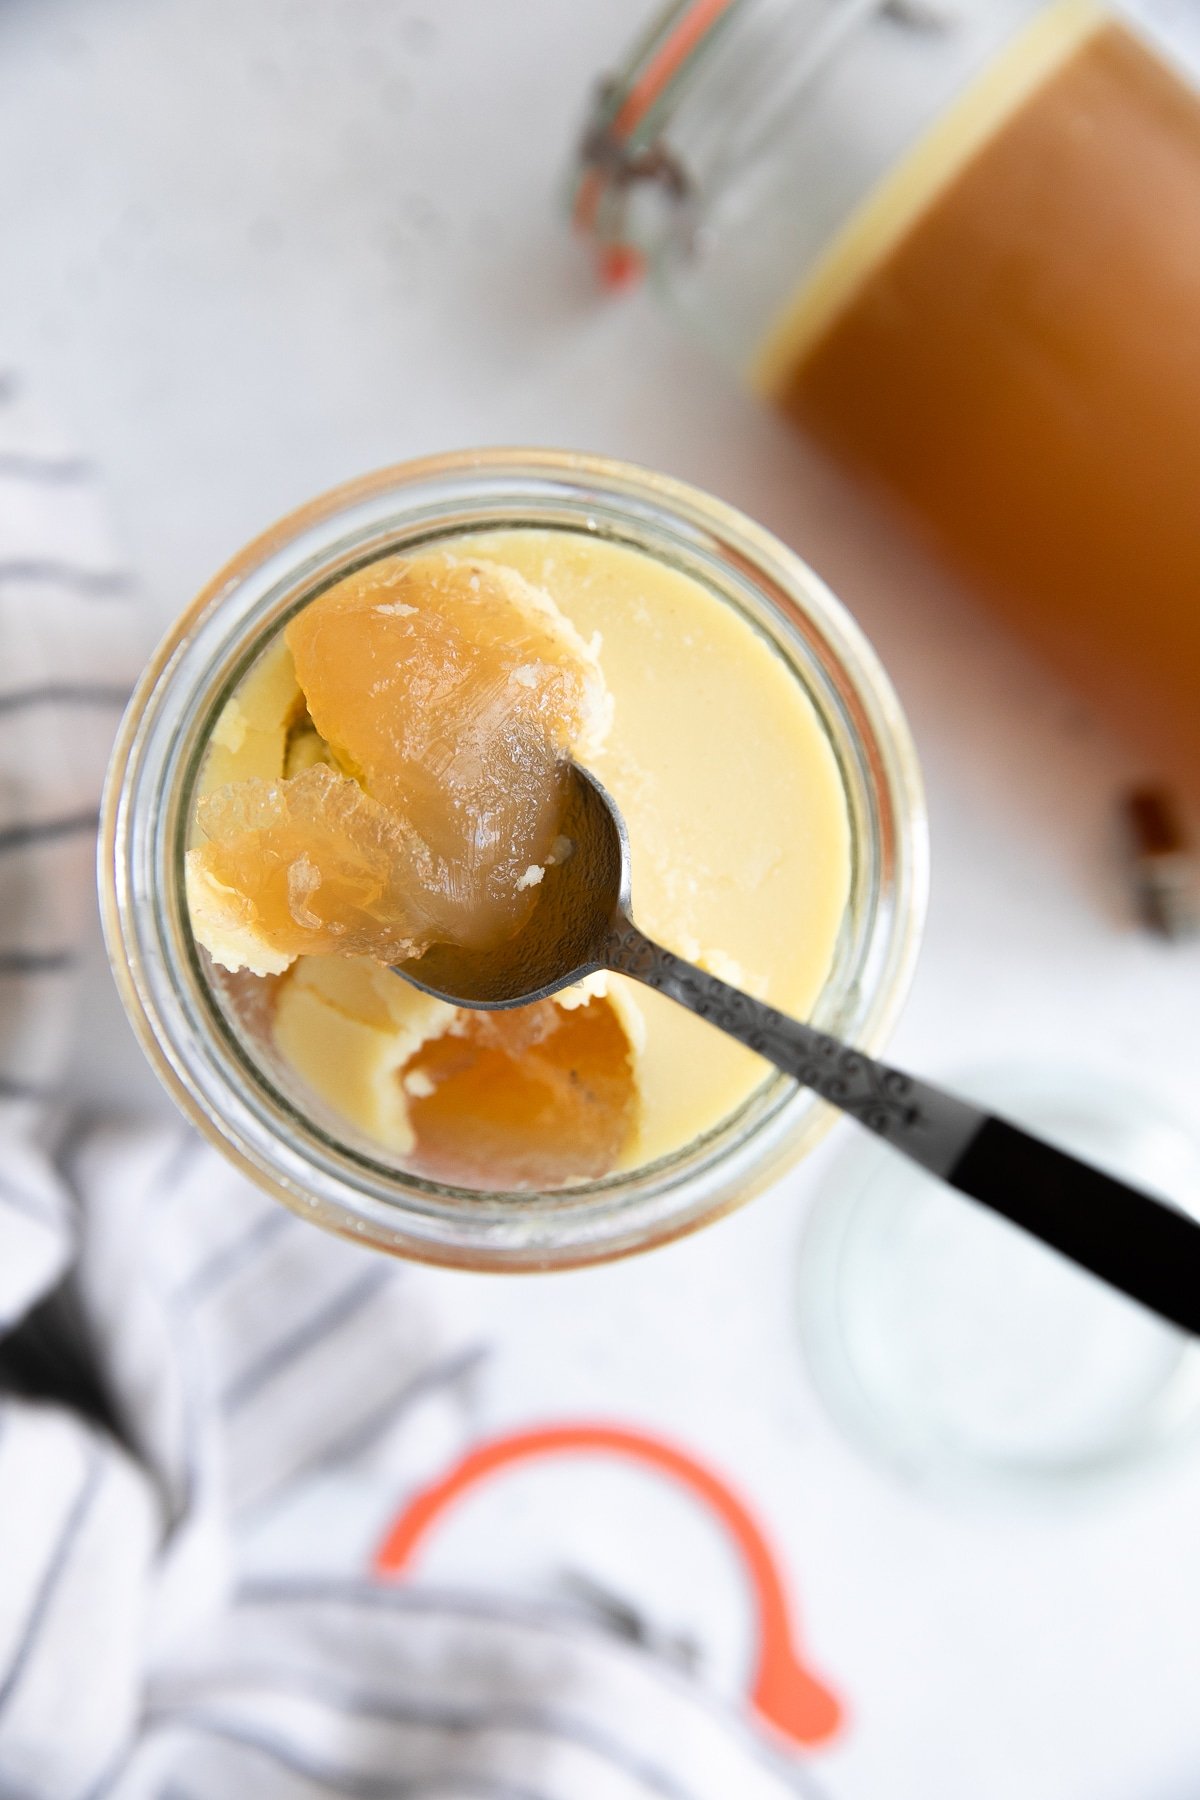
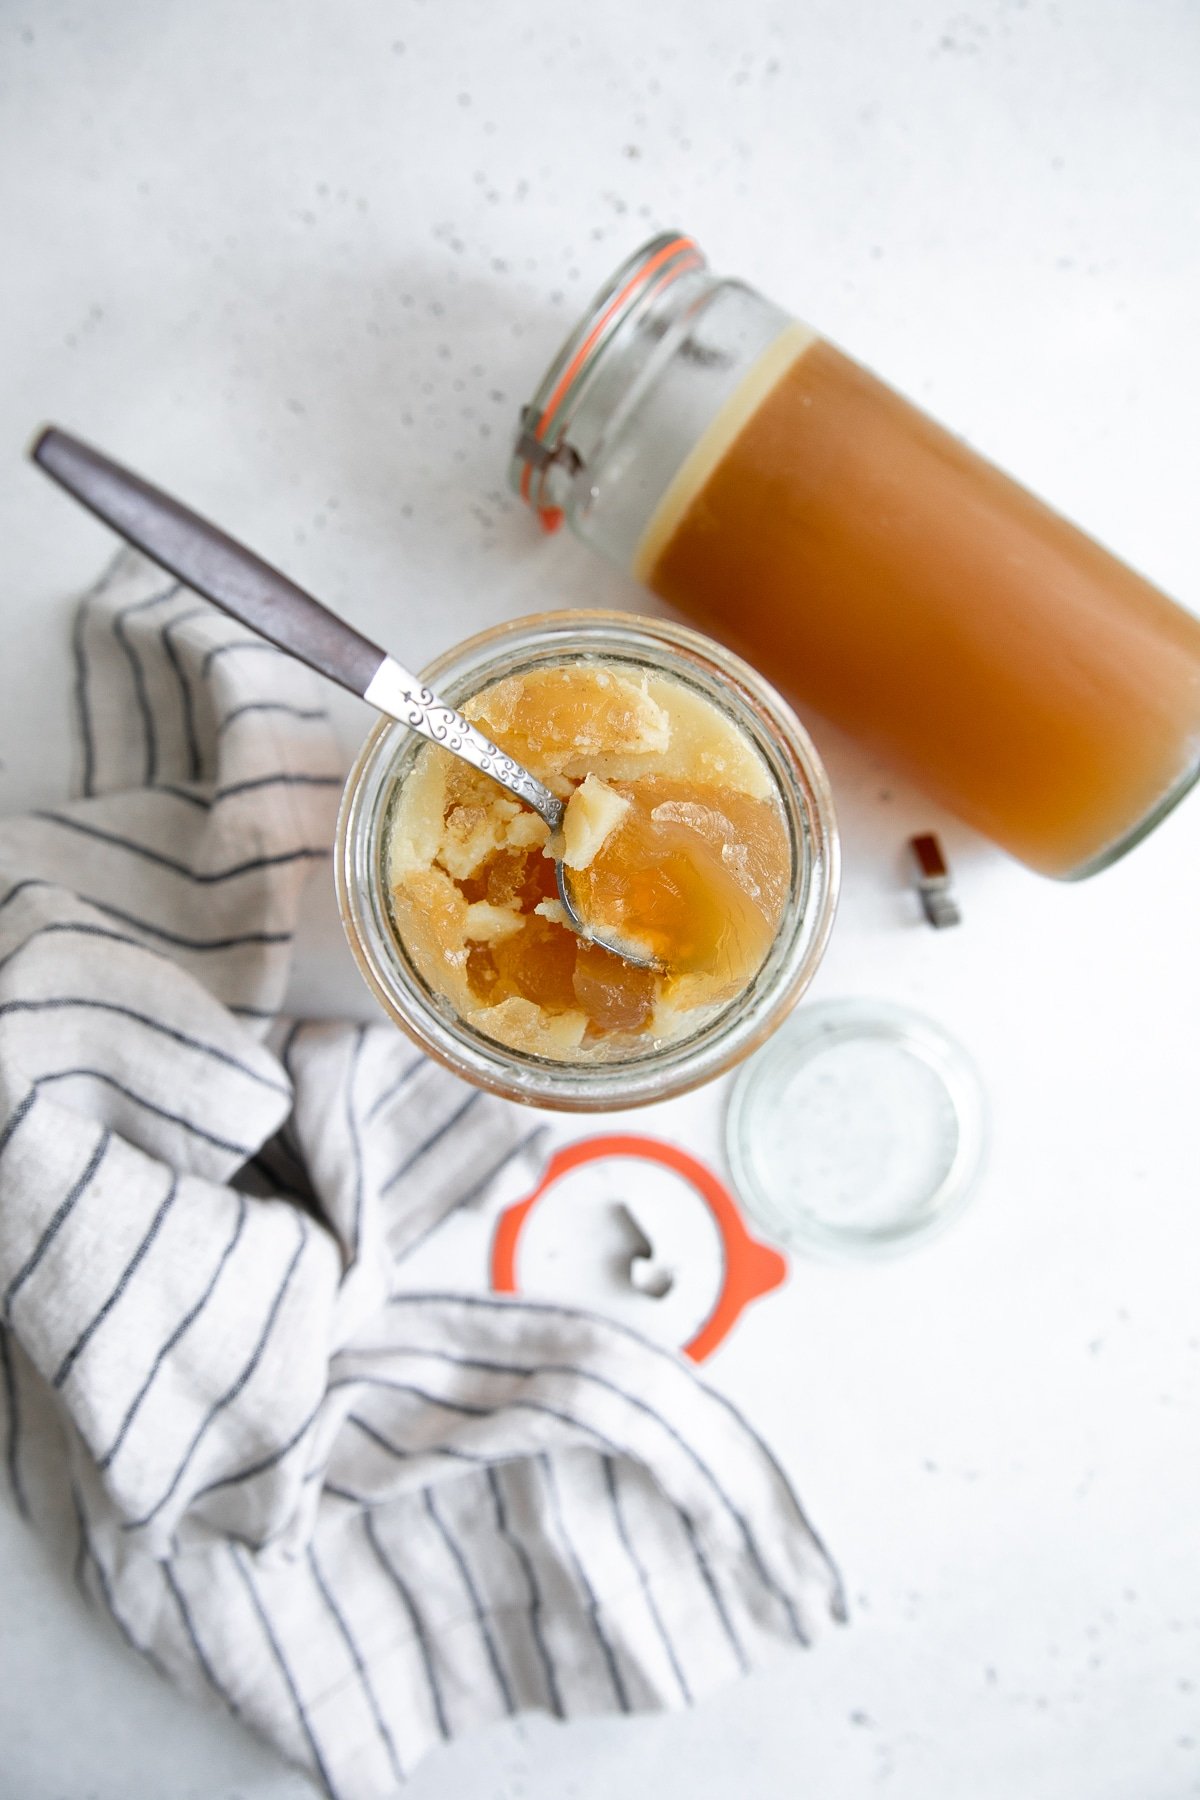
Step 9. Skim the fat from your broth (optional). Transfer the broth to the refrigerator and allow it to cool fully. The result will be a hard, thick layer of fat and a bottom layer that is your bone broth (which should look like gelatinous brown jello). If desired, use a fork to scoop off the top layer of fat. This will leave behind the healthy bone broth, minus the fat.
Step 10. Store your bone broth. Bone broth stores well in the refrigerator for approximately 5 days. If you make a large batch, I recommend freezing smaller batches in the freezer for up to 6 months (it reheats perfectly!).
Frequently Asked Questions
Here are some of the most frequently asked questions I get regarding this bone broth recipe, as well as my stove-top bone broth recipe.
Do I have to blanch the bones?
No. But if you have a little extra time, it’s highly recommended. Why should you blanch your bones? Blanching removes impurities from the bones. While these impurities won’t hurt you, they’re not pleasant and, even after straining, will leave your broth looking murky. If you don’t blanch your bones, be sure to strain your cooked broth through a fine-mesh cheesecloth. Will blanching remove a significant amount of gelatin and nutrients? No. I promise you’ll have plenty leftover.
Do I have to roast the bones?
No. However, roasting (or browning your bones in your Instant Pot) will brown and caramelize them. This creates extra, yummy flavor. Don’t waste all the leftover stuck-on brown bits, either. Deglaze with a little water and make sure all those flavor bits find their way into your pot.
Where can I buy bone broth?
Many of you have expressed that you love bone broth, but don’t always have the time to make your own. My favorite store-bought bone broth when I can’t make my own is Kettle and Fire Bone Broth. Available in classic Beef and Chicken Bone Broth, they also have fun bone broth flavors like Lemongrass Ginger Pho, Chipotle Beef, and Turmeric Ginger. What do I love Kettle and Fire so much?
Made in the USA from 100% grass-fed cattle and bones from organic, free-range chickens. Sustainable and shelf-stable packaging. Never, ever frozen. Simmered 20+ hours in steam-injected kettles.
Is Instant Pot beef bone broth Whole 30?
Yes! This easy Instant Pot bone broth recipe is 100% Whole30 approved.
Is Instant Pot beef bone broth Gluten-Free?
Yes!
How is Bone Broth Different From Regular Broth or Stock?
Technically, there isn’t any clear hard line separating the three, but there are a few differences.
Bone broth: Beautiful, golden, super-flavorful broth made by simmering bones (specifically those high in collagen) for a long period of time, often 12 hours on the stovetop or in a pressure cooker for at least 3-4 hours. Once cooled, bone broth will usually firm up into a jello-like consistency due to its high gelatin content.
Regular broth: Unlike bone broth, regular broth is usually lighter in color and flavor. Made from simmering meat (sometimes on the bone, but not always) and aromatics in water for up to one or two hours.
Regular Stock: Stock lies somewhere between bone broth and regular broth. Made with more bones than regular broth (but typically not the high collagen type), and is usually simmered for a slightly longer period of time. Given the longer cook time, this regular stock typically contains higher traces of gelatin.
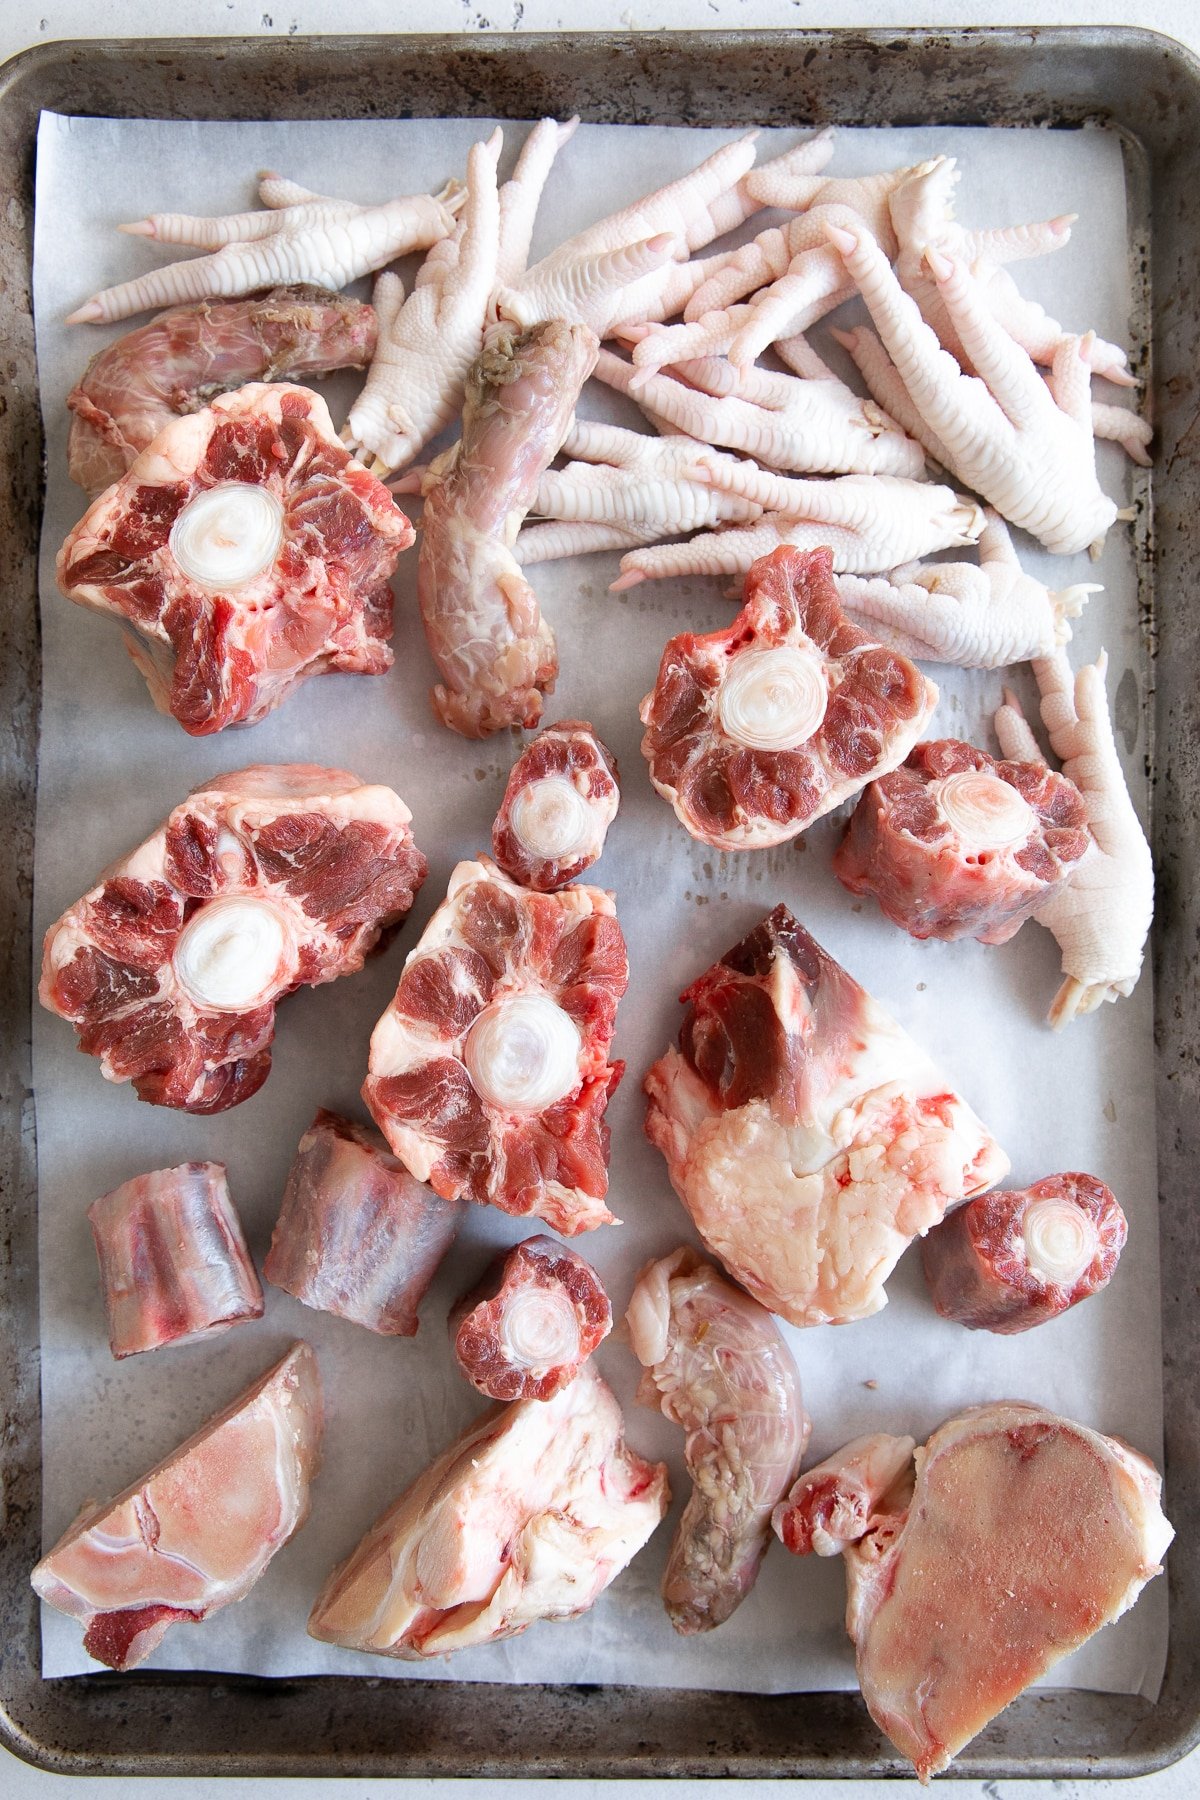
Best Bones for Bone Broth
- The best beef bones to use are knuckles, joints, feet, and marrow bones.
- For added flavor incorporate meaty bones like oxtail, shank, and short ribs.
- Chicken feet contain loads of gelatin and are less expensive than other gelatin-rich bones.
- The bones of younger animals contain a lot of cartilage, as it is this cartilage that will eventually turn to bone as the animal ages. For this reason, veal bones are particularly prized for making stock.
- If you can’t get your hands on any marrow bones, 1-2 whole roasted chicken carcasses will also work. Keep in mind, however, that your broth will contain less collagen.
What bones did I use in this recipe? For this Instant Pot Bone Broth recipe, I added a mix of collagen-rich beef bones as well as chicken feet. If you’re unsure at all, ask your local butcher for the best broth bones and then request that he or she cut them in half.
How to Use Bone Broth
This homemade bone broth recipe can be enjoyed in so many different, wonderful ways.
- Enjoy it straight from a mug.
- Use bone broth in place of water when cooking lentils, rice dishes, or risotto.
- Use it in your favorite chicken and beef stews, such as this Instant Pot beef stew, American goulash, and chicken cacciatore recipe.
- Add it to soups like this bok choy soup, pho, or homemade vegetable soup.
How to Store and Freeze Bone Broth
Before storing your bone broth in the refrigerator or freezer, you want to bring it down to room temperature. You want to do this as quickly as possible to prevent any chance of contamination, as bone broth is the perfect breeding ground for nasty bacteria.
The easiest way to do this is by adding a couple of handfuls of ice to your pot, covering, and then waiting for the broth to cool. Ice helps expedite this process.
You may also create a large ice water bath for your pot by filling your sink (or bathtub) with ice water to a depth of 2-3 inches. Place your pot directly in the ice water and allow it to cool.
Once cooled, transfer your broth to mason jars with lids or airtight reusable storage containers. Refrigerate your broth for up to one week.
If you plan to freeze your broth, transfer desired amounts to large ziplock bags with most of the air removed and seal completely. Lay flat and allow at least 4-6 hours to freeze completely. Or, use ice cube trays to freeze smaller portions (like these silicone ice cube trays with lids). Enjoy within 3-4 months.
More Instant Pot Recipes,
- Butternut Squash Risotto Recipe (Instant Pot)
- Vegetarian Cauliflower Tikka Masala Recipe (Instant Pot)
- Instant Pot Beef Stew Recipe
- Instant Pot Mac and Cheese Recipe
- Chicken Enchilada Soup Recipe (Instant Pot)
If you try making this Easy Pressure Cooker Bone Broth Recipe, please leave me a comment and let me know! I always love to hear your thoughts.

Instant Pot Bone Broth
Equipment
Ingredients
- 3 pounds beef bones, preferably a mix of marrow bones (femur bones) and bones with meat on them (oxtail, short ribs, and knuckle bones cut in half)
- 2 pounds chicken feet
- 3 tablespoon olive oil, divided
- 2 carrots, scrubbed and cut in half
- 2 stalks celery, chopped
- 1 large yellow onion, quartered with skin and root end in tact
- 1 head garlic, halved crosswise
- 2 bay leaves
- 1 teaspoon whole black peppercorns
- 1 teaspoon kosher salt, plus more to taste
- 1 tablespoon apple cider vinegar
- 2 whole cinnamon sticks, optional
- 3 whole star anise, optional
- 10 cups cold water, or enough water to come 1-inch below MAX fill line
Instructions
- Blanch the bones (optional). Add your bones to a large stockpot and cover with cold water. Bring to a boil over high heat and simmer for 10-15 minutes before draining and rinsing with water.
- Sauté vegetables (optional). As the bones are blanching, set your Instant Pot to Sauté Mode on HIGH heat. Once your pot is hot, add 1 tablespoon of olive oil and add the vegetables. Brown the vegetables, approximately 3-4 minutes on each side. Remove and set aside.
- Sauté blanched bones (optional). Set your Instant Pot to Sauté Mode on HIGH heat. Once hot, add an additional tablespoon of olive oil and transfer beef bones in a single layer (you may need to do this in 2 batches) to the Instant Pot. Cook each side for 3-4 minutes or until brown.
- Turn off sauté mode.
- Add all ingredients to Instant Pot. Transfer all bones and vegetables back to the Instant Pot. Add the cinnamon sticks, star anise, bay leaf, black peppercorns, salt, and apple cider vinegar. Fill your Instant Pot with water so that it reaches approximately 1-inch below the MAX fill line.
- Pressure cook bone broth. Lock the lid onto your Instant Pot and set the steam release knob to "sealing" position. Select "manual" HIGH PRESSURE for 3 hours (180 minutes). It takes approximately 20 minutes for the Instant Pot to come to full pressure at which point the timer will start to countdown.
- Natural release. Once the three hours is complete, allow the pressure to release naturally (this will take approximately 20-30 minutes).
- Strain. Carefully strain your cooked broth through a cheesecloth or fine mesh strainer and add a couple of handfuls of ice to your beef broth to expedite cooling, if needed.
- Skim the fat from your broth (optional). Transfer broth to the refrigerator and allow the broth to cool fully. The result will be a hard, thick layer of fat and a bottom layer that is your bone broth (which should look like gelatinous brown jello). If desired use a fork to scoop off the top layer of fat. This will leave behind the healthy bone broth, minus the fat.
- Store your bone broth. Bone broth stores well in the refrigerator for approximately 5 days. If you make a large batch, I recommend freezing smaller batches in the freezer for up to 6 months (it reheats perfectly!).
Notes
- If you prefer to brown your bones and vegetables in the oven: preheat the oven to 450 degrees F. Transfer the bones and vegetables (carrots, onions, garlic, celery) to a large baking sheet or roasting pans. Don’t pile them all on top of each other- use two roasting pans if necessary. Roast for 30 minutes before gently tossing the bones and vegetables, and roasting for an additional 15-30 minutes more.
- Prefer to skip chicken feet? Simply replace with additional beef bones.
- This recipe is Paleo, Keto, and Gluten-Free.
Nutrition
Nutrition information is automatically calculated, so should only be used as an approximation.


Made this yesterday and oh my does it smell amazing! I didn’t have chicken feet or star anise, but figured with a full IP of various beef bones and the veggies it would turn out great. What caught my eye was the cinnamon sticks and I think they give it a depth of flavor. Thanks so much for making bone broth easy!!
I loved your suggestions for use including using it to cook rice and other grains. Thank you
Hi Jessica, love your recipe! If I may ask, if I use 3 pounds of beef bone with marrow and the 2 pounds of chicken feet and followed the recipe exactly as it is, do you know the exact nutritional facts? Just started bulking, so would love to hear your input, thanks!
The best way for you to calculate the nutritional info for this, and everything else you eat while bulking is to use a platform like My Fitness Pal – it works great 🙂
I just completed this recipe but now I am questioning if I did something wrong. The vegetables are cooked but still very intact. The bones still have all the marrow inside. I thought after 3 hours in pressure cooker everything would be cooked down more. Puzzled
Thanks
Trisha
It sounds like you followed the process correctly; the Instant Pot does a great job at making bone broth, but it might not always break everything down completely, especially if the ingredients are in larger pieces. Vegetables maintaining their shape and bones retaining marrow can still occur, as the primary goal is to extract nutrients and flavors into the broth, rather than fully breaking down the ingredients. If you’re seeking a richer broth, you could strain the current batch, then run the broth through another cycle in the Instant Pot with the same bones and veggies to further extract flavors and nutrients.
Can I use a crockpot instead of pressure cooker
My regular bone broth can be made in a slow cooker, but you will need a giant slow cooker or two of them 🙂
I followed this recipe pretty much to the T. I turned out amazing. There was no gelatinous at all. I don’t know if it should have been. But i never want to go back to the box stuff. If I should have had the gelatin can someone advise what I did wrong. I used:
beef bones about 4 pounds
beef shank approx 2 lb
something that looked like a finger’
After I boiled the parts, I rinsed just about all the fat. Maybe I boiled and rinsed the gelatin and fat. There was very little fat that needed to be skinned off the top if any at all.
I used a 6 quart instant pot. This is pretty small.. I did not have any star Anise or Chinese 5 spice. So used all spice. Again, I can’t wait to make this again.
Maybe you rinsed it off too well after the optional blanching – it’s hard for me to say without having been next to you in the kitchen while originally making it. That might be where you are losing gelatin.
But you literally wrote “…before draining and rinsing with water”. Clarification needed in your post, I guess. You mean rinsing the pot or the bones?
I’ve made instant pot bone broth for a few years and I’m just wondering if maybe Denise didn’t cook it long enough.. Sorry to jump in on your conversation but I thought if I can do it , anyone can..!
Some bones are better than others for gelatin. My butcher knows which bones to give me, and he always puts in at least one big knuckle bone – the joint end of the bone. If you only get the cylindrical marrow bones you won’t get nearly as much gelatin. If you used marrow bones and had no fat, you poured off the fat from roasting and overboiled them in the blanching step.
Is there a min and maximum time to making the bone broth in a large crockpot. And is it safe on low or high.
Low for 8 to 12 hours 🙂
I haven’t made bone broth in a couple years. First instant pot attempt my broth is not gelatinous at all.
As another recipe prescribed I did a roast then added bones salt and ACV. Then water a bit short of max line in my 6qt instant pot.
3 hours on high,left to slow release, after 40 still had pressure so I full vented.
Next day I check the broth it might have a scant amount of gelatin…but it is way to flowing.
3 hours on high seems to be the prescription..not hot enough to destroy the collagen evidently. I used oxtail and marrow. Little over a pound each. Sounds like my issue is more bones needed? Not sure what else, I’d love to get this right versus a slow simmer all day
I am not sure about the original recipe you tried three years back, but if you follow the recipe and notes as written here verbatim, without substituting bones or quantities, you should have a gelatinous, high-quality broth 😀
Do you roast/brown/blanch the chicken in this recipe?
Thank you
Yes, the chicken goes with the bones through the entire process in this recipe.
Hi, for my bones I used cow feet, marrow bones, and chicken feet. I had about 1lb more of bones then required but used them all anyway. I let it cook down for 12 hours filling with water only when it got low and my end product left me with about a quart of broth should I have kept adding water? I was worried it wouldnt be gelatinous if I did. Now that the its made can I put it back into a pot and just add more water?? Im new to cooking so I could use the help.
There is no need to add additional liquid now unless you plan on serving it immediately. If you are storing it, it just may be extra concentrated. So you may want to add additional water at the time of serving or if/when adding to a soup.
I think I followed your recipe to the BONE.
6 pounds Beef Marrow Bones
Garlic, carrots, Lime, Onion
I used a pressure cooker on medium and there was steam coming out past the weighted lock going chish chish chish.
After 3 hours I let it rest to release pressure.
When I opened the lid, there was no liquid, just black crust.
Either I should have cooked on Low or added water a few time during the 3 hours.
What did I do wrong?
Hi Stephen,
It is hard to speculate without having been in your kitchen next to you the whole time, but it sounds like your pressure cooker was not sealed correctly, which let all the water out over the three hours – possibly the “chish chish chish” steam coming out the weighted lock or the main lid seal itself.
This is a great recipe, however having made it several times, I do have some tweaks and suggestions for a better final product. One tablespoon of apple cider vinegar is not enough acidity to efficiently break down the collagen, and you may not get the gelatinous bone broth you’re after, which happened to me the first time I made this. The second time doubled the apple cider vinegar to two tablespoons, and I also added the juice from one large lemon. The broth came out much, much better, and very gelatinous.
In terms of the optional steps at the beginning, I don’t feel it’s necessary to saute the bones (unless you want to) however I do highly recommend blanching them, as it’s an easy step and only takes about 20 minutes. It’s impressive when you see the amount of grey foam that surfaces while boiling, and while I’m not sure exactly what that foam is, but happy to remove those impurities from my bone broth.
I haven’t tried adding vegetables yet, I keep mine simple with salt, peppercorns, and bay leaves. I usually add in the extras when I consume the bone broth, I love adding white rice, cilantro, and avocado, very delicious!
Hi! I’ve made this and while I get the coating of fat when chilled, my broth isn’t gelatinized. Am I doing something wrong?
It’s hard for me to say without having been in the kitchen with you the entire time, but I don’t think you did anything wrong. The bone broth itself should be fine and perfectly good if the instructions and ingredients were followed.
It may not be gelatinized due to not enough bones, or the wrong type of bones, but again it’s hard for me to guess without having been there with you.
Add more acidity, a second TBSP of apple cider vinegar and some lemon juice.