This post may contain affiliate links. See my disclosure policy.

Honestly, store-bought pita kinda sucks. This super soft, fluffy, and flavorful homemade Pita Bread Recipe, well, doesn’t.
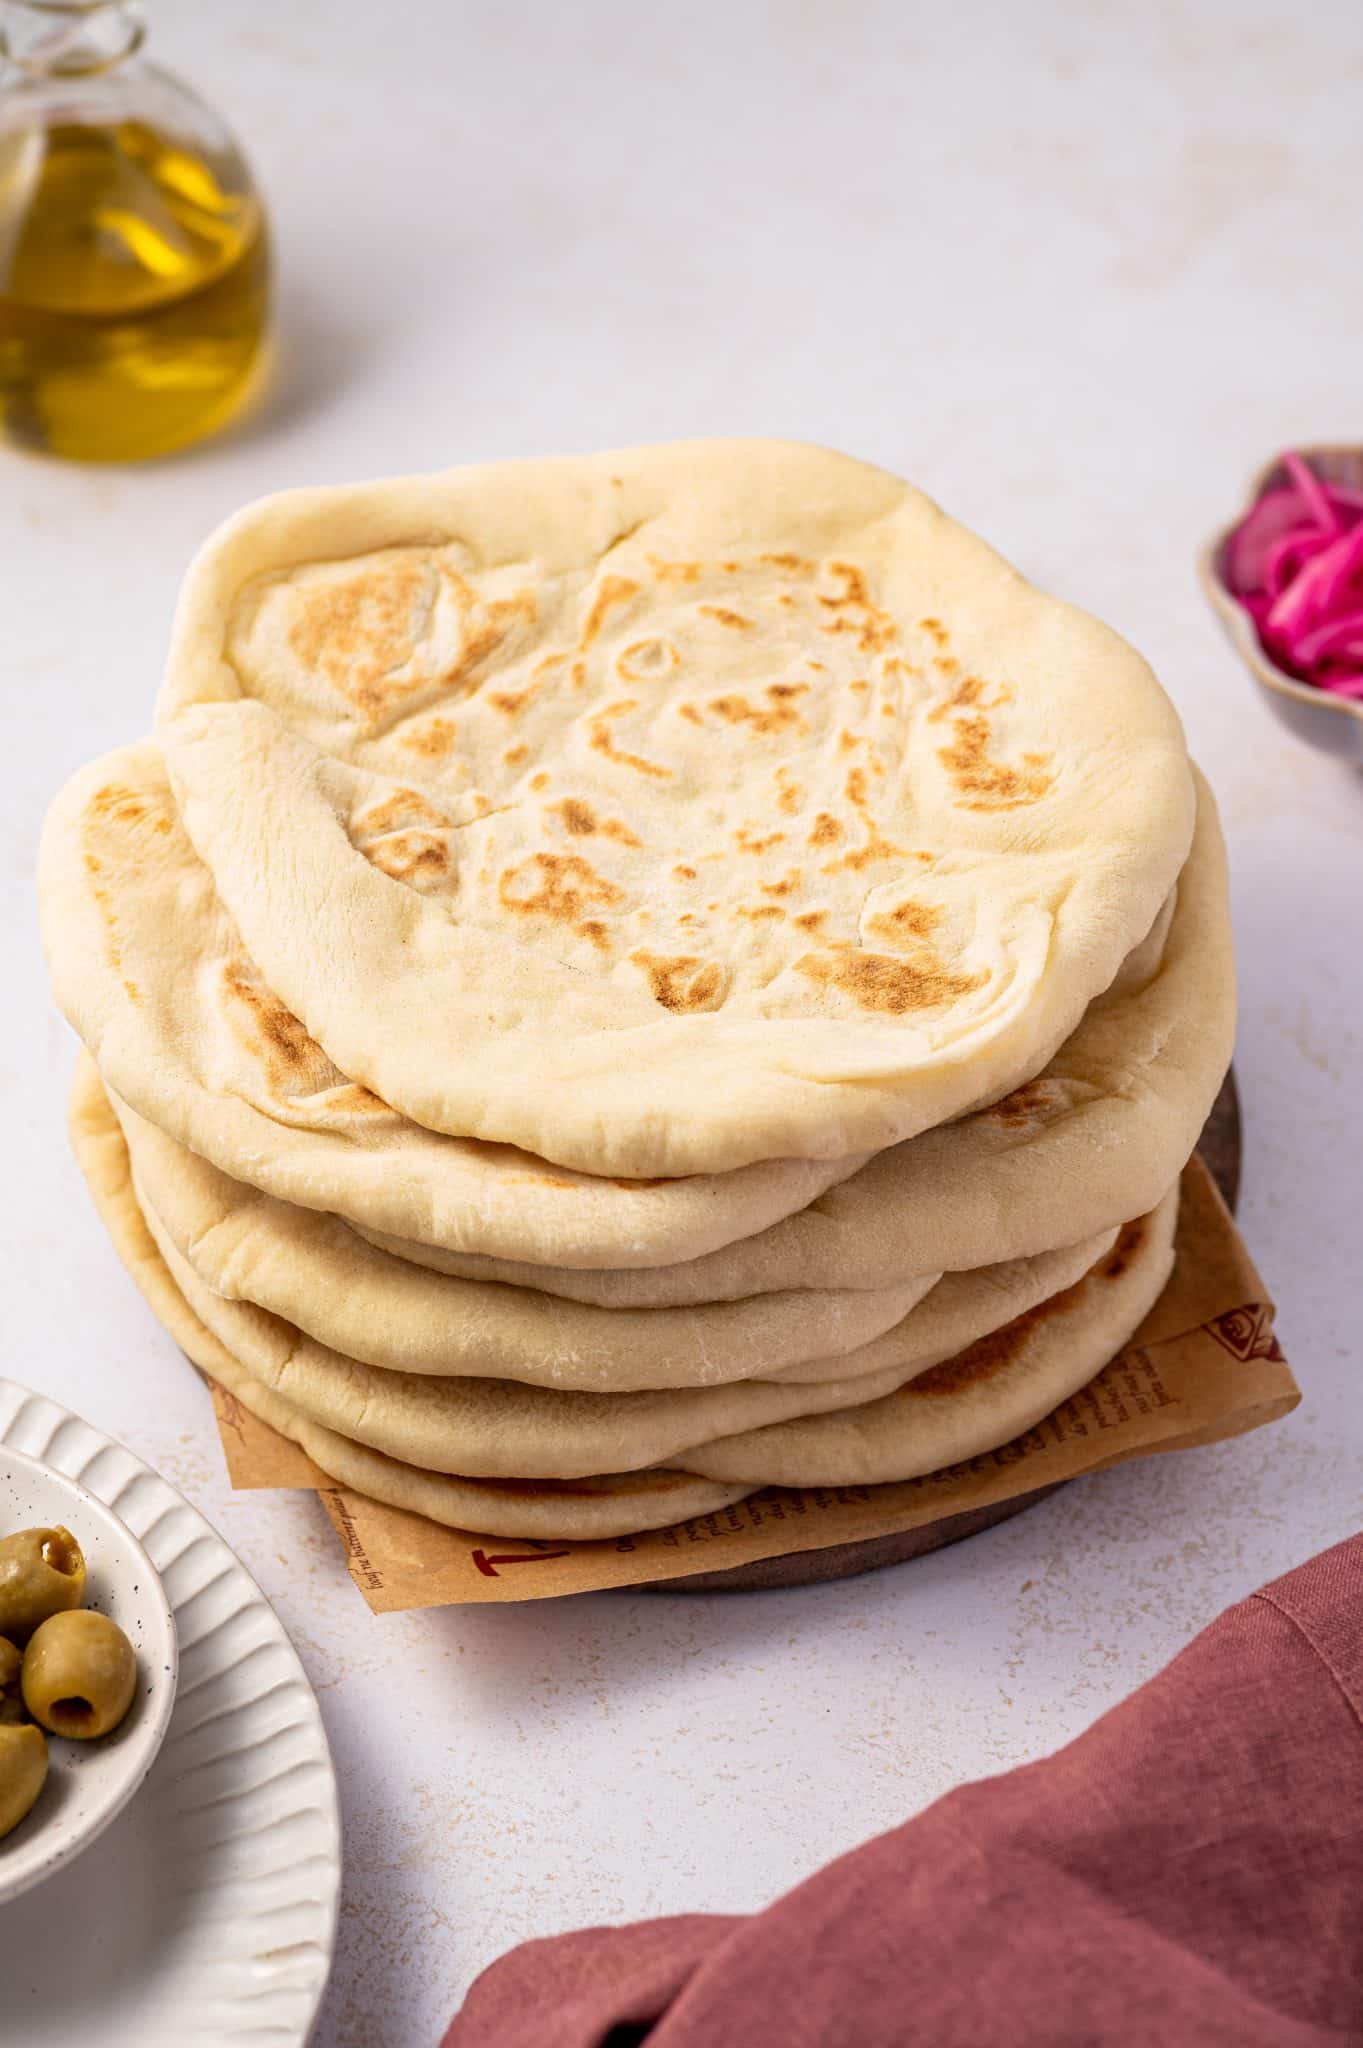
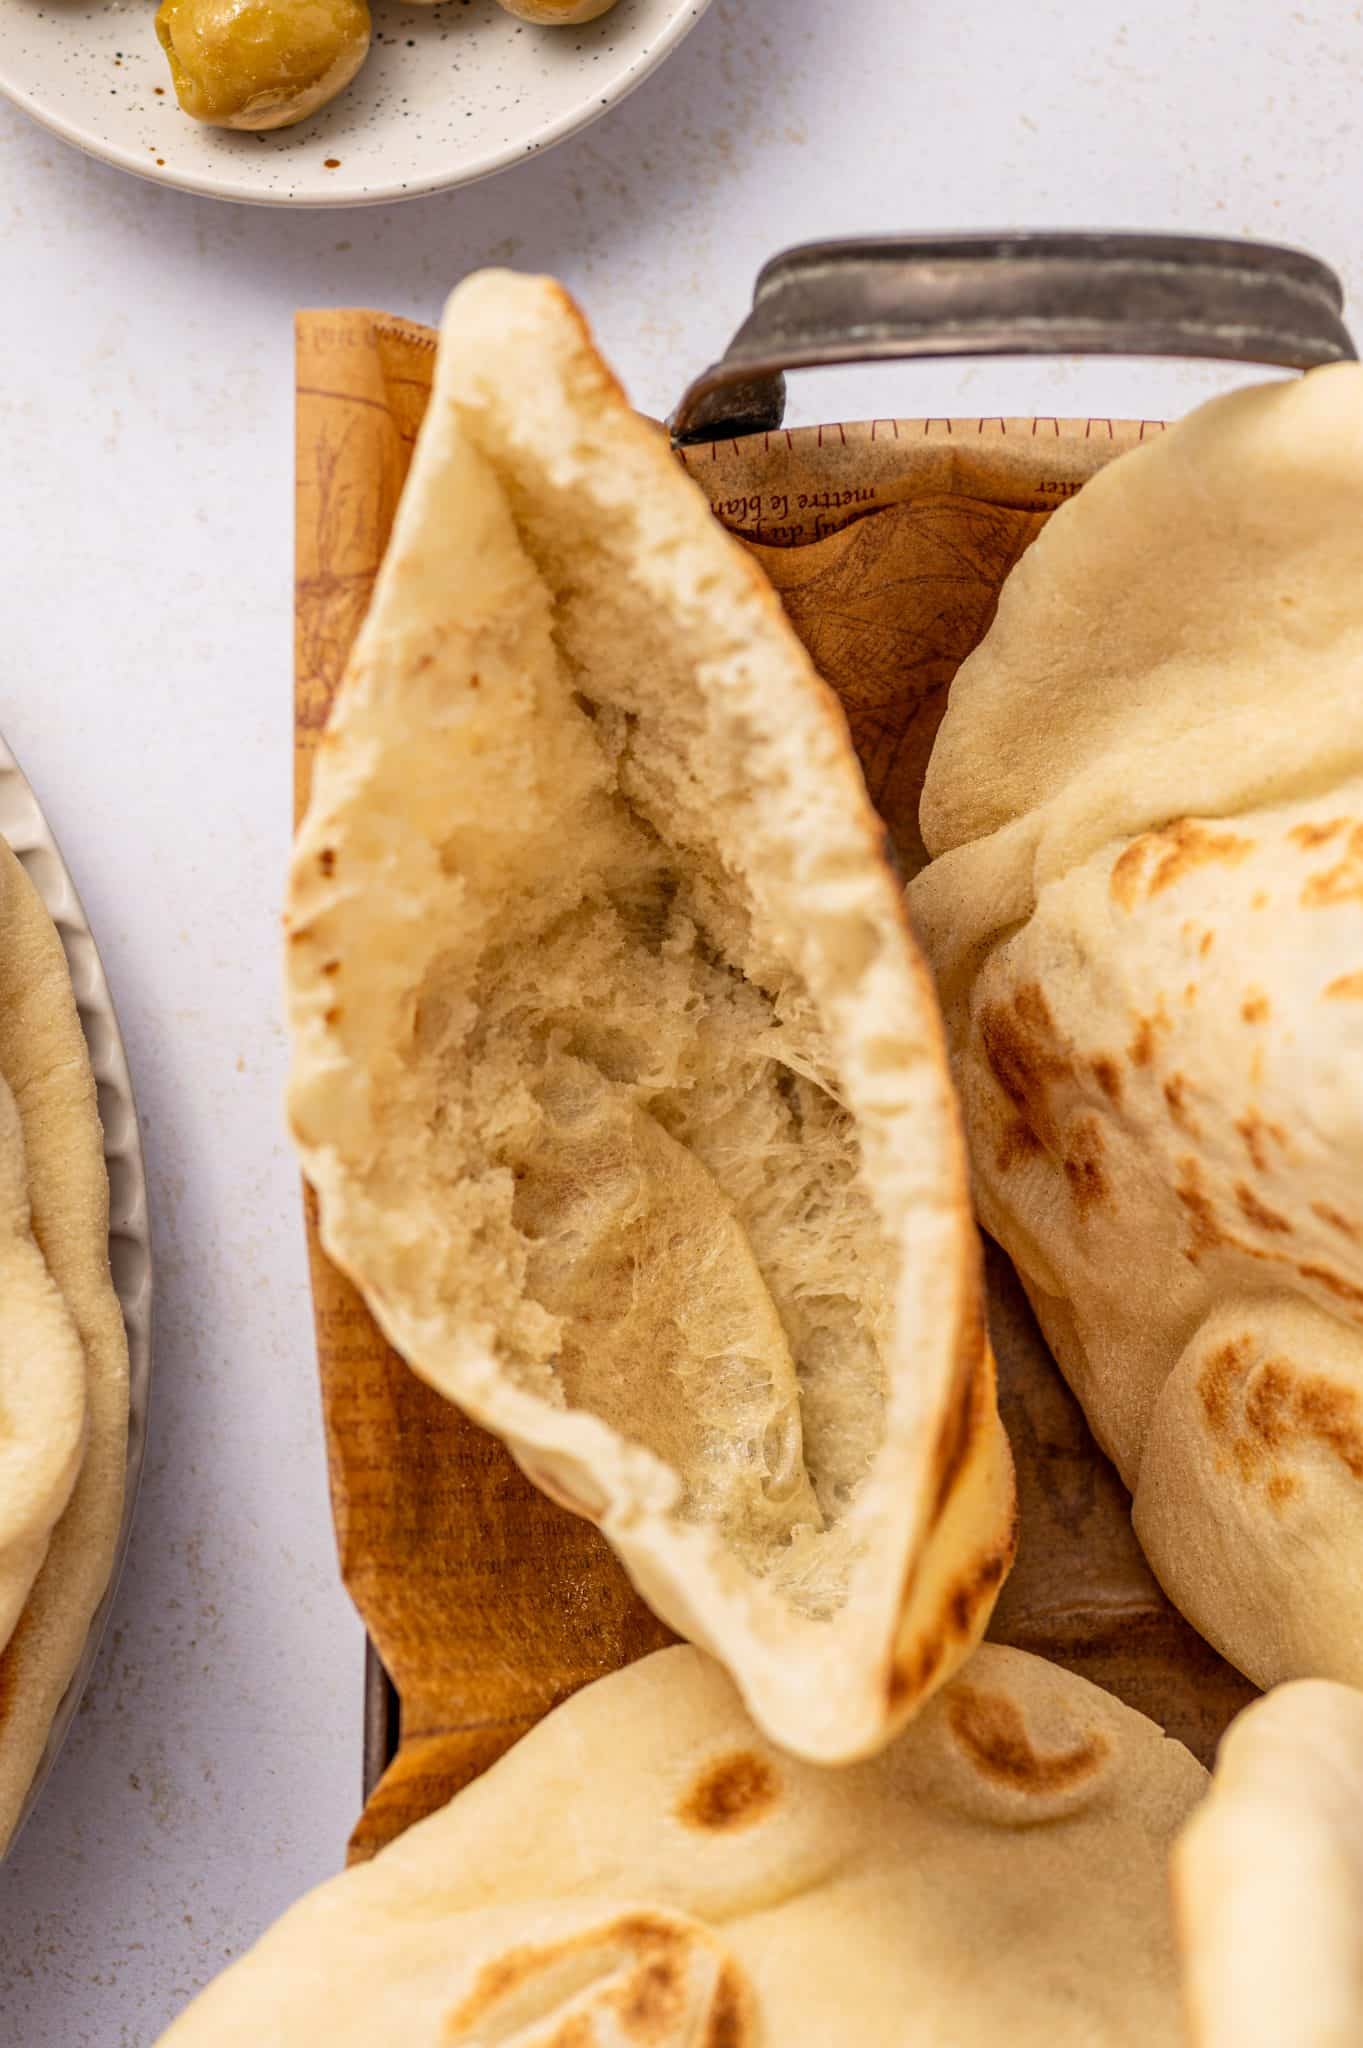
This easy Homemade Pita Bread Recipe makes soft, fluffy, and flavorful pita every time! They’re made with instant yeast and can be baked in the oven or cooked in a skillet. Watch as they puff into soft pillowy pockets perfect for stuffing.
You can see how I made this pita bread recipe with step-by-step images after the recipe card.
In This Post
About this Recipe
Puffing isn’t always perfect. Not every pita will puff, and that’s completely normal. Your pita might puff on one side but not the other, or it may remain mostly flat with just a few bubbles. This can be due to a few simple things—uneven rolling, a cooking surface that isn’t hot enough, or even minor inconsistencies in the dough’s moisture. Even when a pita doesn’t form a full pocket, it’s still absolutely delicious and often extra soft and chewy with beautiful golden spots, making it ideal for wraps, dipping into hummus, or layering with meats and veggies.
This pita bread recipe uses instant yeast. Sometimes called rapid-rise or quick-rise yeast, instant yeast is a type of dry yeast designed to activate quickly. Unlike other types of yeast, it can be mixed directly into dry ingredients without being dissolved in water first (a process called “proofing”). Because of its fast action and direct mixing, it’s perfect for beginners and recipes that need a single rise. Tip: you can still use active dry yeast; just proof it in warm water with sugar for 5–10 minutes before mixing.
You Don’t Always Need to Flip Your Pita. When baking pita in a properly preheated oven—especially on a hot pizza stone—there’s no need to flip it. The intense bottom heat and surrounding ambient heat work together to cook both sides quickly and evenly. In fact, flipping can actually mess with the steam puffing process that creates that iconic pocket, leading to a flatter pita. On the stovetop, though, the heat only comes from the bottom. So, to ensure both sides cook evenly and you get those nice golden spots, flip the pita once after it starts bubbling and the bottom is lightly browned.
Cooking Tips
- The dough should be slightly sticky. After mixing and kneading, your dough should feel soft and slightly tacky to the touch. Avoid over-flouring during kneading, which can lead to dense, dry pitas.
- Consider measuring the flour with a kitchen scale. Did you know that scooping flour directly from the bag with the measuring cup can compact the flour, adding up to 25% more flour than the recipe calls for? For the most consistent results, use a kitchen scale instead of cups. 1 cup of all-purpose flour typically weighs about 120–125 grams.
- Remember to let the dough rest after rolling. Resting the dough after shaping helps the gluten relax so the dough puffs up properly when cooked.
- Cook the pita on a HOT surface. Whether you’re using a skillet or oven, you need to cook pita on a hot surface. A lukewarm pan or tray won’t generate enough steam inside the dough to create the pocket. Preheat your surface thoroughly.

Homemade Pita Bread Recipe
Ingredients
- 3 cups all-purpose flour, plus more for dusting
- 1 packet instant yeast, (2 ¼ teaspoons)
- 1 teaspoon salt
- 2 teaspoon sugar
- 2 tablespoon olive oil
- 1 ¼ cups warm water, (105–110°F)
Instructions
- Mix the dry ingredients. In a large mixing bowl (or the bowl of a stand mixer), whisk together flour, instant yeast, salt, and sugar until well combined.
- Add the wet ingredients. Make a well in the center and add the olive oil and warm water. Stir with a spoon until a shaggy dough forms.
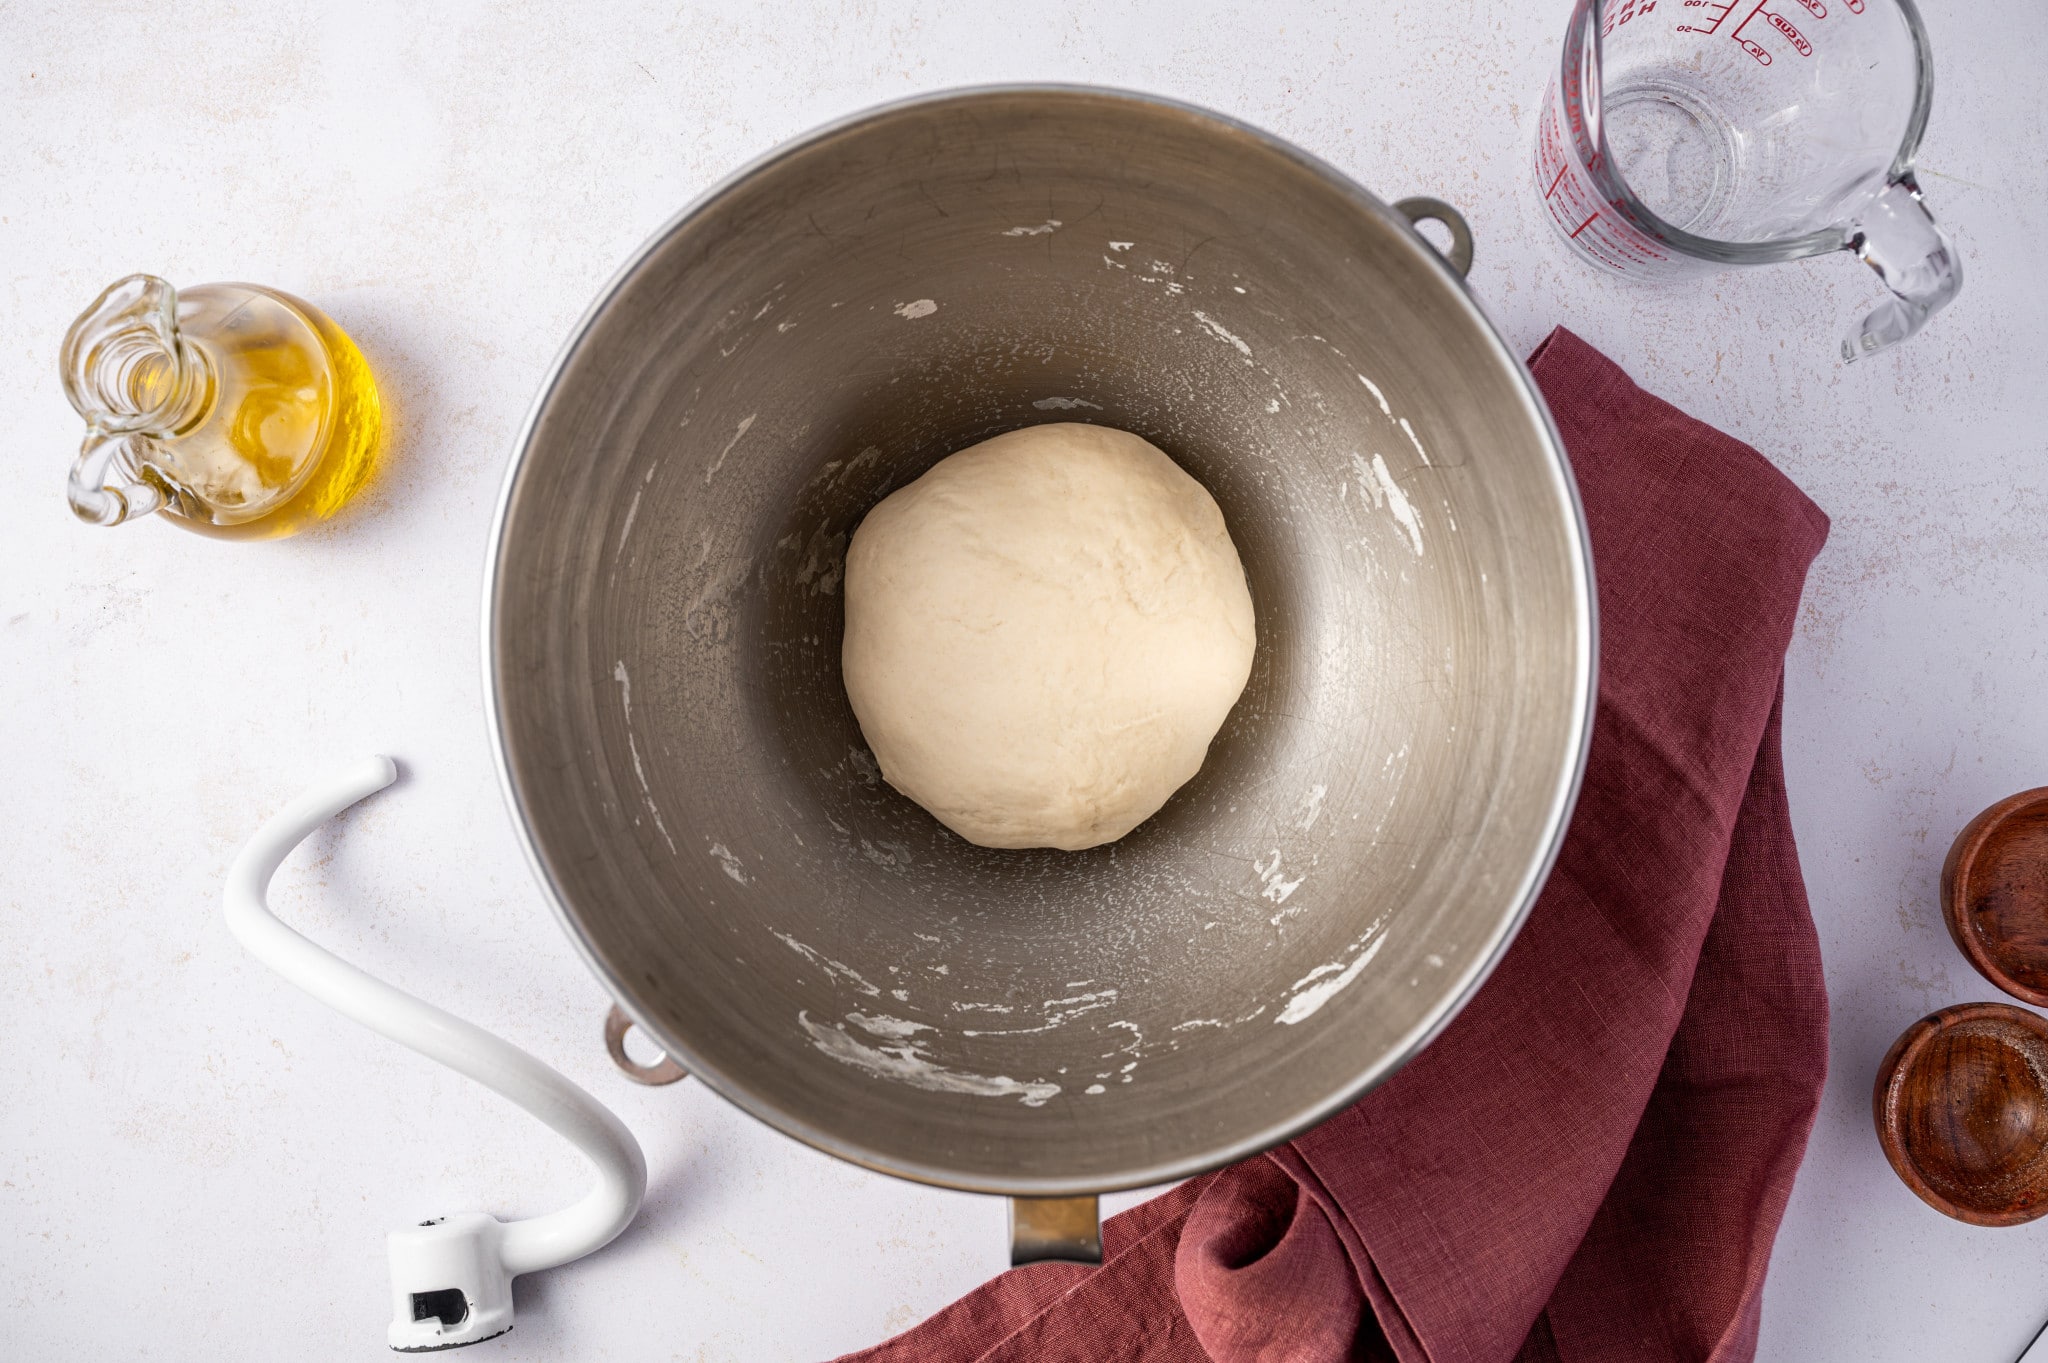
- Knead the dough. Attach the dough hook if using a stand mixer and knead on medium speed for 7–8 minutes, until smooth, stretchy, and elastic. Tip: If kneading by hand, turn dough out onto a lightly floured surface and knead for 10–12 minutes.
- First rise. Lightly oil a clean bowl. Place the dough inside, turning once to coat. Cover with a damp kitchen towel or plastic wrap. Let the dough rise in a warm, draft-free area for about 1 hour, or until the dough doubles in size.
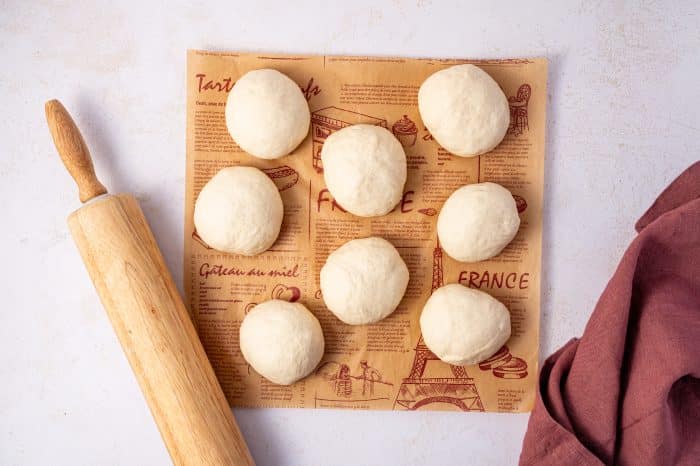
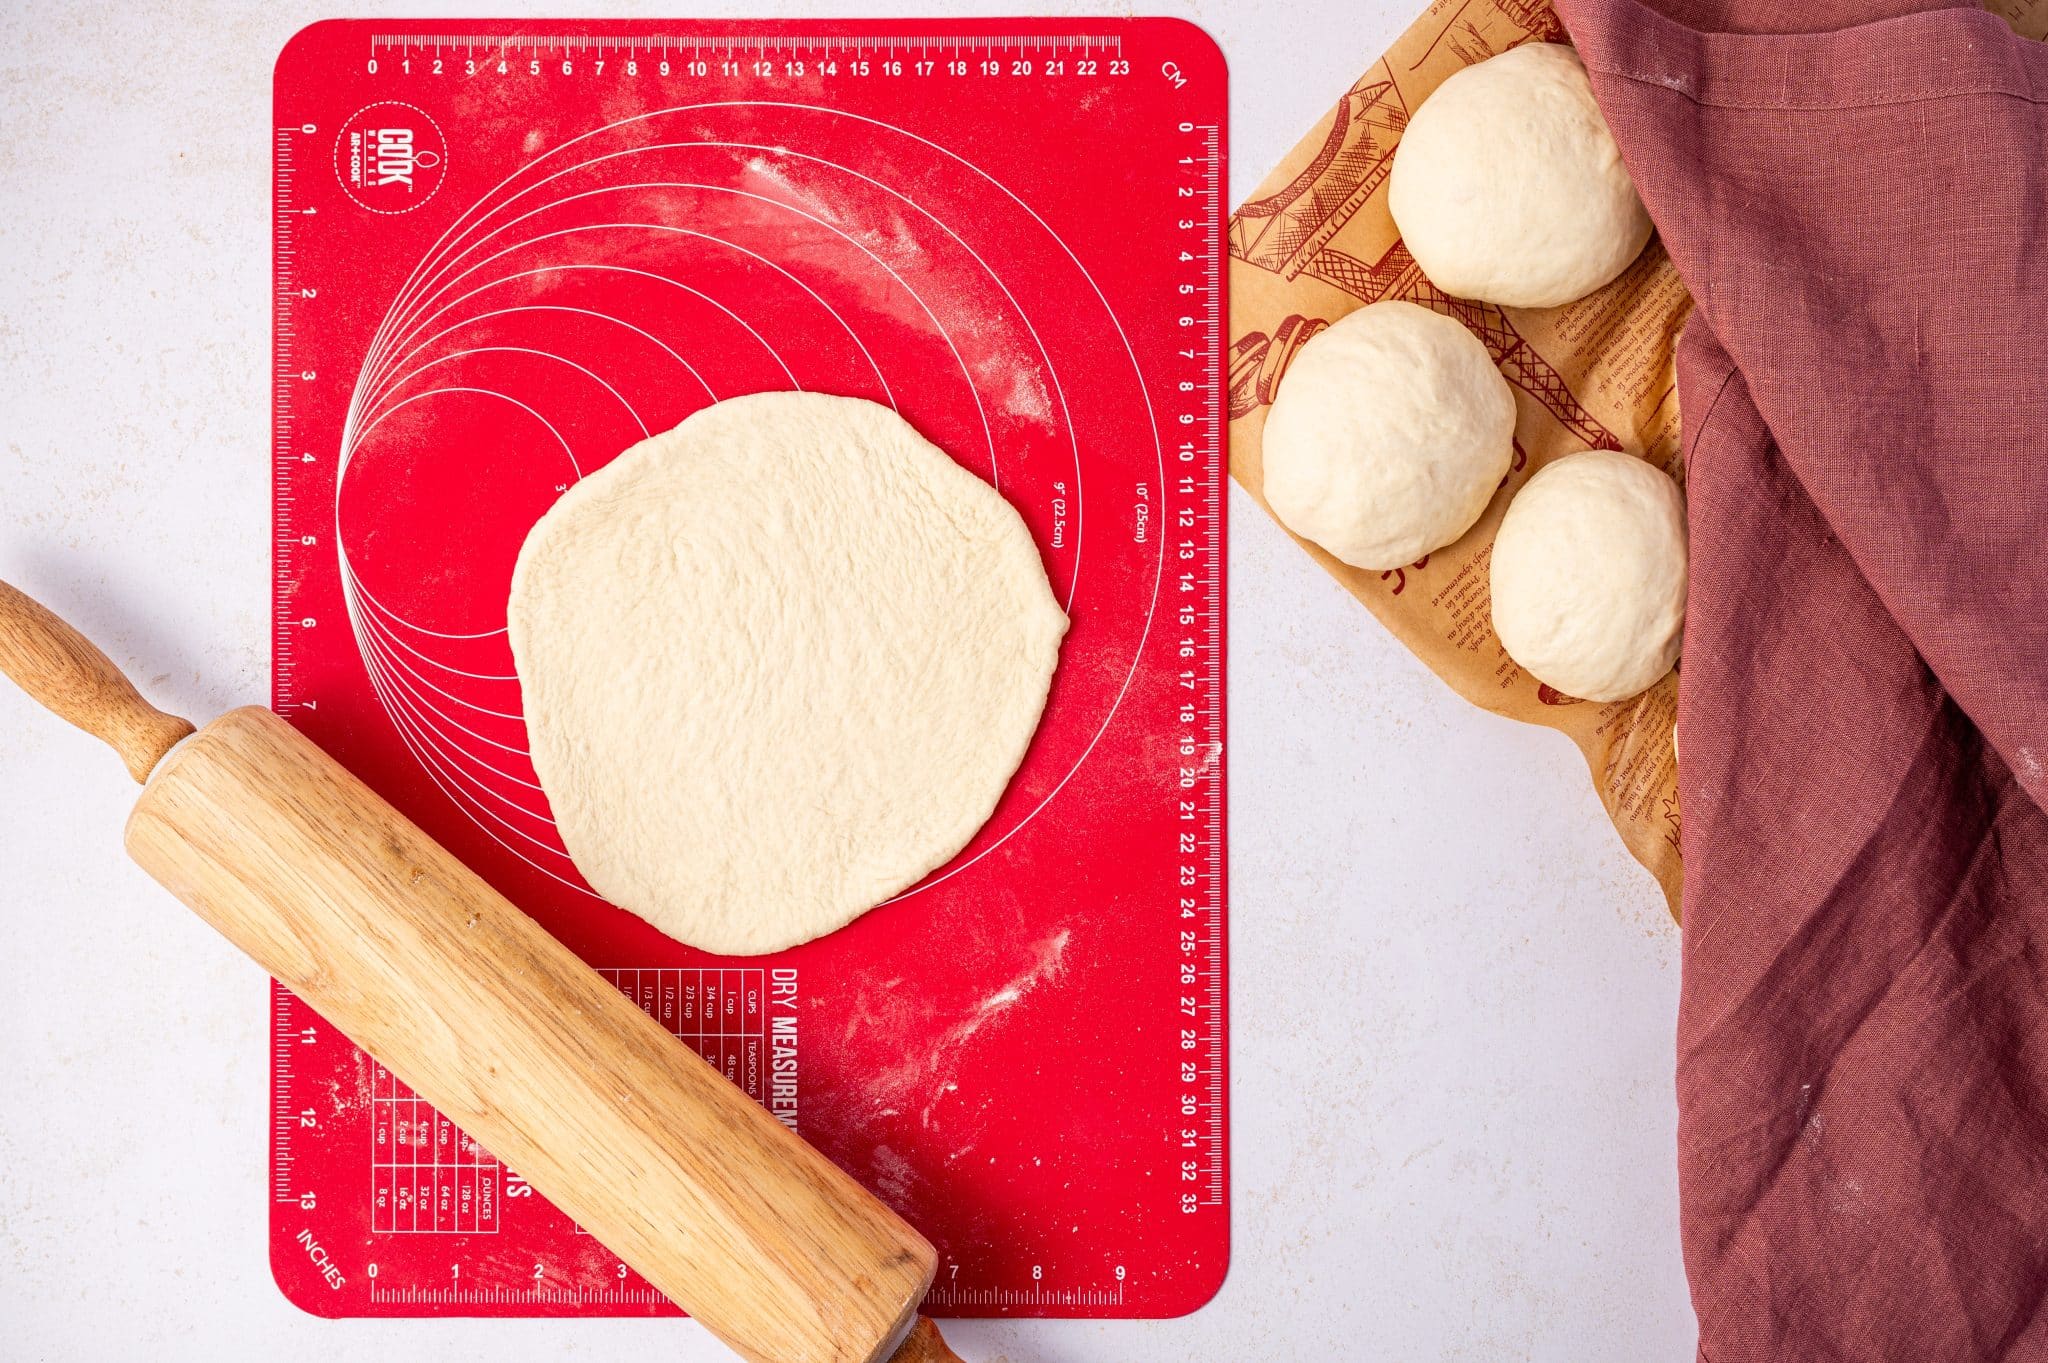
- Divide and shape. Punch down the risen dough to release air. Turn onto a lightly floured surface and divide into 8 equal portions. Roll each piece into a ball, then use a rolling pin to flatten into a circle about ¼-inch thick. Tip: Keep the thickness as even as possible. Rolling too thin prevents puffing; too thick leads to dense bread.
- Rest the dough. Place the rolled circles on a floured surface or parchment paper. Cover with a kitchen towel and let them rest for 15 minutes.
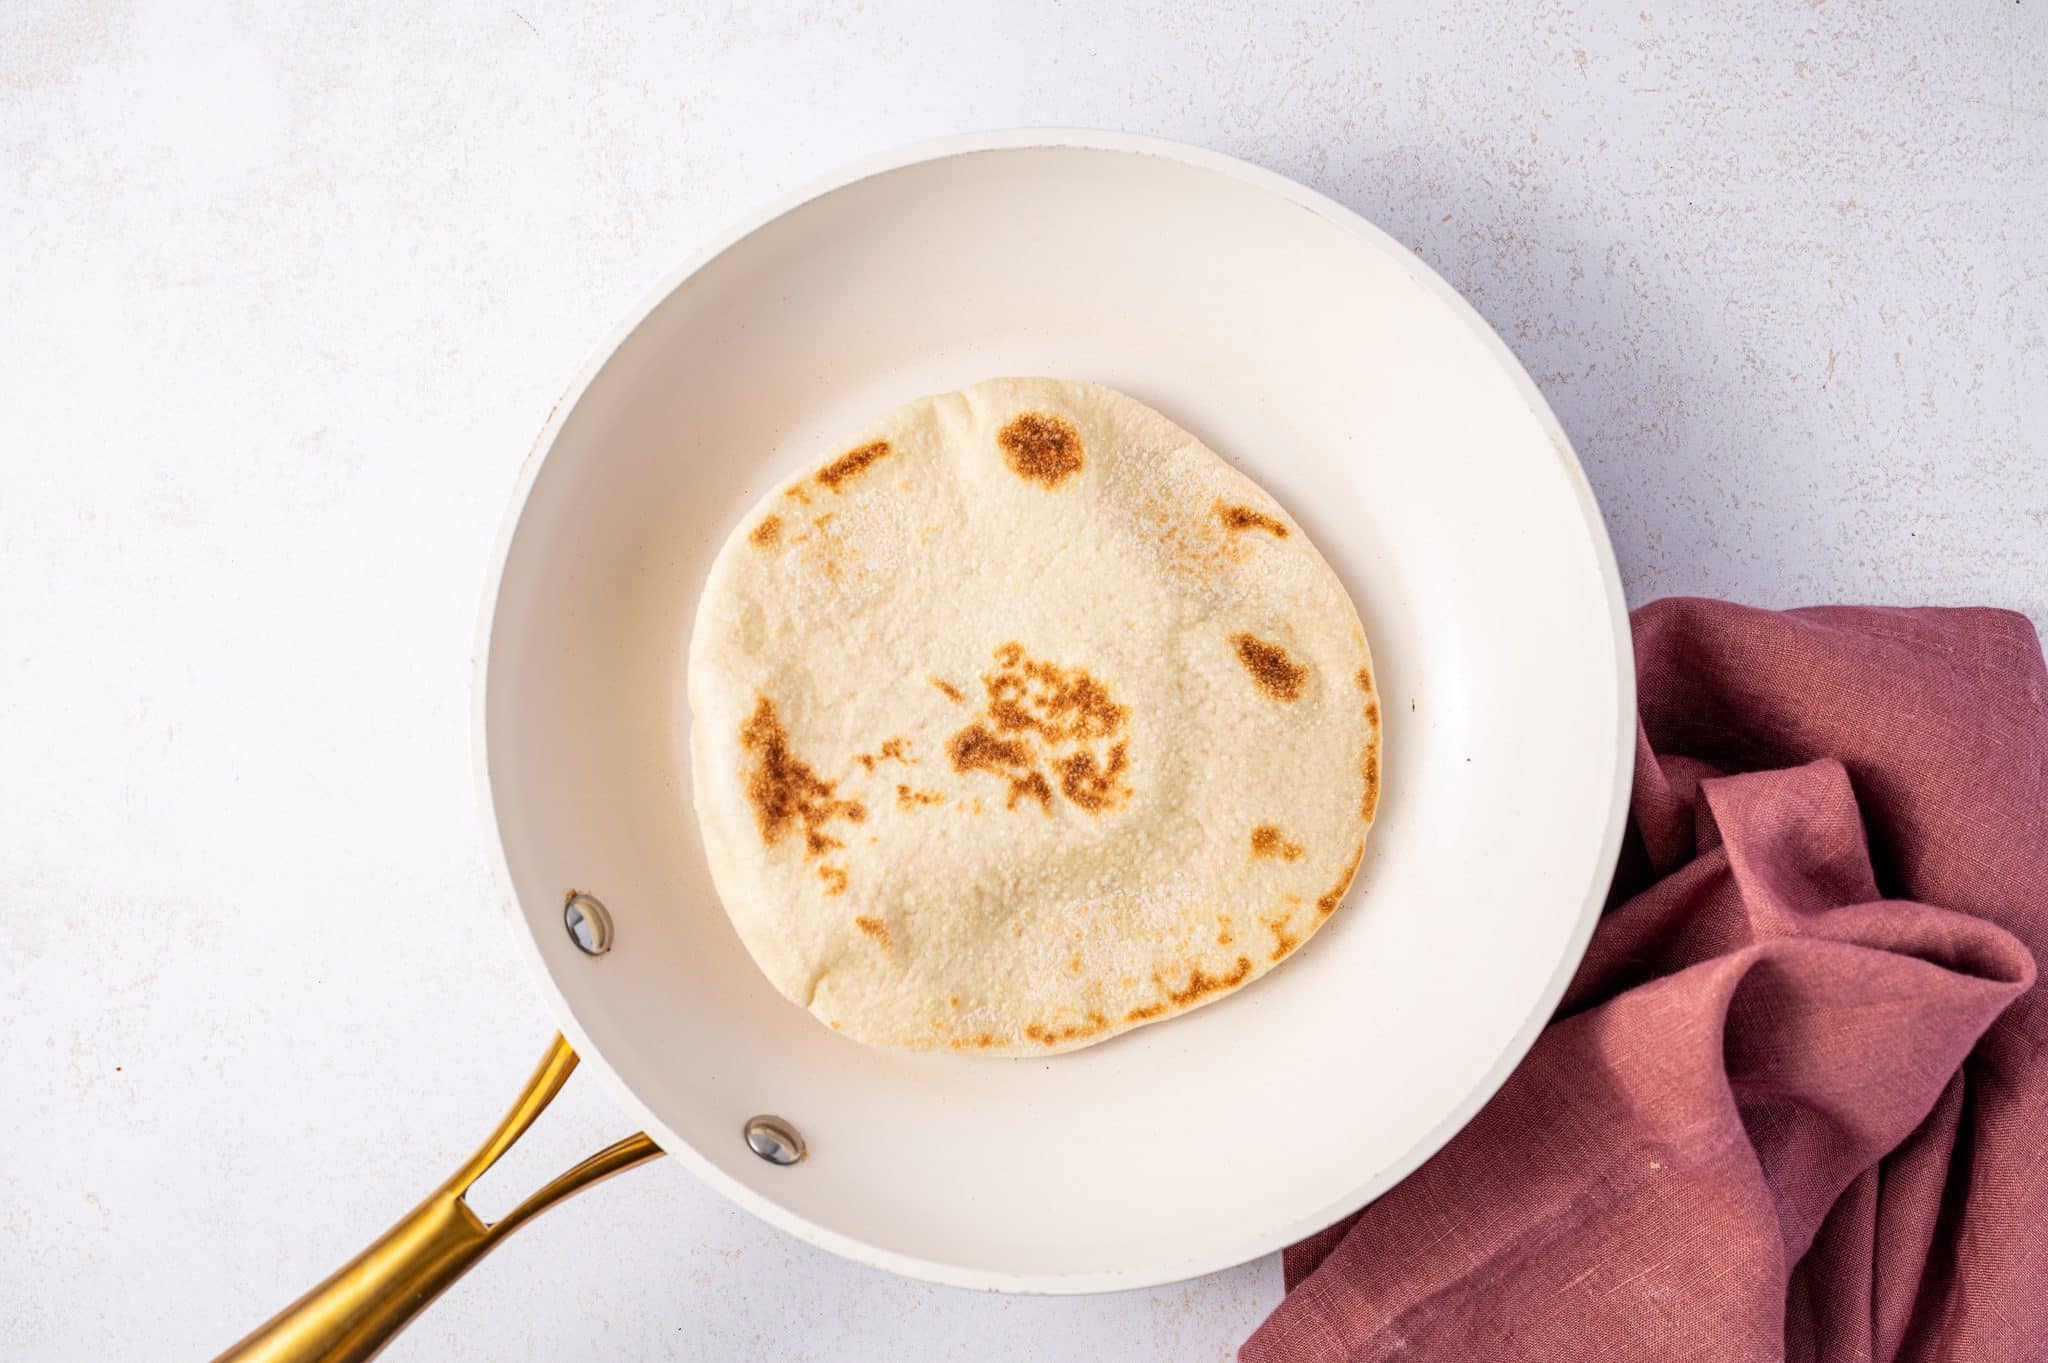
- Stovetop cooking instructions: Preheat a nonstick or cast iron skillet over medium-high heat. Place one dough circle in the hot pan and cook for 1–2 minutes on each side. Watch for puffing and golden spots. Tip: Don’t press down the pita as it cooks—let it puff naturally!
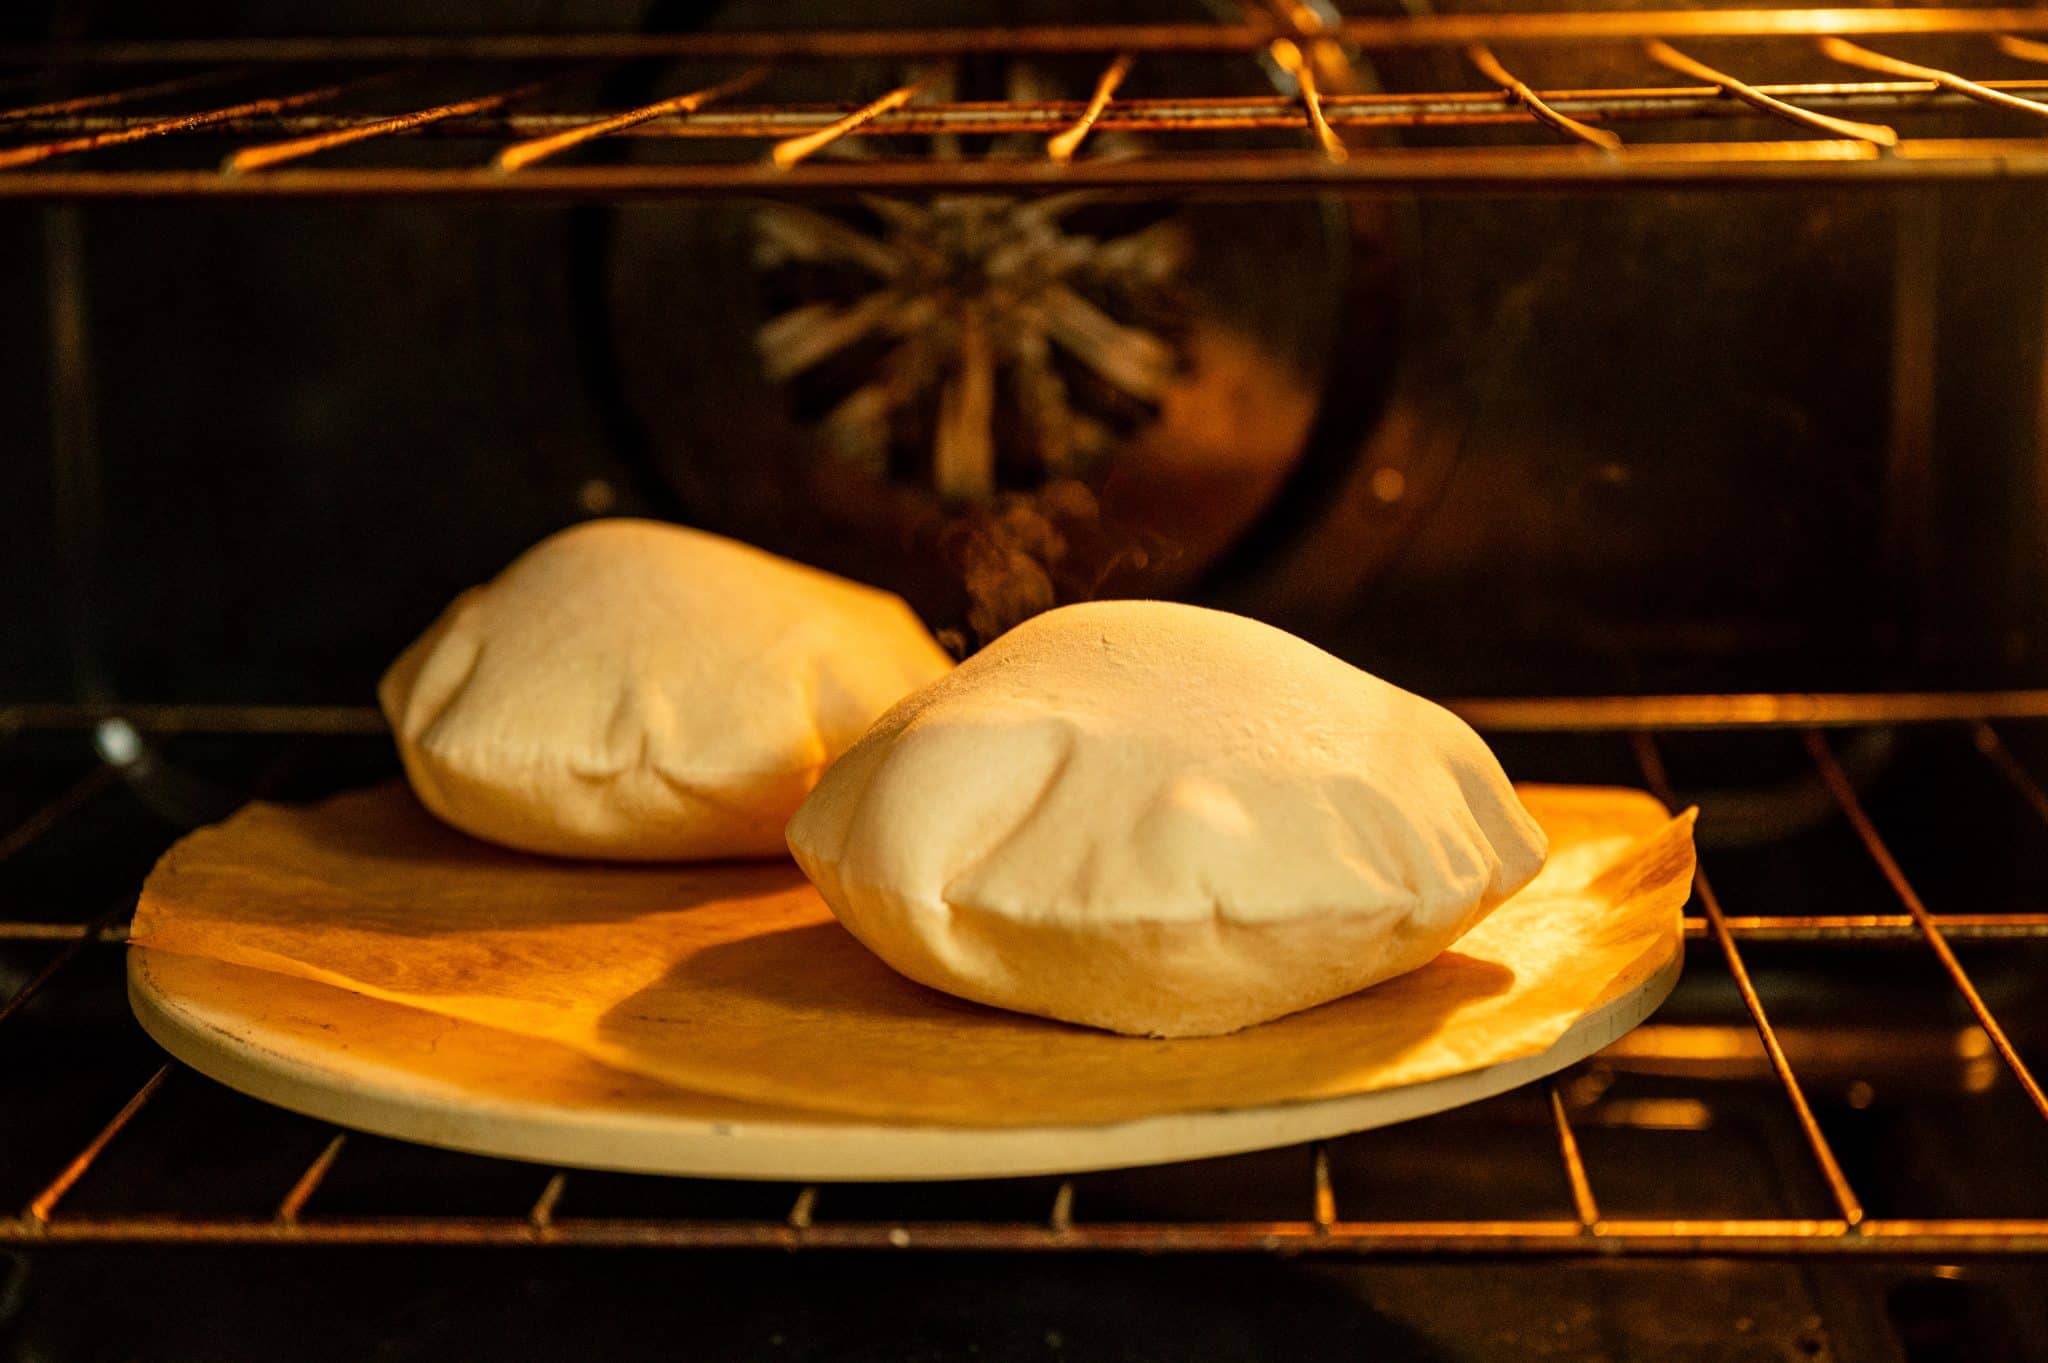
- Oven cooking instructions: Preheat your oven to 475°F (245°C) with a pizza stone or baking sheet inside. Carefully place 1–2 dough rounds onto the hot surface. Bake for 3–4 minutes, or until fully puffed and lightly golden. Tip: A hot surface is key—if your oven or tray isn't hot enough, the steam won’t form inside.
- Wrap and serve. Once cooked, wrap the warm pitas in a clean towel to keep them soft. Serve immediately.
Notes
- The dough should feel soft and slightly sticky after mixing and kneading. Avoid the temptation to add extra flour during kneading, as too much can lead to dense, dry pitas.
- For the most accurate results, consider measuring your flour with a kitchen scale. 1 cup of all-purpose flour typically weighs between 120 and 125 grams.
- Remember to rest the dough after rolling. This helps the gluten relax, making it easier for the pita to puff up properly during cooking.
- Be sure your cooking surface is fully preheated. Preheat your cooking surface in the oven for at least 10 to 15 minutes before cooking. You can test if your pan is hot by adding a couple of drops of water to the skillet; it’s ready when the beads of water sizzle and bounce immediately after coming in contact with the pan
Nutrition
Nutrition information is automatically calculated, so should only be used as an approximation.
Making Homemade Pita with Step-By-Step Images
This homemade pita bread recipe is easy to make. Here’s how:
Step 1: Combine the dry ingredients
Since we’re using instant yeast to make this pita recipe, there’s no need to proof it beforehand. Simply whisk together the flour, instant yeast, salt, and sugar in a large mixing bowl (or the bowl of a stand mixer) until well combined.
Tip: If you’re using whole wheat flour, consider starting with a 50/50 mix of whole wheat and all-purpose to retain softness and structure.

Step 2: Mix the wet ingredients with the dry ingredients
Make a small well in the center of the flour mixture. Pour the olive oil and warm water (ideally 105–110°F) into the well. Use a sturdy wooden spoon or spatula to gradually stir the flour into the liquid, working from the edges inward. Continue mixing until a rough, shaggy dough begins to form and no dry flour remains visible. Note: The dough should be slightly tacky but not wet. If it feels dry, add a teaspoon of warm water at a time.


Step 3: Knead the dough by hand or using an electric mixer
If using a stand mixer, attach the dough hook and knead on medium speed for 7–8 minutes, or until the dough becomes smooth, elastic, and slightly shiny. If kneading by hand, turn the dough out onto a lightly floured surface and knead for 10–12 minutes, using the heel of your hand to push the dough away, then folding it over and repeating the process. You’ll know it’s ready when it springs back when gently pressed and forms a smooth, cohesive ball.
Tip: Avoid adding too much flour during kneading—slightly sticky dough yields softer pita.
Step 4: First Rise
Lightly oil a clean, large bowl and place the kneaded dough inside. Turn the dough once to coat all sides with oil. This keeps it from drying out and helps it rise evenly. Cover the bowl with a damp kitchen towel or plastic wrap to create a warm, humid environment. Set it in a draft-free area—like inside a turned-off oven or microwave—and let it rise for about 1 hour, or until doubled in size.
Tip: If your kitchen is cold, you can warm your oven to the lowest setting for 1 minute, turn it off, then place the dough inside to proof.

Step 5: Divide the dough
Once the dough has risen, gently punch it down to release the built-up gas. Transfer it to a lightly floured surface and divide it into 8 equal pieces using a bench scraper or sharp knife.
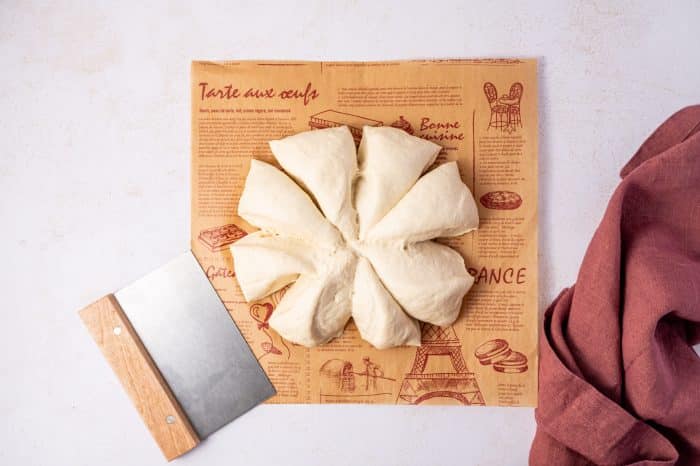
Step 6: Shape the dough
Roll each portion into a smooth ball by tucking the edges under and using the palm of your hand to shape. Using a rolling pin, flatten each ball into a circle about ¼-inch thick and 6–7 inches in diameter.
Tip: Keep the thickness as consistent as possible—uneven dough leads to uneven puffing or burning.
Step 7. Cooking homemade pita bread
You can cook your pita bread on the stovetop or in the oven. Here’s how:
To Cook Pita on the Stovetop
Preheat a cast iron or nonstick skillet over medium-high heat for several minutes until very hot (You can test if your pan is hot by adding a couple of drops of water to the skillet; it’s ready when the beads of water sizzle and bounce immediately after coming in contact with the pan). Gently place one pita round into the pan without pressing it down. Cook for 1–2 minutes, until you see bubbles form and the bottom is golden brown. Flip and cook the other side for an additional 1–2 minutes, allowing the pita to puff up fully. Repeat with remaining dough.
Tip: Resist the urge to press the dough—steam is what creates the signature pocket.
To Bake Pita in the Oven
Preheat your oven to 475°F (245°C) with a pizza stone or heavy-duty baking sheet inside. Once preheated, carefully place 1–2 dough rounds directly on the hot surface. Bake for 3–4 minutes, or until the pitas puff up and turn lightly golden. Remove immediately to prevent over-baking.
Serving Ideas
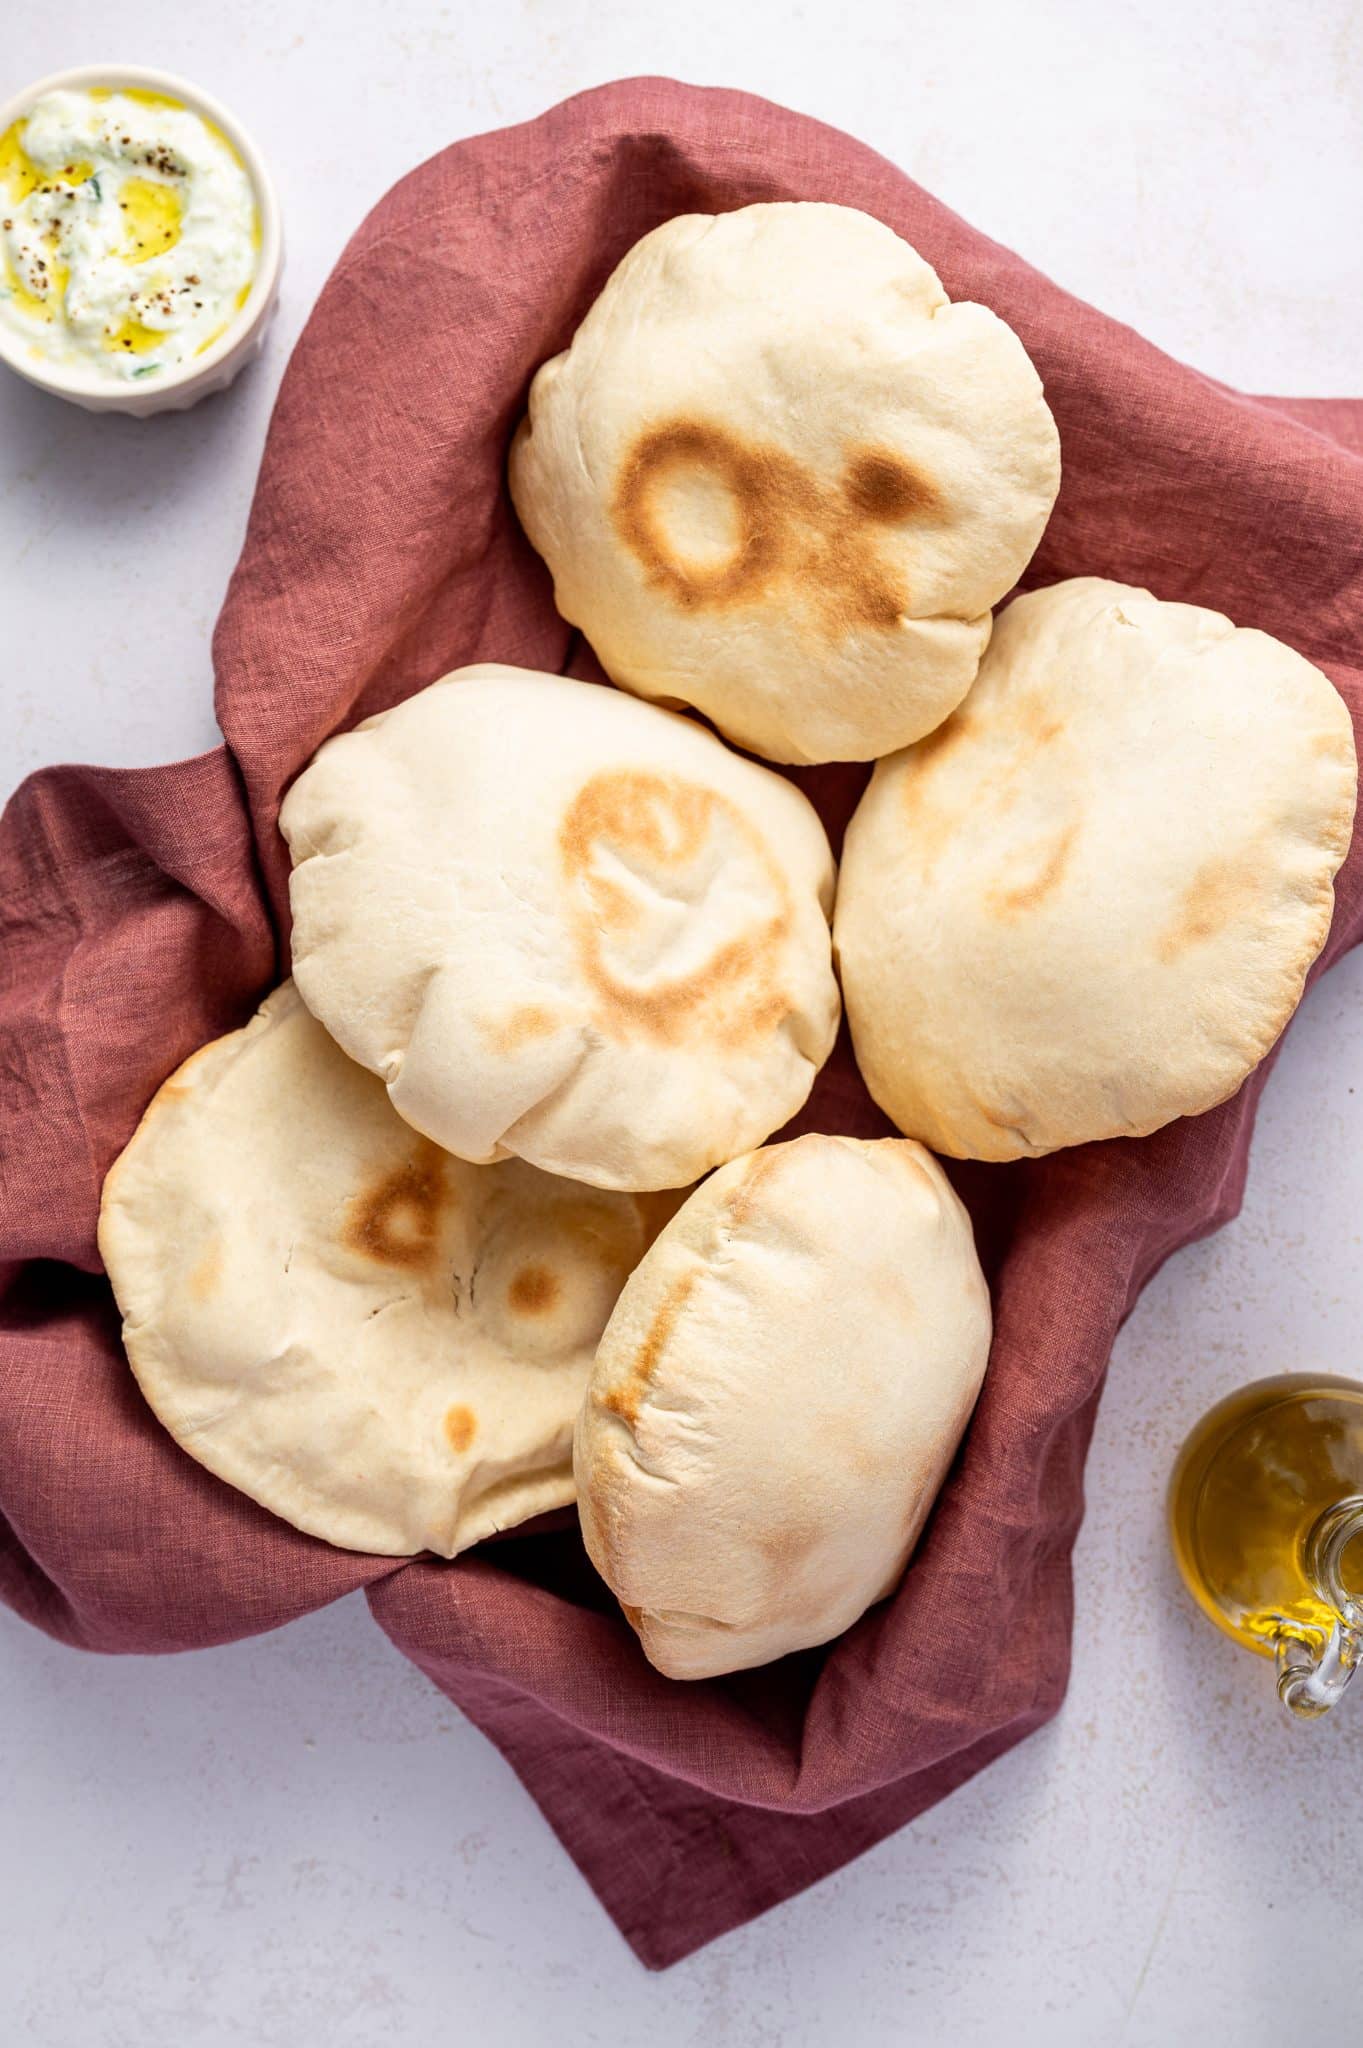
Warm and fluffy pita bread is one of the most delicious gifts to ever fill my belly. I love eating them plain, fresh off the skillet, or smeared with a little melted butter and a sprinkle of salt. But they’re even better stuffed with flavorful fillings like crispy falafel, juicy gyro meat, Greek meatballs (or any type of meatball), chicken souvlaki, or a big scoop of Greek salad. They’re also perfect for wrapping up leftovers, like my Greek Chicken Salad—just tuck the marinated Greek chicken and salad into a pita pocket for a quick and satisfying lunch. And when I’m feeling snacky, I’ll tear them into pieces and use them to scoop up all my favorite dips—hummus, baba ganoush, tzatziki, or anything else that’s creamy, garlicky, or worth mopping up.
Make-Ahead Instructions
You can make pita ahead in a couple of different ways:
- Make the dough ahead of time. After kneading the dough, instead of letting it rise at room temperature, cover it tightly (with plastic wrap or a lid) and place it in the refrigerator. The dough will rise slowly overnight (or up to 24 hours). When ready to use, let the dough sit at room temperature for 30–45 minutes before dividing, shaping, and cooking. This allows it to relax and makes it easier to roll out.
- Par-bake and Freeze. Or, you can cook the pitas halfway (just until they puff, but before they get much color—about 1–2 minutes total on a skillet or in the oven). Let them cool completely, then stack them with parchment paper between each pita and seal them in a freezer-safe bag. Freeze for up to two months. When ready to eat, just reheat directly from frozen in a hot skillet or warm oven (350°F for a few minutes) until soft and fully cooked.
Storage Tips So It Doesn’t Dry Out
As soon as your pitas come off the heat, wrap them in a clean kitchen towel or place them inside a tortilla warmer. The trapped steam helps keep the bread soft and prevents the outer layer from drying or hardening as it cools.
Once the pita bread has cooled, transfer it to a resealable plastic bag or airtight container or wrap it tightly in foil. Store at room temperature for up to 2–3 days. To keep pita bread soft for weeks, freeze it the same day you make it. Divide each pita with parchment paper (to prevent sticking), then seal them in a freezer-safe bag.
Avoid the fridge! Its low humidity will dry out the pita quickly. Room temp or freezer is best.
For the softest texture, reheat pita wrapped in foil and warm in a 350°F oven for 5–10 minutes. Or microwave briefly wrapped in a damp paper towel.
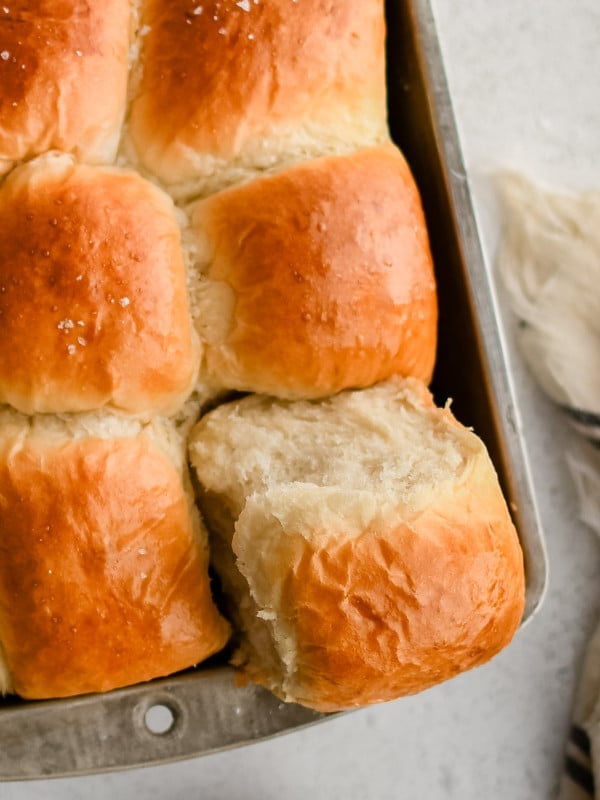
Looking for more homemade bread recipes? Try my classic buttermilk biscuits, homemade dinner rolls, or soft pretzel bites next!


Your advice concerning weighing ingredients is spot on. Most, if not all, digital scales will read out in grams. I, myself, always weigh out the ingredients when I bake. That said you neglected to include the weight of all the ingredients in your formula. Bear in mind that 1 Imperial oz of water equals 30 ml which equals 30g metric. Ten oz (1 1/4 cup) of water equals 300g metric. Much easier to weigh liquids than to read the meniscus in a measuring cup. The water equivalency works for most liquids. Dry goods packages usually list the weight in grams on the package so it makes it easy to calculate the metric equivalent. Same goes for oils and syrups such as honey.
Thank you so much for the thoughtful feedback! I completely agree—baking by weight really helps with accuracy and consistency, especially for recipes like this. I also appreciate you mentioning the tips about weighing liquids; it’s such a helpful reminder. Thank you again for sharing your experience!