
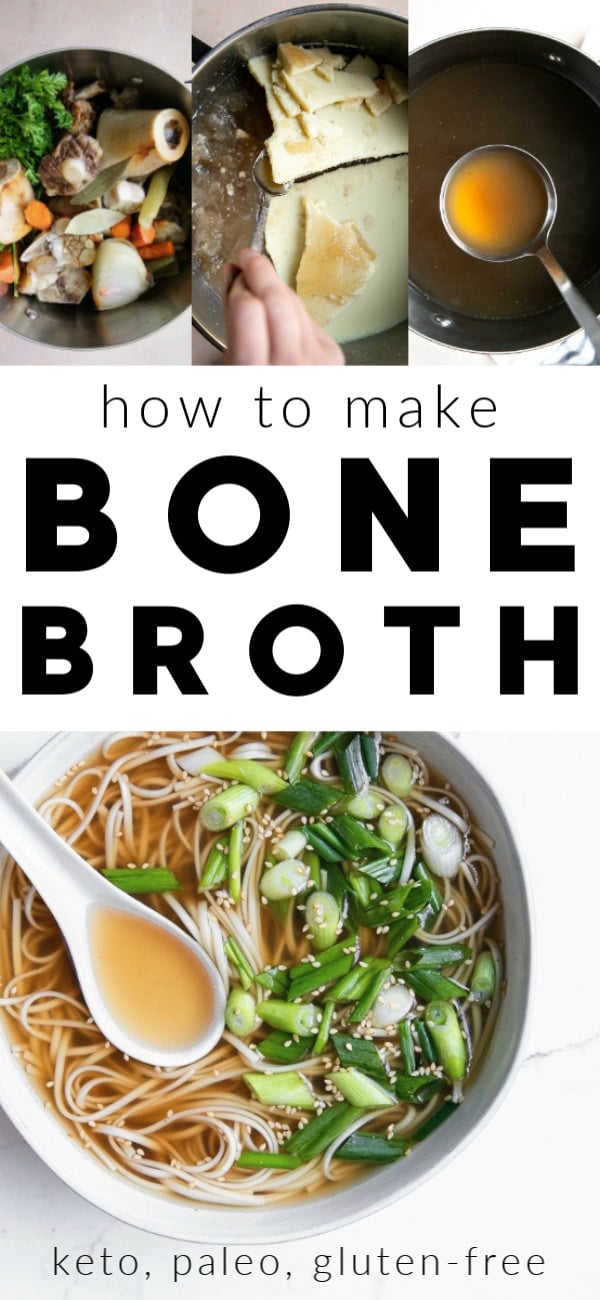
Restorative and nourishing, Bone Broth is everywhere these days- and understandably so! It’s affordable, packed with age-defying collagen, and easy to make right at home in either your Instant Pot, slow cooker, or in a stockpot on the stove. Learn How to Make Beef Bone Broth with my easy-to-follow instructions, tips, and answers to all your bone broth frequently asked questions.
What is Bone Broth?
Bone Broth is a savory, nutrient-dense, and collagen-rich liquid made from simmering marrow-rich animal bones (beef, chicken, turkey, pork) in water for an extended period of time. In addition to bones and connective tissue, vegetables like celery, carrots, and onions, fresh herbs, and garlic for extra flavor.
Since bone broth is often graded by how gelatinous it is upon cooling, sometimes apple cider vinegar or white vinegar is added in small amounts to help break down the animal proteins and connective tissues. This aided breakdown helps provide a broth higher in protein and collagen.
How is Bone Broth Different From Regular Broth or Stock?
Technically there isn’t a clear hard line separating one from the other, but there are a few differences.
Totally confused? Let me try to clarify.
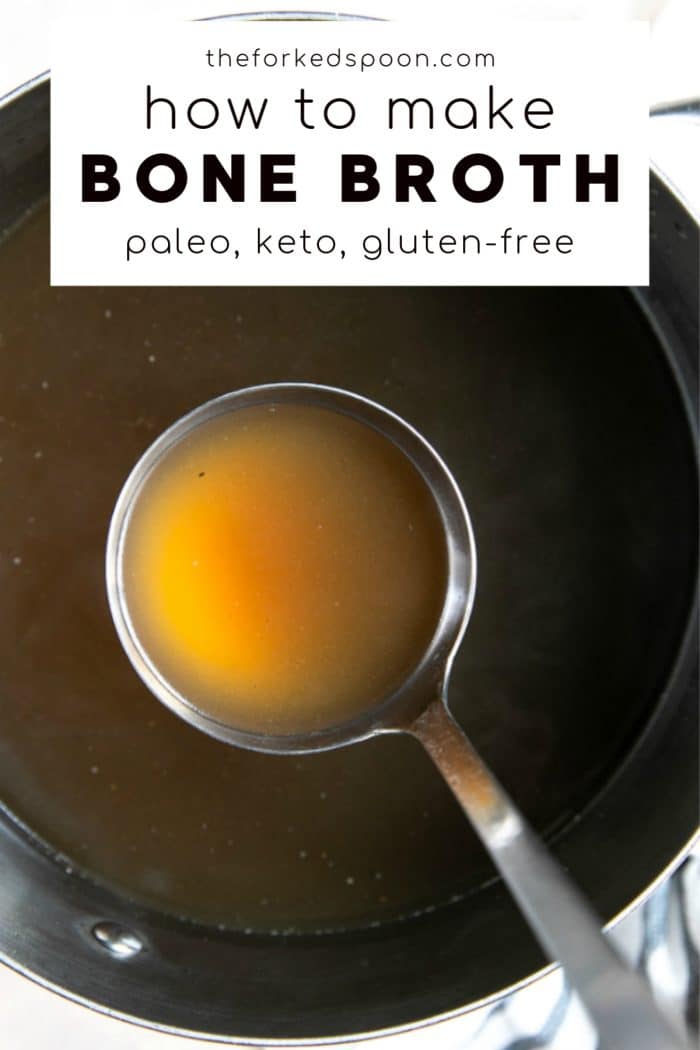
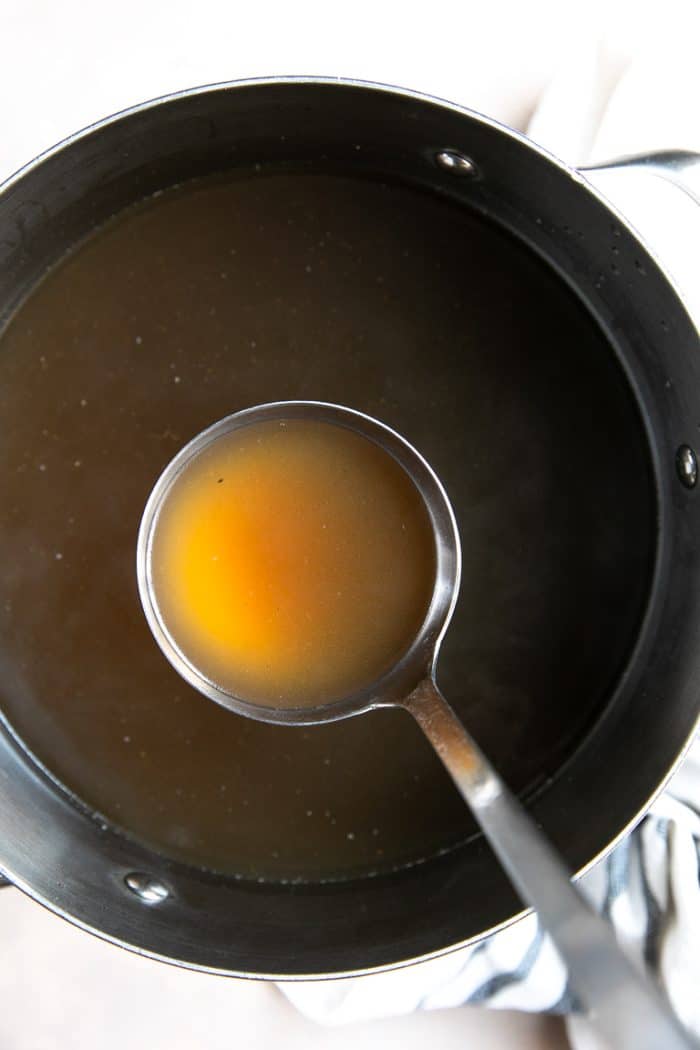
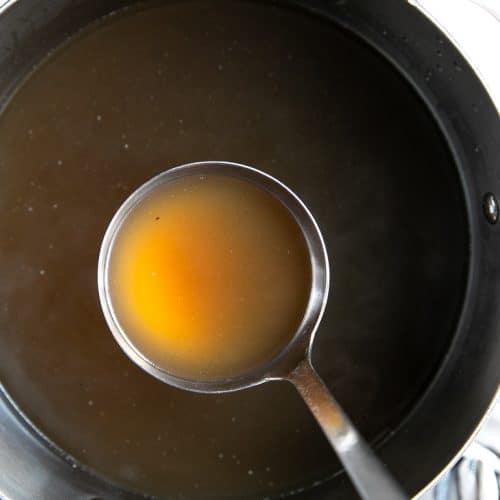
Bone broth: Beautiful, golden, and super-flavorful. Bone broth is made by simmering bones (specifically those high in collagen) for longer periods of time (often 12-hours on the stovetop) or pressure cooker for at least 3-4 hours. Once cooled, bone broth will usually firm-up into a jelly-like consistency due to its high gelatin content.
Regular Stock: Depending on the type of bones used, regular stock can be quite gelatinous after cooking. It typically simmered for longer periods of time compared to regular broth. Homemade chicken stock, as an example, can bee made using an entire, uncooked, whole chicken or just the remaining chicken carcass.
Regular Broth: Typically thinner as it contains much less, if any, collagen. Regular Broth is made from boiling actual meat, and less from marrow-rich bones. For example, after poaching chicken the resulting liquid is considered chicken broth.
So, if you’re wondering which of the three will give you the most collagen-rich and nutrient-dense broth, the winner is bone broth, hands down.
When prepared correctly, of course.
What are the Benefits of Bone Broth?
With its sudden rise in popularity, there has been a nonstop buzz all about the miracle health benefits of bone broth. We already know it to be a nutrient-rich liquid made by simmering animal bones (cow, chicken, pork bones, and sometimes fish bones) and connective tissue in water over a long period of time. But it is also believed that drinking bone broth is beneficial to our joints, digestive system, and skin as it contains many important minerals and nutrients.
While there is plenty of evidence to suggest these benefits to be true, there is no published research confirming, with absolute certainty that this is the case. Full disclosure.
6 (possible) benefits of drinking bone broth
- Bone broth is highly nutritious. As a total package, bone broth is rich with vitamins and nutrients such as calcium, magnesium, and phosphorous. The total amount will vary depending on the type of animal source and bones you use, but in general, you’ll find loads of calcium, magnesium, potassium, and phosphorus, Vitamin A, K2, and minerals like zinc, iron, boron, manganese, and selenium in any given batch of quality bone broth recipe.
- It may protect the joints. Tissues and bones contain collagen. When cooked, collagen turns into gelatin. This gelatin – liquid (when heated), thick and jelly-like (when chilled) – is filled with amino acids, the building blocks of proteins. Glucosamine and chondroitin, in particular, are thought to reduce the symptoms of osteoarthritis (source 1, 2) and reduce joint pain.
- It may aid in digestion. Especially for people with inflammatory bowel disease or leaky gut syndrome according to this article which explains that specific amino acids may decrease the duration of active disease and contribute to the maintenance of IBD remission.
- May lead to better night sleep. According to Neuropsychopharmacology, Glycine, a non-essential amino acid found in bone broth, like this Instant Pot bone broth recipe, may improve sleep quality. Of course, more research is needed.
- Claims that it may help you lose weight. Since bone broth is a rich source of protein some like to claim that it will help you feel fuller, longer, and therefore help you lose weight. I know that for me personally a cup of bone broth would never fill me up so I’m highly suspicious about this one.
- Suggested to help fight inflammation. The amino acids glycine and arginine have strong anti-inflammatory effects. Arginine, in particular, may help fight inflammation associated with obesity in women (source). Chronic inflammation may lead to a number of serious diseases such as heart disease, diabetes, metabolic syndrome, arthritis, and types of cancer.
Ingredients in Homemade Bone Broth
- Beef bones
- Carrots
- Onions
- Celery
- Garlic
- Bay leaves
- Whole black peppercorns
- Whole star anise
- Cinnamon sticks
- Apple cider vinegar
If possible, try to purchase organic grass-fed beef bones. This guarantees a broth free of added hormones and antibiotics.
Equipment needed to make stock at home
You don’t need a ton of fancy equipment to make homemade broth. However, you will need a few essentials including,
- Stockpot– you will need at least two 8-quart stockpots to prepare this particular recipe.
- Roasting Pans or lined baking sheets – Because yes, for the best possible broth, you need to roast the bones before you boil them.
- Wire mesh strainer– inexpensive but completely necessary, you need a wire mesh strainer to strain the delicious broth from the bones and vegetables.
What are the Best Bones for Bone Broth?
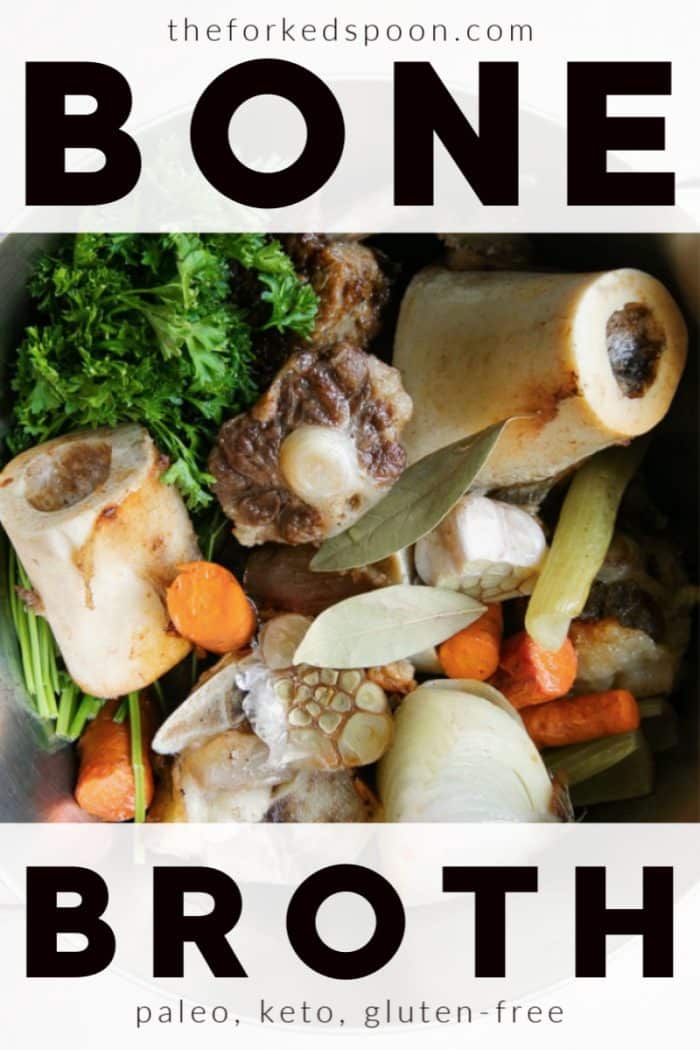
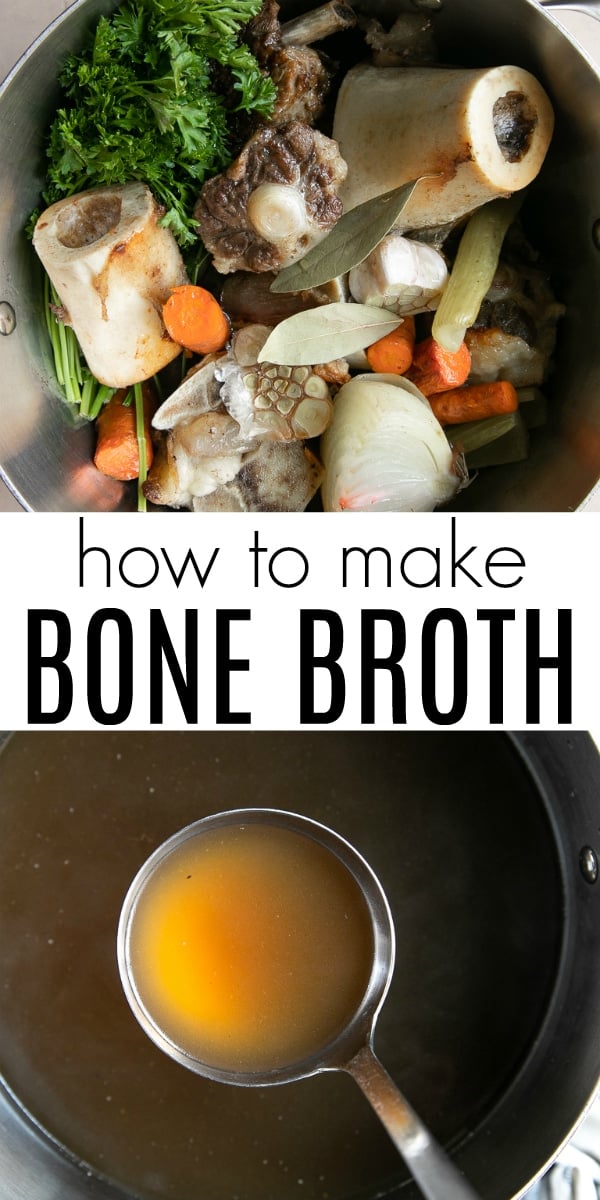
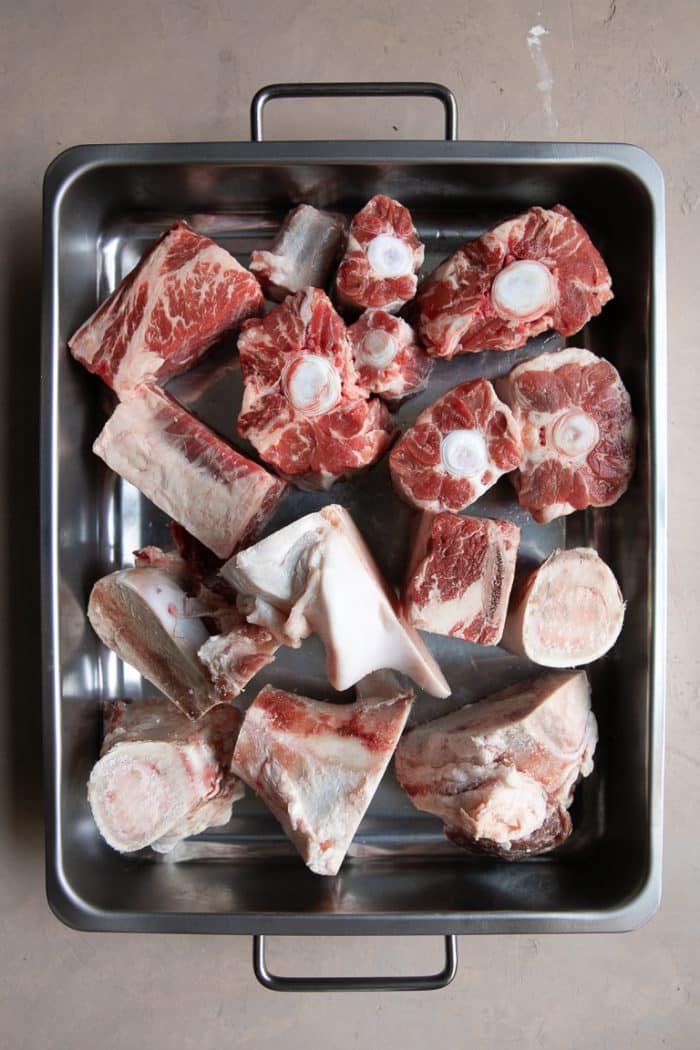
In this particular beef bone broth recipe, I have added a mixture of knucklebones, short ribs, oxtail, and femur bones. The result was a delicious, nutrient-filled, gelatin-rich broth.
The best bones for the best bone broth (beef or chicken bone broth) include:
- Knuckles
- Joints
- Feet
- Marrow bones
- For added flavor incorporate meaty bones like oxtail, shank, and short ribs.
- Chicken feet (not included in this recipe) contain loads of gelatin and are less expensive than other gelatin-rich bones.
- The bones of younger animals contain a lot of cartilage, as it is this cartilage that will eventually turn to the bone as the animal ages. For this reason, veal bones are particularly prized for making stock (but I can’t do veal, so no veal bones in this soup).
Tip – If you’re unsure at all, ask the local butcher at your favorite grocery store for the best broth bones and then request that he or she cut them in half for you. Trust me, you do not want to bring home an entire femur – it won’t fit in your pot.

How to make bone broth
Although most major grocery stores carry bone broth, the cost of this convenience comes with a hefty price – around $5-6 a quart. Fortunately, making homemade broth at home is both easy and affordable.
Plan to start your broth in the morning, giving your bones at least 8-12 hours to simmer over low heat. If you prefer to make it using your Instant Pot or pressure cooker, check out my post dedicated just to that, How to Make Instant Pot Bone Broth.
Ok, let’s get started.
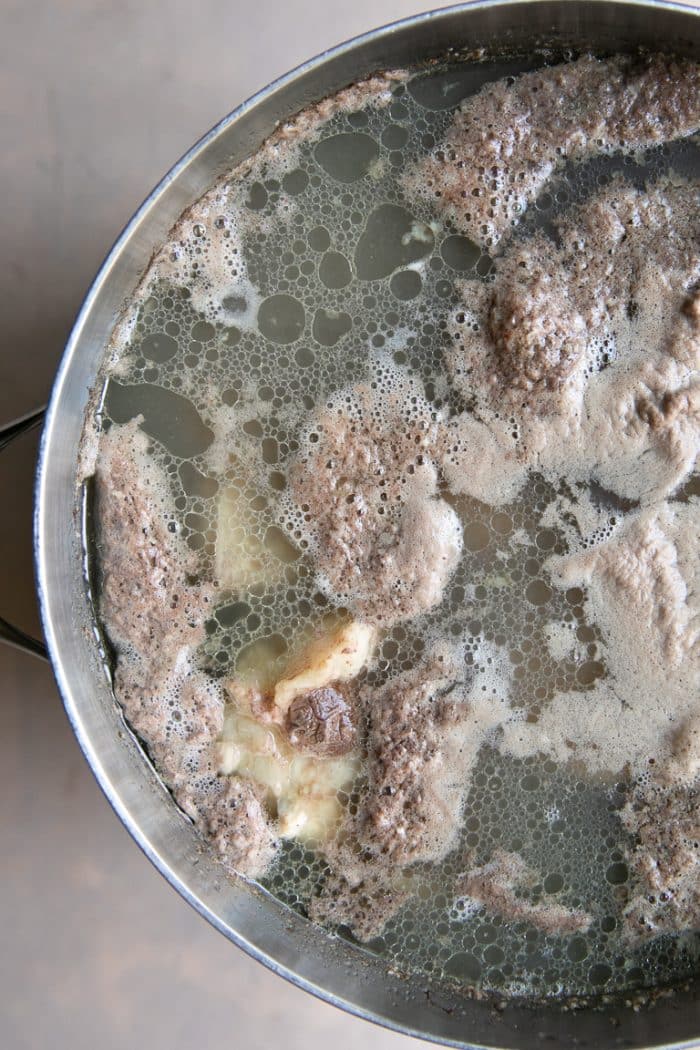
Step 1: Blanch the Bones
Divide the bones between two large pots and cover with cold water. Bring to a boil over high heat and simmer for 10-15 minutes before draining and rinsing the bones with water.
Do you have to blanch the bones? The answer is no. However, I recommend, especially if you’re making broth from beef bones, that you do blanch them first. If you’re using chicken bones or chicken feet blanching is less important, but beef bones really need this extra step, especially if you want a clear stock.
What’s the purpose of blanching? The purpose is to remove impurities, coagulated protein, and blood which ultimately results in a cleaner, better tasting broth.
As far as nutrient loss due to blanching? The nutrient loss is too small to justify not blanching (in my opinion).
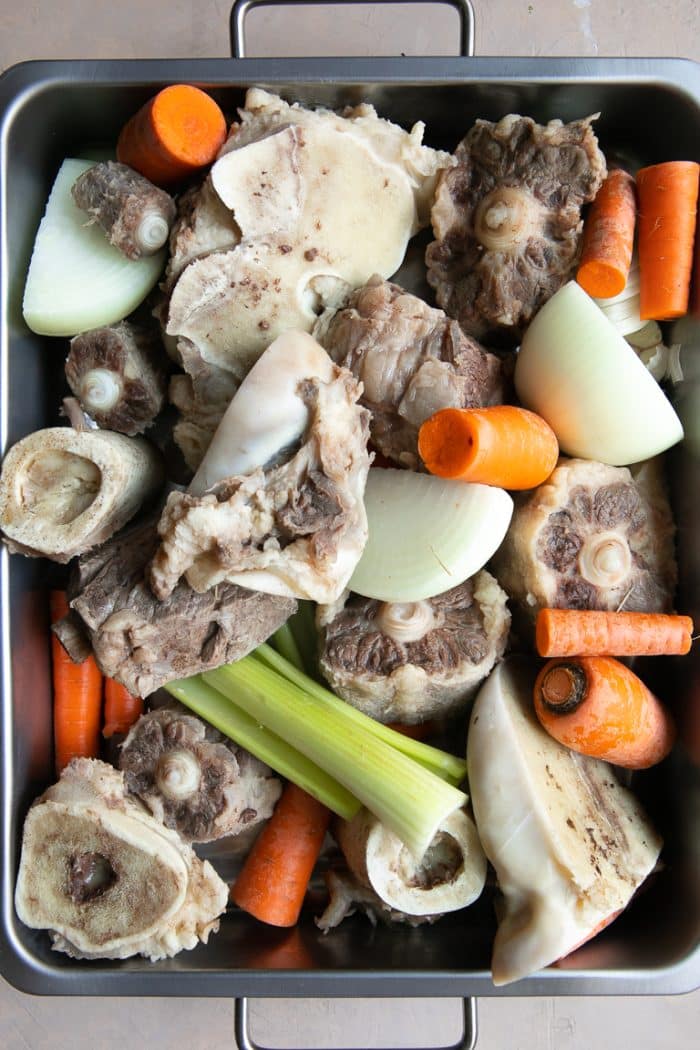
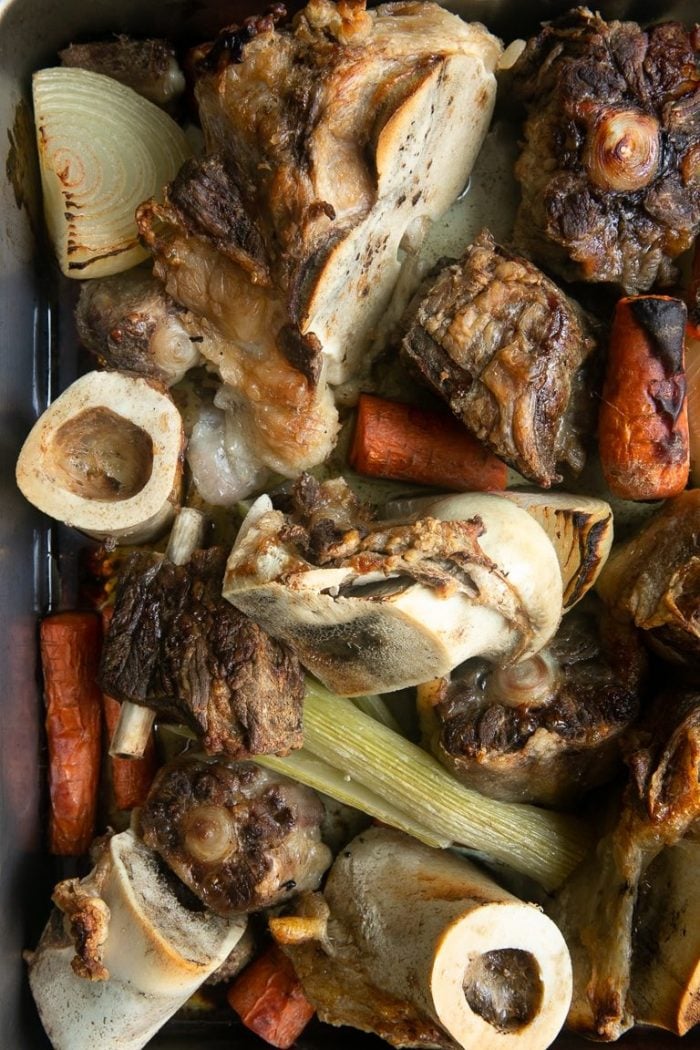
Step 2: Roast the Bones and Vegetables
Now that your bones have been blanched, drained, and rinsed, it’s time to preheat your oven to 450 degrees F. Transfer the bones and vegetables (carrots, onions, garlic, celery) to the roasting pans. Avoid piling them all on top of each other- use two roasting pans, if necessary. Roast for 30 minutes before gently tossing the bones and vegetables, and roasting for an additional 15-30 minutes more.
Why roast bones for broth? Roasting equals flavor! And we love a little added flavor, right? This step in an easy way to brown and caramelize your bones without a lot of added work. Do you want to char or burn your bones? No. But, nice, deep browning? Yes.
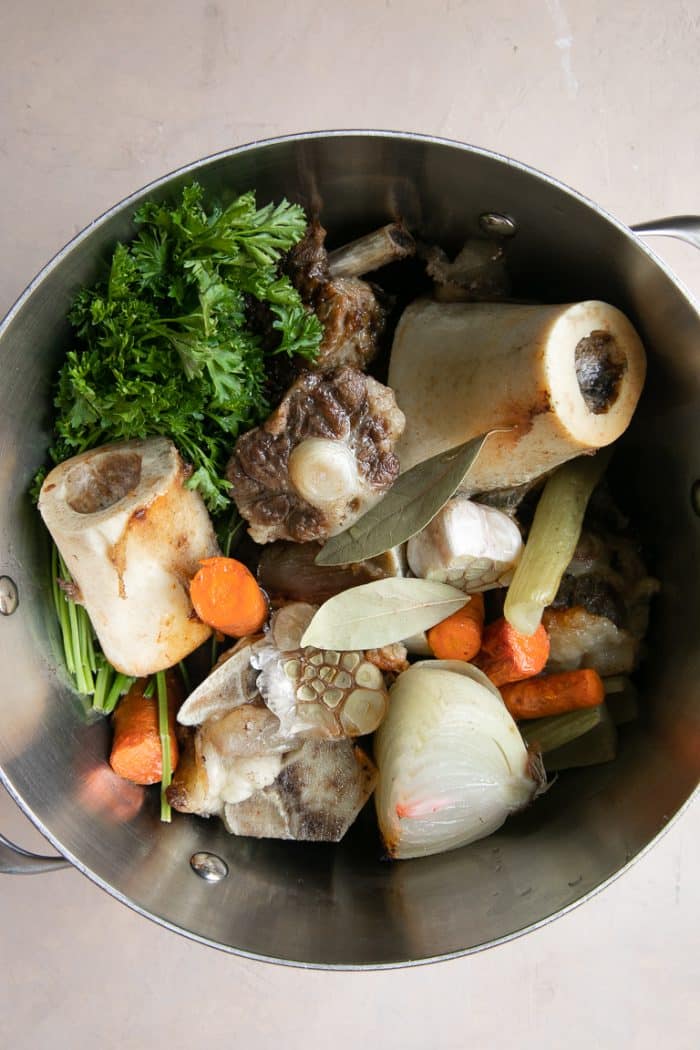
Step 3: Transfer the Bones Back to the Stockpots & Bring to a Boil
Wash the stockpots that were used to blanch the bones (this is super important) and divide the roasted bones and vegetables between the two pots. Scrape up any brown bits and juices remaining in the roasting pan using a metal spatula and a little water, if needed, and divide between the two pots (don’t worry, all those brown bits are FLAVOR!).
With the bones and vegetables divided, divide the bay leaves, peppercorns, star anise, cinnamon sticks, and apple cider vinegar between the two pots.
Fill each pot with approximately 12 cups of cold water, or enough water to cover the bones by approximately an inch.
Cover each pot with a tight-fitting lid and bring to a low boil.
Can you cook your broth in a slow cooker (Crockpot)?
Yes. Absolutely. For this recipe, you will likely need 2 large slow cookers. Instead of transferring the roasted bones, veggies, herbs, and spices to large stockpots divide them among two (or three) slow cookers, cover with cold water, and cook on low for 24-48 hours with the lid slightly ajar. Add additional water, as needed, to keep the bones covered.
Step 4: Simmer
Reduce heat to low and simmer, with the lid slightly ajar, skimming any foam or excess fat, as needed. Simmer for at least 8-12 hours or up to 24 hours (do not leave the stove running overnight. Simply cool and store in the refrigerator and continue to simmer the next day). Add more water if needed to make sure bones and vegetables remain fully submerged.
- If the vegetables (particularly the carrots) turn too soft and mushy at any point throughout cooking, use a slotted spoon to remove. Enjoy as a delicious snack or discard.
Step 5: Strain the Bones
Once the bones have simmered and your broth is ready, you will need to strain the broth through a fine-mesh strainer. For an extra clear broth, strain a second time through a food-grade cheesecloth.
Set aside the broth to cool and allow the bones to cool (see more on storage and cooling below).
Step 6: Don’t Forget About the Meat
Depending on the type of bones you use to make your bone broth, you may or may not have any meat left to be picked off. In my case, I had tons of leftover delicious meat perfect for soup, sandwiches, or (if you’re not into the meaty bits) the family pet. Don’t let it go to waste! As for the vegetables, blend them together and add them to cooked rice, mashed potatoes, or, add a little broth and make it a delicious blended soup.
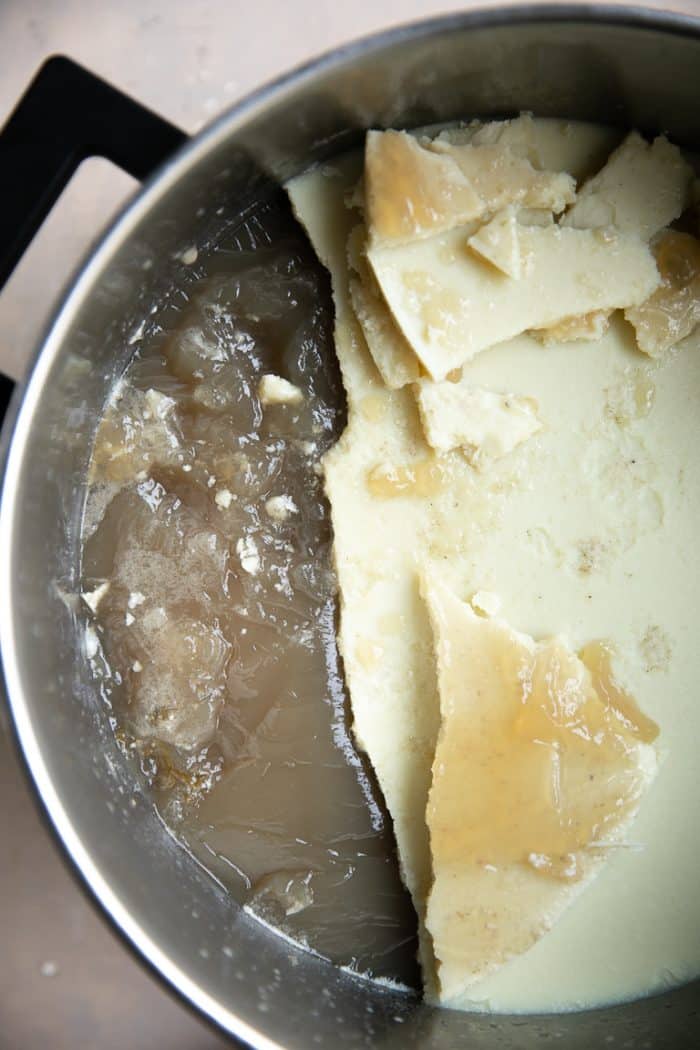
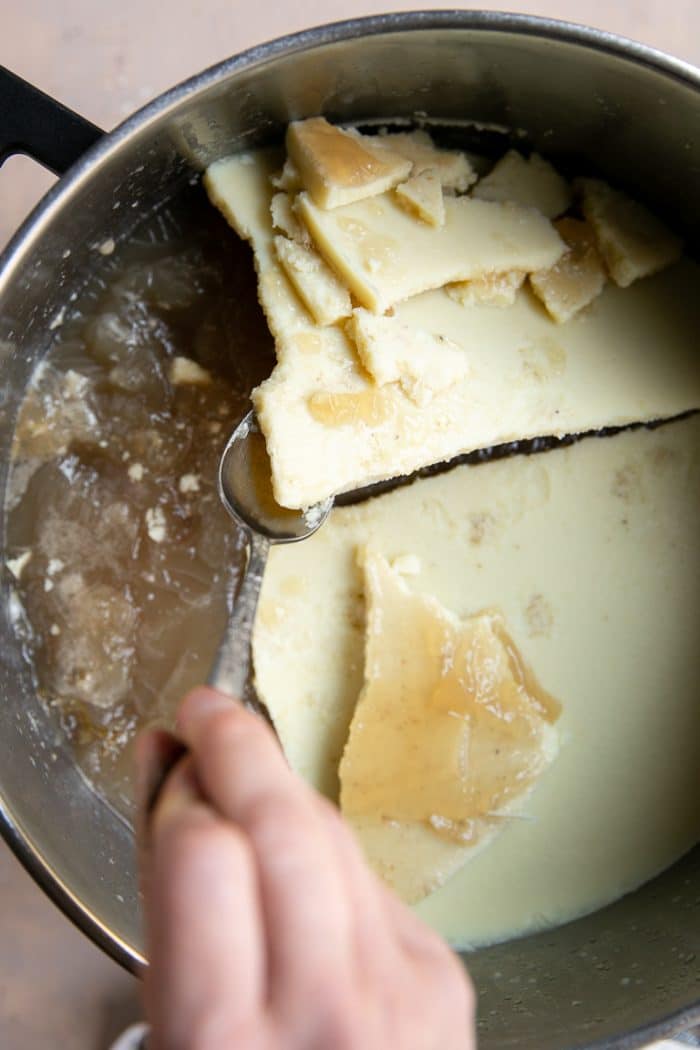
Step 7: Skim the Fat from Your Broth (optional)
Add a couple of handfuls of ice to your broth to expedite cooling and cover with a lid. Transfer your broth to the refrigerator and allow it to cool completely. The result will be a hard, thick layer of fat and a bottom layer that is your bone broth (which should look like gelatinous brown jello). If desired use a fork to scoop off the top layer of fat. This will leave behind the healthy bone broth, minus the fat.
Step 8: Store your bone broth
Bone broth stores well in the refrigerator for approximately 5 days. If you make a large batch, I recommend freezing smaller batches in the freezer for up to 6 months (it reheats perfectly!)
Tips and Tricks
- Use a mixture of different beef bones. Not all bones are created equal, as such, try to use 2-3 different types of bones to make your broth.
- Don’t forget to blanch the beef bones before roasting. Guys, this step is SO IMPORTANT. Blanching the bones for 15-20 minutes helps remove all those nasty bits that, well, make your bone broth look and taste kinda gross. These nasty parts won’t hurt you, but in order to achieve the beautiful, clear, rich bone stock, you need to blanch the bones.
- Roast your bones. Roast them high and roast them long. Roasting the beef bones browns and caramelizes them. This translates to more flavor. Who doesn’t want more flavor?
- Avoid the temptation to add too much “other stuff”. You are making bone broth NOT bone/vegetable/herb garden broth. This is not to say that you shouldn’t add any roasted veggies or spices, but keep it at a minimum so that the beef bones can really shine.
- If one stockpot isn’t big enough, use two. Your beef bones want to be fully submerged in water. If your pot isn’t big enough, use two.
- Allow enough time for the bones to simmer. You guys, a few hours is not enough time. I allowed this pot of beef bones to simmer for 14 hours and it turned out just perfect. Patience is key. With that said, longer is not always better. There is no need to simmer your bones for any longer than 24 hours.
- Refrigerate the soup overnight and remove the fat layer from the top. Of course, you don’t have to do this. Or you can do this and leave some of the fat. No matter what you decide, once the broth is reheated, it will all dissolve back into the smooth, beautiful delicious broth you started with.
- Add salt to taste. If you’re expecting your bone broth to taste identical to your favorite Vietnamese bowl of Pho without adding any salt then I am sorry to say you will be very disappointed. You will need salt. Exactly how much depends entirely on you.
How to Store Bone Broth
Let’s discuss storage and freezing.
I like to store my broth in sealed jars or freezer-safe bags ziplock bags. These are my favorite glass storage jars to use when freezing. They’re tall and skinny and great for deep freezers. When storing in the refrigerator, however, I usually keep leftovers in a pot with a lid as it is so much easier to reheat.
How long will leftover bone broth last?
Broth stored in the refrigerator will keep for 4-6 days while broth stored in the freezer will keep for at least 4-6 months.
Before storing or freezing always…
Before storing it’s super important to cool your broth to room temperature. Ideally, you want to do this as quickly as possible to prevent any chance of contamination. The easiest way to do this is by adding a couple of handfuls of ice to the pot, covering, and waiting for the broth to cool. The ice will help expedite this process.
Or, as suggested by a reader, fill your sink or bathtub with a few inches of cold water. Place the pot in the cold water and allow the broth to cool to room temperature.
How to Use All That Broth
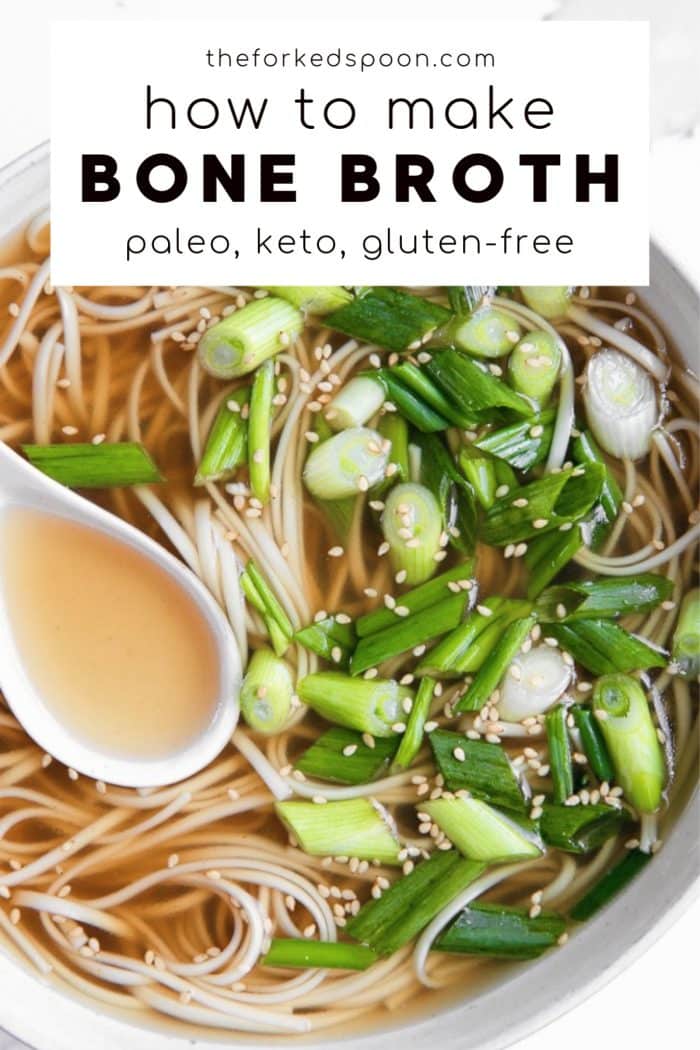
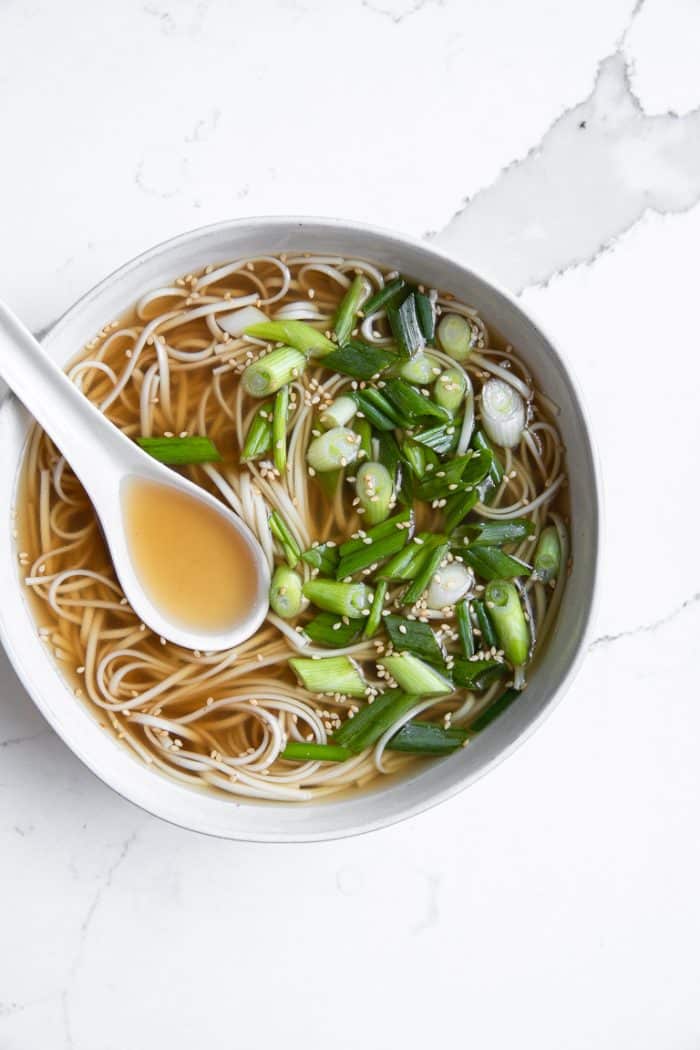
Your reasons for making bone broth will likely determine how you serve it. For restorative and medicinal purposes, it is hugely popular to sip a cup of warm bone broth with a sprinkle of sea salt and cracked pepper.
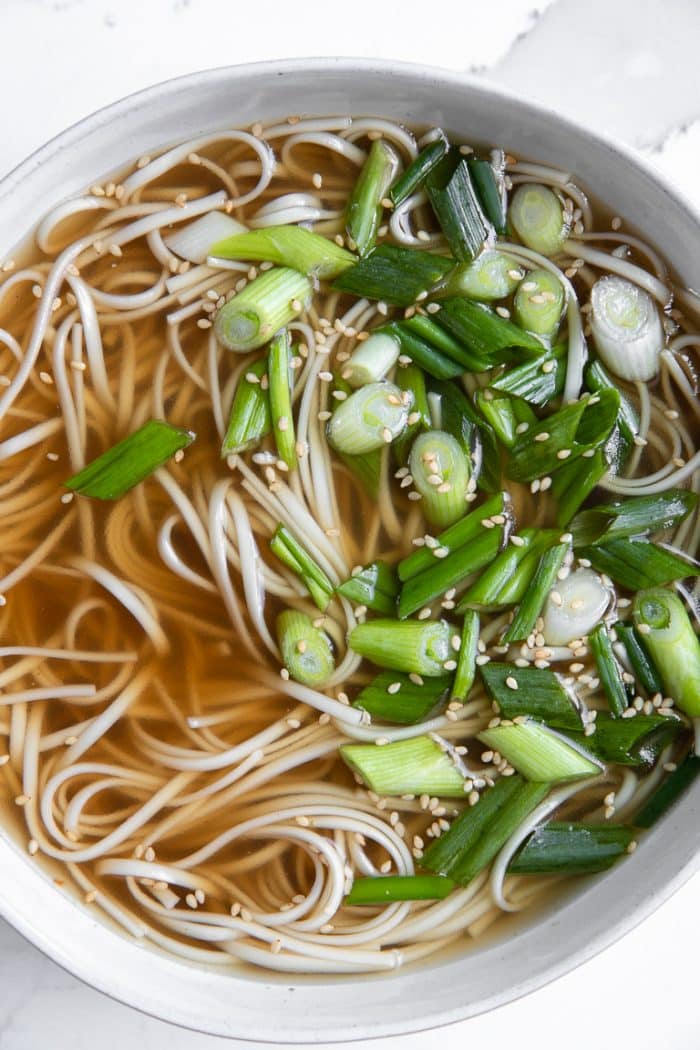
If you’re not really interested in drinking your broth, use it the same way you would regular meat stocks or broths.
- Use it to make soups and stews, including bok choy soup, Vietnamese pho, chicken and wild rice soup, and beef stew.
- Use it to cook rice and grains like brown rice, risotto, wild rice, farro, lentils, and quinoa. Swapping water for bone broth is an easy way to add extra flavor and protein.
- Use it to make delicious sauces like gravy, roux, pan sauces, or reductions.
- Other delicious recipes include jambalaya, beef stroganoff, and tater tot casserole.
How Much Bone Broth Can I Drink Each Day?
A lot of you have asked how much broth you can (or should) drink each day. The truth is that I am not a doctor. So, if you’re drinking bone broth for medicinal reasons at all, I highly recommend consulting your doctor.
For anyone looking to include bone broth as part of an already balanced and healthy diet and lifestyle, enjoy anywhere from 2-4 cups daily.
Bone broth is not suitable for vegetarians, vegans, or anyone following a low-protein diet. It is wonderful, however, for those looking to include more protein as it is paleo and keto-approved, gluten-free, and dairy-free.
More Easy Recipes,
If you try making this Homemade Bone Broth Recipe, please leave me a comment and let me know! I always love to hear your thoughts.
RECIPE CARD
Bone Broth Recipe (How to Make Bone Broth)
Ingredients
- 10 pounds beef bones - preferably a mix of marrow bones (femur bones) and bones with meat on them (oxtail, short ribs, and knucklebones cut in half)*
- 4 large carrots - chopped into 2-inch pieces
- 2 medium onions - quartered
- 2 whole heads garlic - halved crosswise
- 6 stalks celery - cut into 2-inch pieces
- 4 bay leaves
- ¼ cup black peppercorns
- 4 whole star anise
- 2 whole cinnamon sticks
- 2 tablespoon apple cider vinegar
Instructions
- Blanch the bones. Divide the bones between two large stockpots and cover with cold water. Bring to a boil over high heat and simmer for 15-20 minutes before draining and rinsing the bones with water.
- Roast the bones and the vegetables. Ok, so the bones have been blanched. Now, preheat the oven to 450 degrees F. Transfer the bones and vegetables (carrots, onions, garlic, celery) to the roasting pans. Don't pile them all on top of each other- use two roasting pans. Roast for 30 minutes before gently tossing the bones and vegetables, and roasting for an additional 15-30 minutes more.
- Transfer the bones and vegetables back to the stockpots. But not before washing the stockpots first. Make sure you wash your pots after the bones were blanched and drained. Transfer the bones and vegetables back to the stock pots and scrape up any remaining bits and juices remaining in the roasting pan using a metal spatula and a little water, if needed. Transfer to the pot with the bones (don't worry, all those brown bits are FLAVOR!).
- Boil the bones. With the bones and vegetables divided between the two pots divide the bay leaves, peppercorns, star anise, cinnamon sticks, and apple cider vinegar between the two pots. Fill each pot with approximately 12 cups water, or until bones are fully submerged. Cover the pots and bring to a low and gently boil.
- Simmer the bones. Reduce heat to low and simmer, with the lid slightly ajar, skimming any foam or excess fat, occasionally. Simmer for at least 8-12 hours, ideally 24 hours (do not leave the stove running overnight. Simply cool and store in the refrigerator and continue to simmer the next day). Add more water if needed to make sure bones and vegetables remain fully submerged.
- Strain the bones. Once the bones have simmered and your broth is ready, you will need to strain the broth through a fine mesh strainer. Set aside the broth to cool and allow the bones to cool.
- Don't forget about the meat. Whether you eat the meat still left on the bones in a bowl of soup or in sandwiches, I can almost guarantee that there is a TON of delicious meat waiting to be picked from the bones. Don't let it go to waste! Discard the meat-free bones and vegetables.
- Skim the fat from your broth (optional). Add a couple handfuls of ice to your beef broth to expedite cooling and cover with a lid. Transfer broth to the refrigerator and allow broth to cool fully. The result will be a hard, thick layer of fat and a bottom layer that is your bone broth (which should look like gelatinous brown jello). If desired use a fork to scoop off the top layer of fat. This will leave behind the healthy bone broth, minus the fat.
- Store your bone broth. Bone broth stores well in the refrigerator for approximately 5 days. If you make a large batch, I recommend freezing smaller batches in the freezer for up to 6 months (it reheats perfectly!).
Jessica's Notes
- Yes. Absolutely. For this recipe, you will likely need 2 large slow cookers. Instead of transferring the roasted bones, veggies, herbs, and spices to large stockpots divide them among two (or three) slow cookers, cover with cold water, and cook on low for 24-48 hours with the lid slightly ajar. Add additional water, as needed, to keep the bones covered.
Nutritional Information
(Nutrition information provided is an estimate and will vary based on cooking methods and specific brands of ingredients used.)


Hi I’be made this recipe twice now, I’m just wondering why you don’t include fish sauce an important ingredient in a beef broth for pho. How much of the fish sauce should I add assuming I’m doing the 10 lb of beef bones. Thank yoy
Great question Chris! This recipe is just for basic Bone Broth. Bone Broth is one of many ingredients in Pho. Please see my Pho Recipe to make Vietnamese Pho with this Bone Broth, as you will find fish sauce and all the other ingredients there 🙂
This recipe is delicious and very well written. I would like to have the recipe for the dish shown just above the recipe please. Thank you!
Beautifully written and illustrated
Can’t wait to try
Thoughtfully written you have covered everything
Thank you
Hi, just curious why we broiled vegies and then boiled them, you don’t mention if and when they’re re-incorporated into the broth. I am sorry if it’s there and I missed it. I just want to make this correctly. Thank you
Hi Rick,
The broil and then boiling of the vegetables is to get the additional flavor from them, it’s optional 🙂
The standard bone broth recipe does not incorporate the vegetables back into the broth after they have been boiled with the bones.
Yeah I get that. It doesn’t state when to put vegies back in with the bones though, that’s my question. Sorry if I was confusing in first post
No worries rick 🙂 , please see step 4 in the recipe card:
”
4. Boil the bones. With the bones and vegetables divided between the two pots divide the bay leaves, peppercorns, star anise, cinnamon sticks, and apple cider vinegar between the two pots. Fill each pot with approximately 12 cups water, or until bones are fully submerged. Cover the pots and bring to a low and gently boil.
“
Hi, thanks for the reply. I don’t think I asked my question properly. In your directions I am almost positive you don’t mention when to add the vegies back with the bones. I am sorry if I missed it but I have read multiple times. I want this to turn out properly. Thank you
Hi again Rick! No worries, you add the roasted veggies and bones together in the pot/pots in step 4 of the recipe card 🙂
I am very sorry. I have read step 4 a bunch of times and I still don’t see when to add vegies to the bones, it just mentions with them divided and doesn’t say when to add them back.
Sorry for being a pain in the broth
There is never pain in the broth Rick! I updated step #3 to better reflect the vegetables 🙂
Starting a batch using your method today, as it’s a chilly weekend ahead and soup tomorrow night sounds comfy. Instead of boiling/simmering on the stove top though, I will put my stockpot in the oven at 210 degrees for 24 + hours. No hard boiling or stirring results in a beautifully clear broth. Just make sure your oven doesn’t have an auto-off feature. If you’re not sure, just turn off and re-start before going to bed.
This proved to be excellent guidance for my first official effort to make a bone broth. It turned out excellent, thank you!
Hi,
Quick question. Just wondering why you suggested if you are freezing the bone broth that you freeze it in ziploc bags as opposed to mason jars?
Thanks for the recipe 😀
Great question Andrea 🙂
Mostly because with glass jars you run the risk of accidentally cracking the glass. If you do try glass jars, make sure the broth has cooled to room temperature or in the refrigerator before putting it into the freezer, to reduce the chance of the glass cracking. Also, when taking it out of the freezer, you should allow the broth to return to room temperature slowly.
And for the record, my latest batch was put in glass jars, a few of which are in my freezer 😀
Hi Jessica,
Have you ever tried to make broth in instant pot or pressure cooker?
Hi Kathy,
I have not tried to make bone broth in a slow cooker, as I don’t have a slow cooker big enough for the amount of broth I like to make in a batch 🙂
But I have made a yummy instant pot bone broth recipe
How many cups do I drink per day
That would be completely up to you Helen 🙂
Hi! I really want to do this, but if I buy the meat in the grocery store – can you help with what kind to get? Also, this might be a really dumb question, but do I remove all the meat from the bones or do you leave the meat on there?
Lastly, instead of a stockpot, can I do this in a crock pot?
Hi Michelle,
Per the recipe card above, you buy:
“preferably a mix of marrow bones (femur bones) and bones with meat on them (oxtail, short ribs, and knuckle bones cut in half)”
Yes, you leave the meat on these bones.
I have not tried making this recipe with a crockpot, mostly due to the fact that I don’t have a slow cooker big enough to produce the amount of broth I want. With that said, I don’t see why it wouldn’t work in the largest slow cooker you have to get the max amount of broth possible 🙂 . The timing should be about the same as the recipe.
Hi,
I was wondering what you would think about adding chicken bones to your recipe. Using both beef bones and chicken bones. I am not sure of how the combination of the bones would taste.
Yes Margot, you can add chicken bones to your bone broth 🙂 . While I have not tried this, I think it will make the bone broth taste a bit more mild compared to the original recipe.
Are we suppose to push the marrow out of the bones and incorporate it into the soup? When would we do this? Or does it happen naturally? Thanks!
That’s a great question Tara 🙂 ! Sometimes, the marrow comes out naturally, and sometimes it sticks/stays inside the bone. It depends on the marrow, bone, and types of cuts.
If it doesn’t, you can definitely still get it out and eat it if desired, which is what my husband does if it doesn’t come out.
Hey Jessica,
Thanks so much for the recipe, it certainly has some good reviews. It is bubbling away atm, has been for 6 1/2 hours and it smells amazing, I’ve also sneaked a taste and it’s great already! One thing I was hoping to clarify though is, when do I stop adding liquid i.e. how do I know the recipe is done? I know you give a length of time to cook it for which is perfect but if I choose to go the full 24 hours let’s say, I will need to keep topping up the water to cover the bones and veg. When would I stop topping it up though, as in would the broth already be thicker or is there a point to look out for to know it’s done e.g. half the bones are now exposed. I only ask so that I can get the best consistency as I know I’m going to love this. Thanks again!
Great question Christopher.
The bones should always be covered in water, so fill as necessary for the recipe cooking time of 10 hours or more. If you want to reduce the broth after the cooking time, first strain and remove the veggies/bones, and then you can reduce according to your taste/preference for the desired consistency 🙂
Hi Jessica,
Thanks for the prompt response. I let it go for 20 hours and let it cool in the fridge overnight. This morning there was a lovely thick layer of tallow on top but when I went through that I’m afraid I found that my broth had not thickened. There was plenty of marrow in the bones and I assumed there would be plenty of Gelatin but I assume this is what the issue is? Do you think I should try reduce it to get the jelly consistency? Thank you!
Hi Christopher,
It could have been not enough gelatin on the bones used as you mentioned, but it’s hard for me to speculate without seeing it myself. You could try to reduce to your taste to get the desired jelly consistency, but chances are that your broth already tastes good as is.
Hey Jessica,
So as this was so good I am doing it again. I did however this time get some oxtail and a foot to go along with it. I was wondering if you would suggest blanching the oxtail along with the bones? The pics seem to suggest so but the description didn’t mention it so I was wondering your thoughts on this? Thanks again!
Hi Christopher,
Yes, I recommend blanching all the bones you plan on using 🙂
what if the bone with some meat on was not fully submerged while it simmered on low over night and through the next day?
Hi Lizelle,
It’s hard for me to say without personally looking at it. But I would probably flip the bone over so the unsubmerged part is submerged and simmers for another 30 minutes plus for food safety 🙂
This recipe is perfect! My nutritionist recommended this specific recipe to me and I am so glad I went through with it!