This post may contain affiliate links. See my disclosure policy.

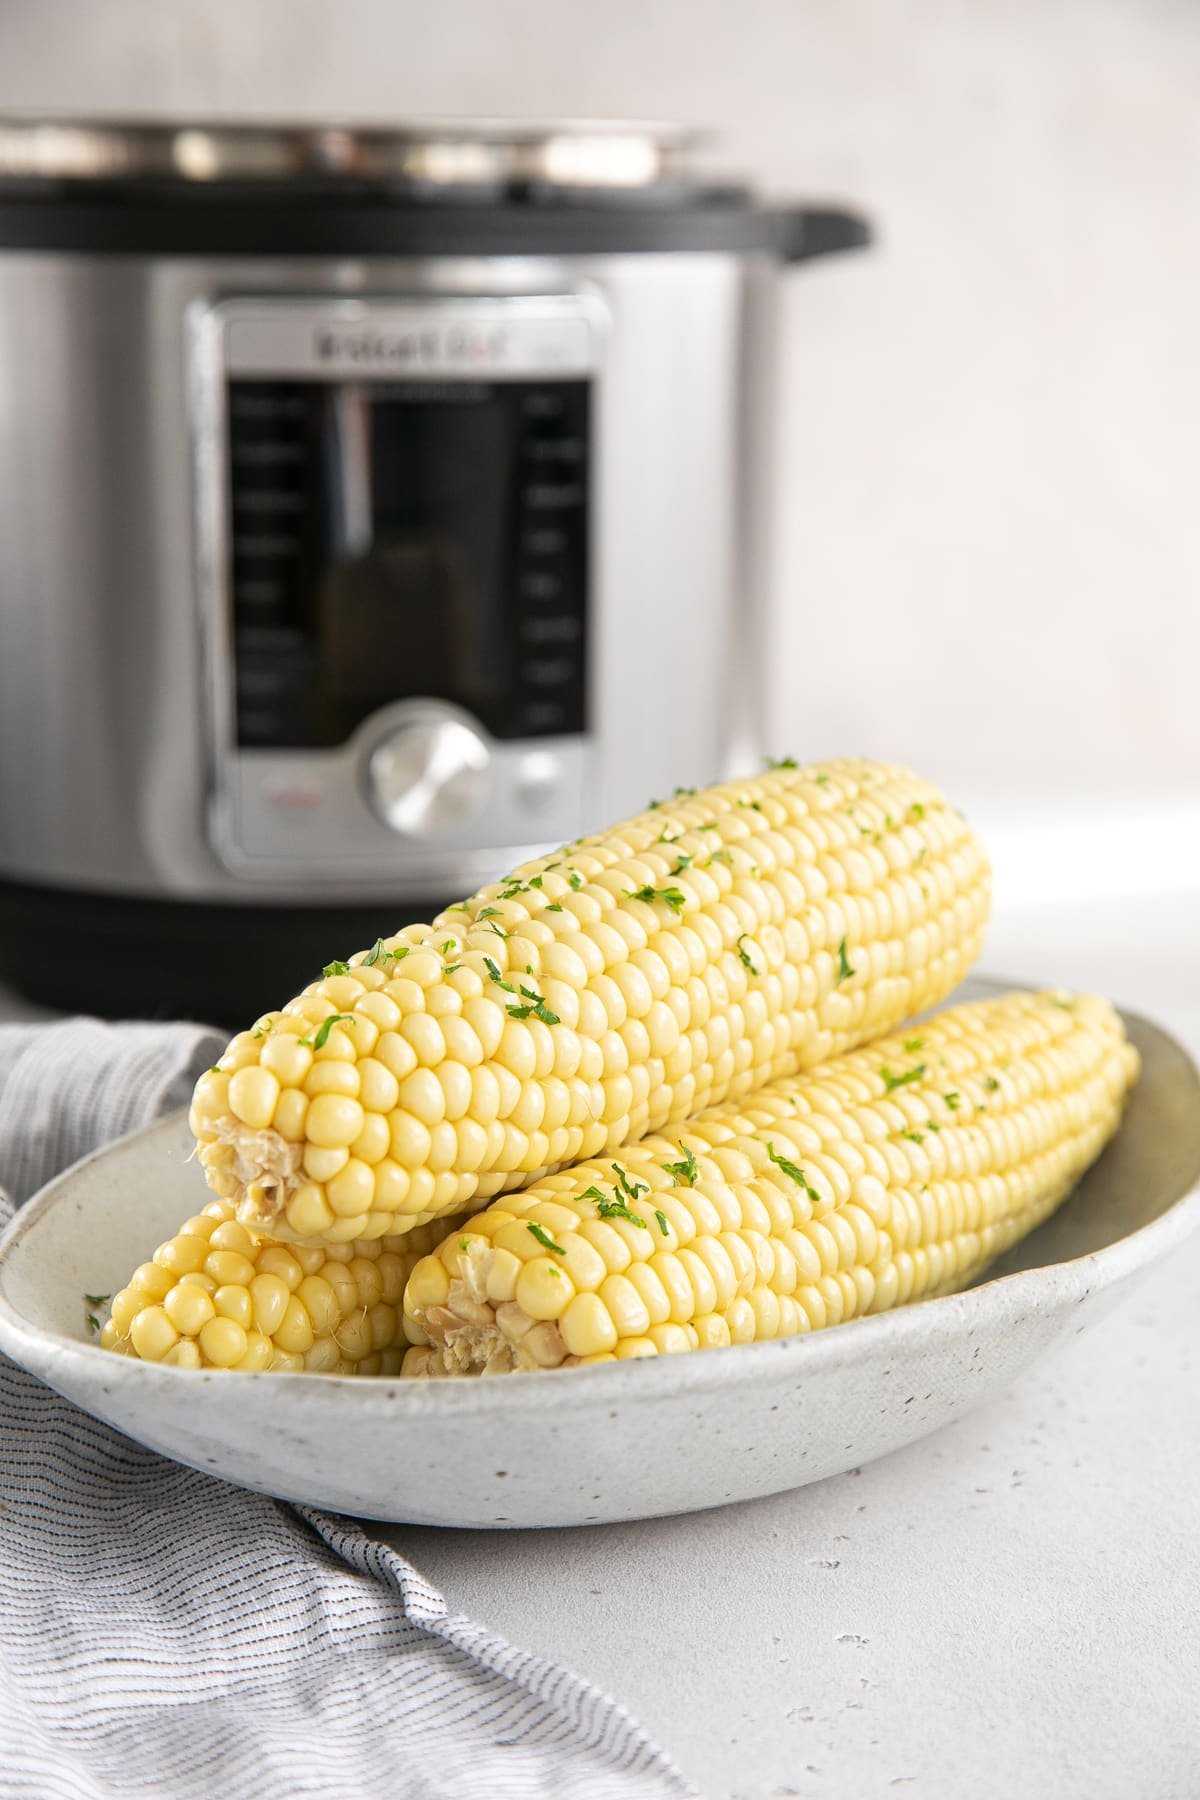
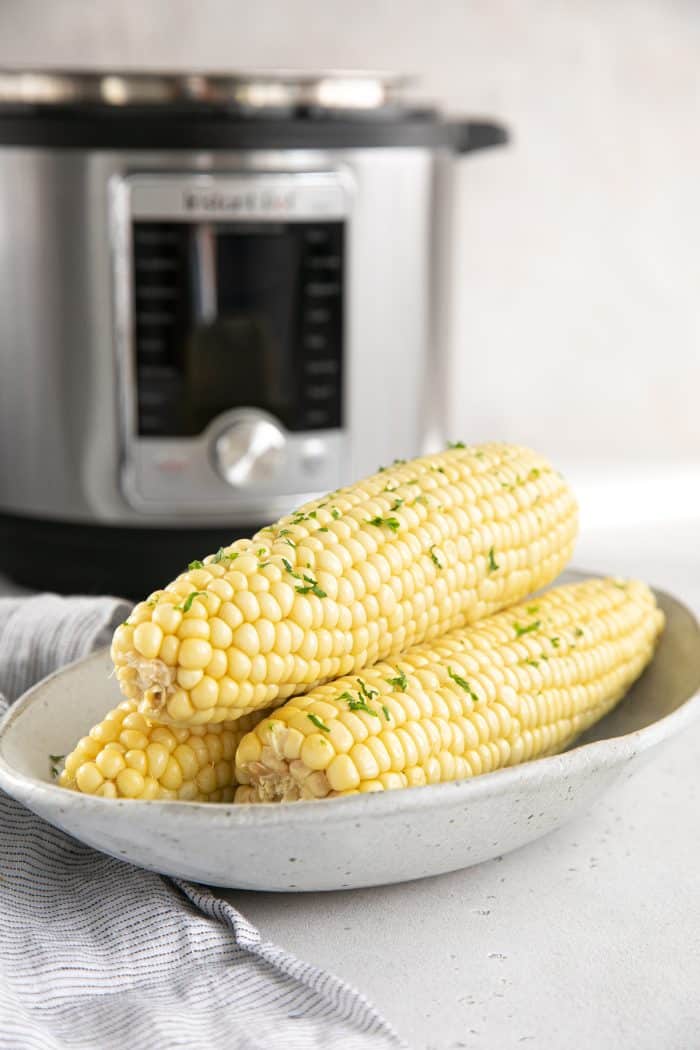
This Instant Pot Corn on the Cob makes it so easy to cook perfectly tender and delicious sweet corn every single time! Once you learn how to cook corn in your pressure cooker, you won’t want to cook corn any other way.
Perfect Corn on the Cob
Perfectly tender, sweet, and buttery corn on the cob is one of my favorite sides to serve with everything from baked chicken breasts to grilled veggie skewers, pulled pork to Italian pasta salad. It was one of those things as a small child that I looked forward to whenever my mom announced that corn on the cob would be the vegetable for dinner, and it remains a favorite still to this day.
Table of Contents
Nowadays, however, when I’m not chomping away at butter covered corn on the cob, you’ll find me adding it to all kinds of easy recipes like these Mexican street corn nachos, salads, and corn and zucchini chowder. Not to mention every single bbq recipe under the sun.
In the past, I always cooked corn in a big pot of water right on the stovetop. I know this is super easy to do, but cooking corn in the Instant Pot is so much easier. There’s no babysitting, and no wondering, is it done yet? Most importantly, the results are perfectly cooked corn on the cob every single time.

Corn on the Cob Recipes – More than Just Butter
A smear of melted butter and a generous pinch of salt will forever be my go-to corn on the cob recipe. So simple. So sweet. So easy.
But, there’s more than just one way to gobble up this grain.
- Chimichurri Sauce Recipe
- Butter, lime, and chile powder
- Butter, parmesan cheese, and fresh garlic
- or just try drizzling with garlic butter sauce
Or, cut from the cob and add to all your favorite recipes! (hint – soups love sweet corn!)

Can You Cook Corn in the Husks?
Yes, corn can be cooked in the electric pressure cooker with the husks still on. However, I find that it is easier to shuck my corn before it is cooked. Why?
After the corn cooks, they’re hot! And the husks actually insulate the heat, keeping each corn on the cob hotter, longer.
Unless you’re happy to wait 10-15 minutes for your corn to cool (not me, I need to get dinner on the table!), I recommend removing the husk and silks beforehand.
NOTE: Should you cook your corn on the cob with the husks still on, add one minute to the total cook time (for a total of 3 minutes).

How to Make It
Get perfectly cooked Instant Pot corn on the cob by following a few simple steps. To start, you’ll first want to decide if you plan to cook your corn with, or without, the husks (read all about my thoughts on this above).
- Total cook time without husks: 2 minutes
- Total cook time with husks: 3 minutes
Place 1 cup of water inside the inner pot of your pressure cooker and place the metal trivet (or steamer basket) at the bottom of the pot.
Add the corn and secure the lid. Turn the steam release valve so that it is in the sealing position. Cook on “Manual” or “Pressure Cook” for 2 minutes (without husks) or 3 minutes (with husks).
Remember, it will take approximately 10 minutes for your Instant Pot to reach pressure, and then the cooking time will begin counting down.
When the total cooking time ends, quick pressure release by carefully turning the steam release valve to the venting position. Wait for the steam to release and the pin to drop before opening the Instant Pot lid.
Carefully remove the corn from your Instant Pot and season with butter, salt, and pepper.

More Instant Pot Recipes,
Instant Pot Butternut Squash Soup Recipe
Instant Pot Butternut Squash Risotto Recipe

If you try making Pressure Cooker Corn on the Cob, please leave me a comment and let me know! I always love to hear your thoughts.
Instant Pot Corn on the Cob Recipe
Equipment
Ingredients
- 4 corn on the cob, (or as many will fit in your pressure cooker)
- 1 cup cold water
Instructions
- You may cook your corn with the husks still on, or with the husks removed (see notes). If you choose to leave the husks on, trim approximately 1-inch from each end of your corn on the cob.
- Place 1 cup of water inside the inner pot of your Instant Pot and place the metal trivet (or steamer basket) at the bottom of the pot.
- Lay the ears of corn across the top of the trivet, alternating directions between layers.
- Secure the lid and turn the steam release valve to the sealing position. Press or turn the knob to select the "Manual" or " Pressure Cook" option. Cook on high pressure for 2 minutes. Your pressure cooker will take approximately 10 minutes to reach pressure, and then the cooking time will begin counting down.
- When the total cooking time ends, quick release the pressure by carefully turning the steam release valve to the venting position (I usually do this with a kitchen towel shielding my hand). Allow the steam to release and the pin to drop the open the Instant Pot lid.
- Carefully remove the corn using kitchen tongs to a clean serving platter or individual serving plates and serve smeared in butter and seasoned with salt, black pepper, or fresh herbs, if desired.
Notes
- It is the same amount of work and effort to shuck your corn both before or after it’s been cooked. One key difference, however, is that if you want to remove the husk and silks until after it’s been cooked, you will have to wait for your corn to cool significantly as it will be very hot (and quite painful to shuck with bare hands).
- Total cook time without husks: 2 minutes
- Total cook time with husks: 3 minutes
- I was able to comfortably fit 4 large corn on the cob in my 6-quart Instant Pot. To use an 8-quart Instant Pot, follow the instructions as directed, but add 1.5 cups of water to the inner pot.
- This recipe is intended for fresh corn on the cob.
Nutrition
Nutrition information is automatically calculated, so should only be used as an approximation.


can i prepare ahead of time and use as an appetizer for a party
Yes, Ria, you can prepare ahead of time and use as an appetizer 🙂