This post may contain affiliate links. See my disclosure policy.

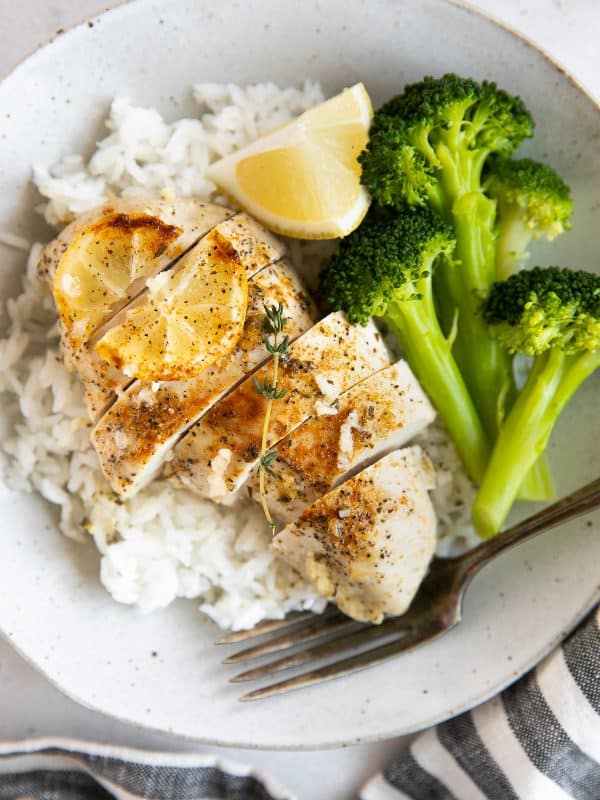
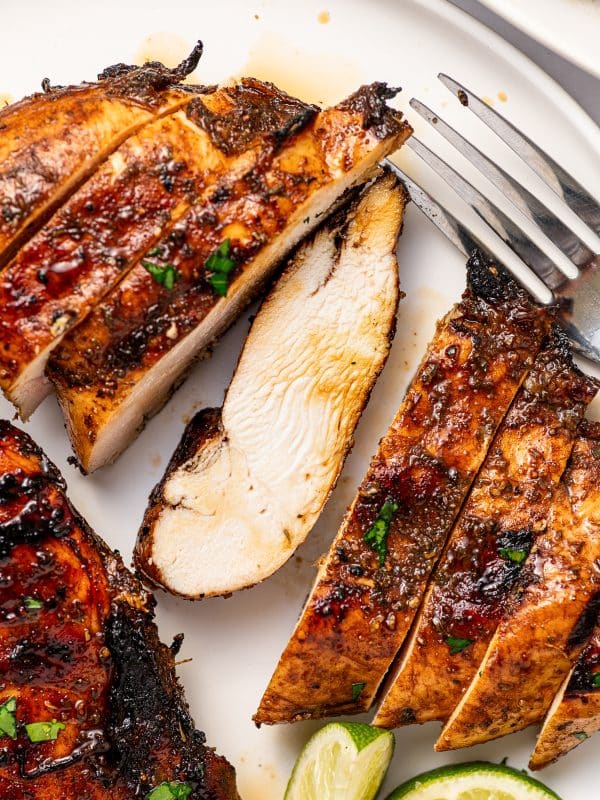
Perfect Oven-Baked Chicken Breasts that are tender, juicy, flavorful, and so easy to make! All you need is a drizzle of olive oil, a little seasoning, and a few simple tips for guaranteed delicious, no-fail, cooked chicken breasts every time!

High in protein and low in fat, I cook a lot of baked chicken breasts. It’s embarrassing, actually. Unlike baked chicken thighs and baked chicken legs, this low-fat superstar can be somewhat tricky to bake. For years, I cooked my chicken so dry that the only way to salvage it was by ‘rehydrating’ it in a combination of ketchup and Ranch dressing.
So today, I’m sharing my go-to recipe for perfect oven baked chicken breasts. This easy, fool-proof recipe results in the most flavorful and juicy chicken breasts, every single time.
It’s simple. Drizzle your chicken with a bit of oil, sprinkle with a little seasoning (check out my favorite seasoning combos below), and bake in a preheated oven set to 425 degrees Fahrenheit. Learn more below!
Table of Contents
- Key Ingredients
- What is the Best Temperature to Bake Chicken Breasts?
- How to Bake Chicken Breasts Like a Pro
- Step-By-Step Instructions
- Should I Brine Chicken Breasts Before Baking?
- Perfect Chicken Deserves the Perfect Seasoning
- Serving Ideas and Leftovers
- Storage, Freezing, and Reheating Tips
- More Chicken Recipes
- Oven-Baked Chicken Breasts Recipe
Key Ingredients
Find the printable recipe with measurements in the recipe card below.
- Boneless Skinless Chicken Breasts: For best results, try to purchase chicken breasts that are about the same size and thickness. Bone-in skin-on chicken breasts can be used instead of boneless skinless chicken breasts, but they will take approximately 30-40 minutes to cook, depending on their size.
- Olive oil: Used to coat the chicken breasts and prevent them from drying out. Butter may also be used. Melt the butter first and use a pastry brush to brush it over the chicken.
- Spices and Herbs: This recipe calls for a simple mixture of salt, black pepper, sweet paprika, and homemade Cajun seasoning. This is my go-to seasoning blend for chicken breasts. Check out some other seasoning ideas below.
What is the Best Temperature to Bake Chicken Breasts?
The best temperature to bake chicken breasts is 425°F (220°C).
Baking chicken breasts at this temperature allows them to cook quickly while retaining moisture, resulting in juicy and tender meat. Boneless, skinless chicken breasts typically take about 20-25 minutes to reach an internal temperature of 165°F (74°C), while bone-in, skin-on chicken breasts will take slightly longer, at least 30-40 minutes. Always use a digital meat thermometer to ensure the chicken is fully cooked without overcooking.
Jessica Top Cooking Tips
How to Bake Chicken Breasts Like a Pro
Nearly two decades of cooking chicken breast have taught me a thing or two about how to cook them. Here are my most important cooking tips:
- Marinate (optional): Marinades made from acidic ingredients like lemon juice, vinegar, yogurt, or buttermilk are great at tenderizing meat. It’s what makes my chicken souvlaki recipe and Greek chicken so flavorful and delicious. For the best flavor, plan ahead and marinate for at least 30 minutes to overnight.
- Bring the chicken to room temperature: If you have the time, let your chicken breasts rest for 15-30 minutes at room temperature before cooking. Cold chicken is more likely to bake unevenly, resulting in chicken that is overcooked on the outside and undercooked on the inside.
- Bake at a higher heat: I always bake my boneless, skinless chicken breasts in a preheated oven set at 425°F (220°C). Higher heat allows the chicken breasts to retain moisture and cook faster.
- Use a meat thermometer: If you do nothing else, do this. Thanks to this super basic ten-dollar digital meat thermometer from Amazon, hundreds of meaty main dishes have been saved from over or undercooking.
- Rest: After removing the chicken from the oven, allow them to rest for at least 5 minutes before slicing. This allows the juices to redistribute throughout the meat.
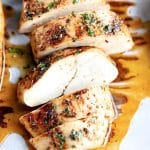
- Baste in olive oil and fresh herbs (optional): This is one of my top secret flavor tips for perfectly baked chicken breasts. Simply mix a little olive oil, minced parsley, and salt in a small bowl and slather it over the chicken after cooking. Use any type of herb you’d like (basil, thyme, oregano, rosemary)! It’s my lazy version of homemade chimichurri sauce 🙂
Step-By-Step Instructions
Below is an overview of exactly how I bake my everyday chicken breasts, start to finish. Review the tips in the section above for the best results. For printable instructions, please refer to the recipe card at the end of this post.
- Remove the chicken from the refrigerator 30 minutes before baking. If the chicken is wrapped in butcher paper, open the packaging and place them in an even layer on a large plate.
- Preheat your oven to 425°F (220°C) and line a large baking sheet with parchment paper or aluminum foil for easy clean-up.
- Pat the chicken dry with paper towels and place them in a large mixing bowl.
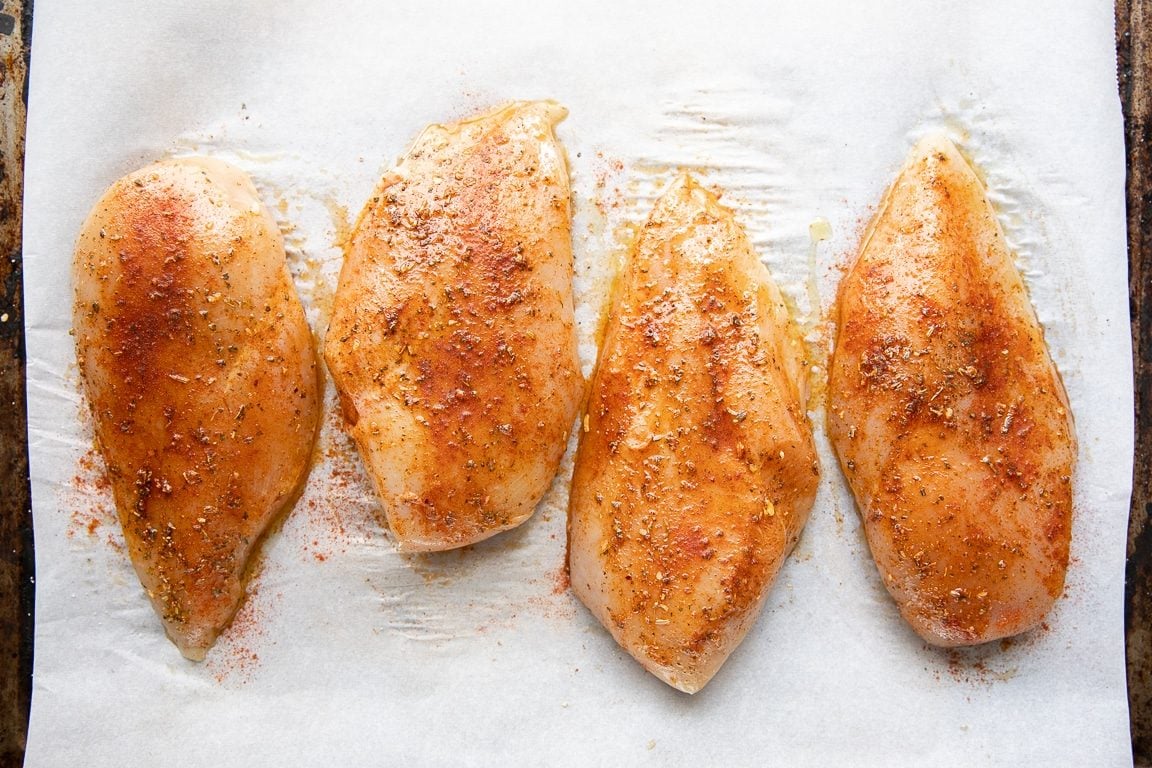
- Drizzle with about 1 tablespoon of olive oil and sprinkle with your desired seasoning mixture. Use your fingers to rub the olive oil and seasoning mixture all over the chicken breasts.
- Place the chicken on the prepared baking sheet in an even layer. Bake for 20-25 minutes or until the internal temperature registers 160-165°F as measured by a digital meat thermometer (cooking times will vary).
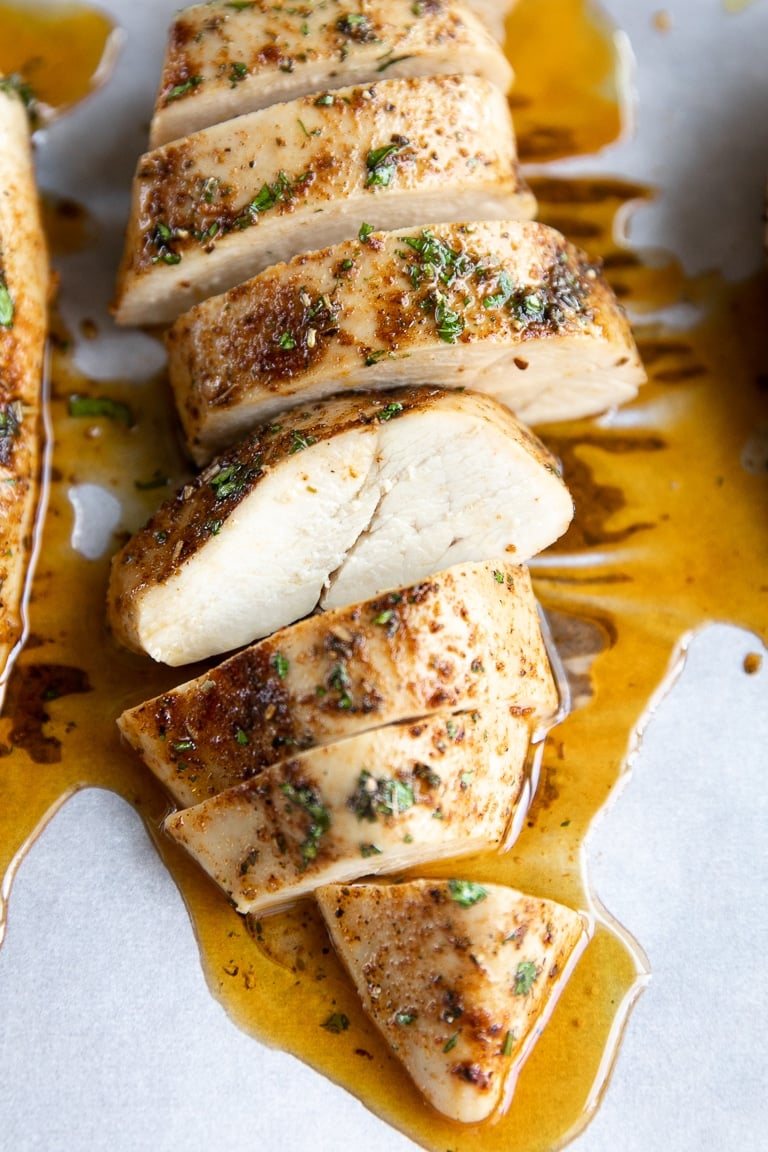
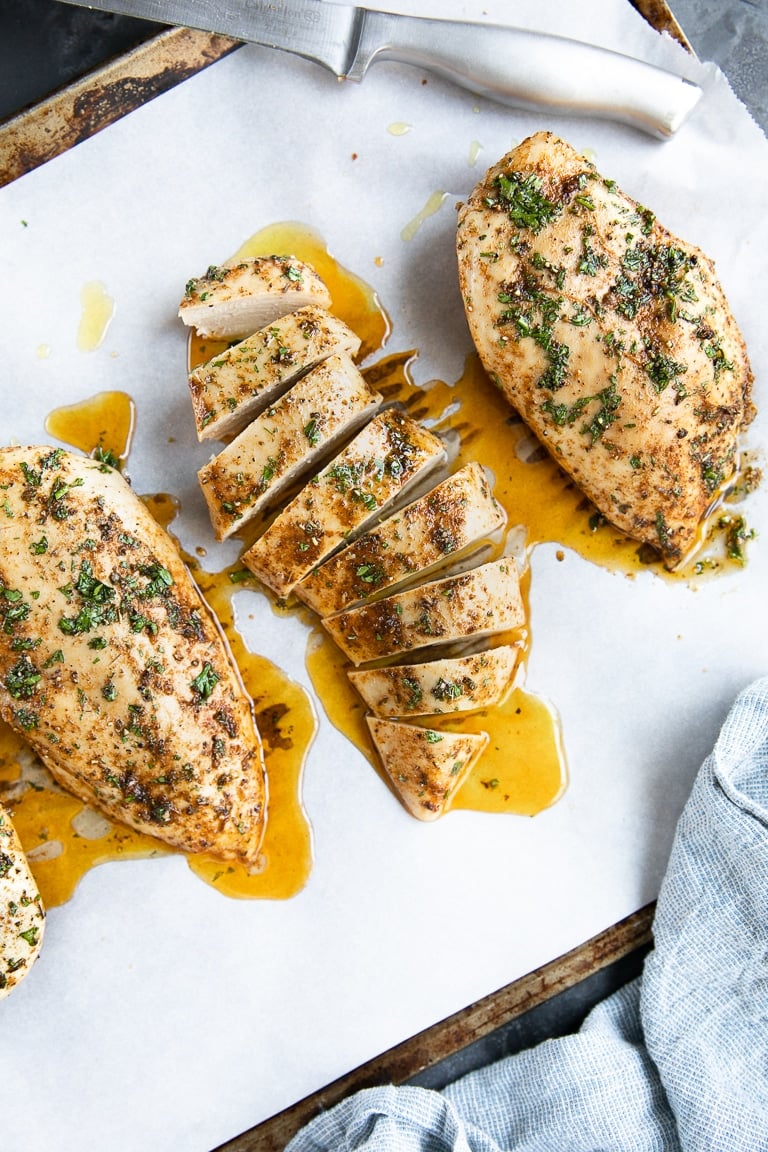
- While the chicken bakes, combine the olive oil, minced parsley, and a pinch of salt in a small bowl.
- Remove from the oven and rest for 5 minutes, then brush with the parsley and olive oil mixture, if using, and season to taste.
Should I Brine Chicken Breasts Before Baking?
When I originally wrote this post in 2019, I suggested brining chicken in a solution of water, salt, and sugar for as little as 30 minutes. I no longer find this necessary. Allowing your chicken breasts 15-30 minutes to warm to room temperature before baking and a generous coating of seasoning is much more beneficial.

Perfect Chicken Deserves the Perfect Seasoning
Even the most perfectly baked chicken breast needs a little seasoning. Here are a few ideas to take your next chicken dinner from delicious to damn delicious.
Note: Measurements are for 4 boneless, skinless chicken breasts or approximately 1.5 to 2 pounds total.
- Classic: 1 teaspoon each of garlic powder, onion powder, smoked paprika, and salt, plus ½ teaspoon black pepper.
- Brown Sugar: Very similar to my baked pork chops recipe, the simple seasoning rub includes 2 teaspoons of brown sugar, 1 teaspoon each of garlic powder, onion powder, sweet or smoked paprika, and salt, plus ½ teaspoon black pepper.
- Cajun: Use 1-1½ tablespoons of my homemade Cajun seasoning recipe to transform simple chicken breasts into a bold and delicious dinner of your dreams. Especially delicious added to this Cajun chicken Alfredo.
- Poultry seasoning: For extra savory flavor, add approximately1½ tablespoons of my homemade poultry seasoning. Note that this recipe does not include salt or black pepper, so be sure to adjust to taste.
- BBQ: This simple, sweet, and smoky BBQ dry rub is perfect for baked chicken breasts. You’ll need, 2 teaspoons brown sugar; 1½ teaspoons smoked paprika; 1 teaspoon garlic powder + onion powder; ½ teaspoon of chili powder, ground cumin, and salt; and ¼ teaspoon black pepper
Serving Ideas and Leftovers
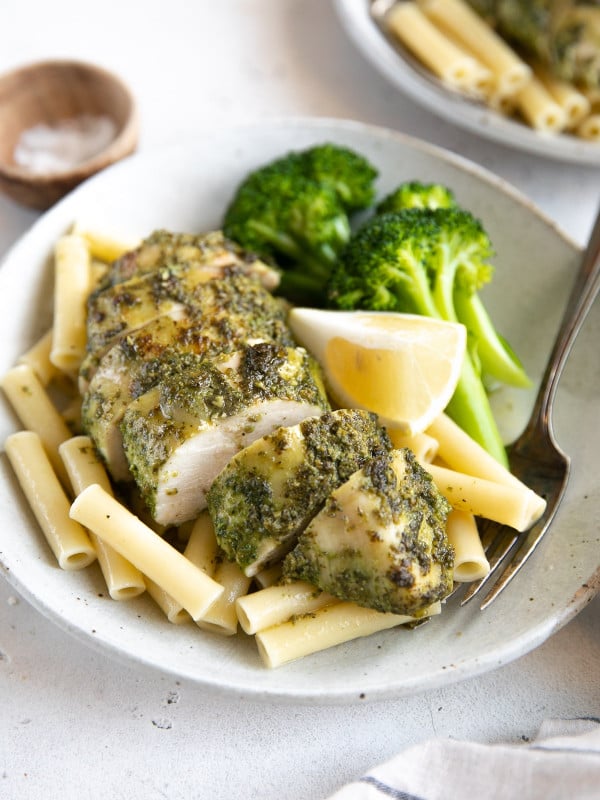
There are so many ways to serve this tasty, juicy chicken breast recipe. You can chop, shred, slice, and meal prep for countless recipes.
Just after baking chicken breasts, I take full advantage of their peak flavor and juiciness and serve them just as they are with veggie sides like roasted zucchini or roasted acorn squash. One of my son’s favorite meals is baked chicken coated in homemade shake and bake seasoning, served with roasted potatoes and carrots. It’s an easy dinner, and the leftovers make a great lunch the next day.
Speaking of leftovers, baked chicken breasts make the best leftovers. I typically bake 6 to 8 pounds at a time to get my family through the week, and not one bit is wasted.
First, I use leftovers in salads and sandwiches. Chopped or shredded chicken works well in almost any salad! Try it in my favorite buffalo chicken salad recipe or stuffed into these 15-minute Mediterranean chicken wraps.
After a few days in the refrigerator, I shred whatever’s left and repurpose it into something warm and comforting like a soup or a casserole. Stir it into homemade chicken noodle soup, white chicken chili, or mix it into this reader-favorite crack chicken casserole recipe.
Storage, Freezing, and Reheating Tips
Once you bake your chicken breasts, you have about 5 days to serve, consume, or repurpose them. For best results, wait to chop, slice, or shred any leftover baked chicken until you know how you plan to use them.
As a general rule, I never chop or slice leftover cooked chicken until I’m ready to reheat and serve. This is to prevent the chicken from drying out. Shredding chicken ahead is an exception to this rule, since I typically freeze shredded chicken right away, or use it in creamy baked casseroles, soups, or mixed with sauce.
I almost exclusively reheat baked chicken in the microwave, sorry, not sorry. The key is to slice the whole chicken breast into thick slices before microwaving. This allows for even cooking. Microwaving the entire baked chicken breast will result in a dry and chewy overcooked exterior, and barely warm interior.
You can freeze whole, chopped, sliced, or shredded baked chicken breasts; but sliced or shredded chicken thaws and reheats best (in my opinion). Always allow your chicken to cool completely before transferring to freezer-safe containers or ziplock bags to prevent freezer burn and freeze for up to 2 to 3 months.
For best results, thaw your frozen baked chicken overnight in the refrigerator, unless you plan on adding it to soup. I have added both fully thawed and completely frozen shredded chicken to the soup and noticed no difference.
More Chicken Recipes


Oven-Baked Chicken Breasts Recipe
Ingredients
- 4 boneless skinless chicken breasts, about 1½-2 pounds
- 1-2 tablespoon olive oil
- 2 teaspoon Cajun seasoning
- 2 teaspoon sweet paprika
- ½ teaspoon salt, plus more to taste
- ½ teaspoon freshly ground black pepper
- 2 tablespoon fresh parsley, minced, optional
Instructions
- Approximately 20-30 minutes before baking, remove the chicken breasts from the refrigerator and allow them to rest at room temperature.
- Preheat the oven to 425℉ (220˚C) and line a large baking sheet with parchment paper or aluminum foil. Set aside.
- Pat the chicken breasts dry with paper towels and transfer them to a large bowl. Drizzle with 1-2 tablespoons of olive oil and sprinkle with Cajun seasoning, paprika, salt, and black pepper. Use your fingers to gently rub the olive oil and seasoning over the entire surface of the chicken breasts.
- Transfer the seasoned chicken breasts to the prepared baking sheet in a single layer, making sure the chicken breasts aren't touching.
- Bake for 20-25 minutes, or until the internal temperature reads 160-165℉ with a digital thermometer. Cooking time will vary depending on size and thickness.
- Remove from the oven and rest for 5 minutes before serving.
Notes
- ½-inch thick: 15-18 minutes
- ¾-inch thick: 18-20 minutes
- 1-inch thick: 20-25 minutes
- 1½-inches or more: 25-30 minutes
Nutrition
Nutrition information is automatically calculated, so should only be used as an approximation.


So delicious and easy!!
Thank you so much, Corrie! I am so glad you enjoyed it and found it easy to make. 🙂
Can you use boneless pork chops in the same manner
Hi Michael, this is an excellent question as I have not tried it with boneless pork chops. Pork chops are on my list of proteins to experiment with so I’ll have to get back to you, but I don’t see why not. Just be sure to check the internal temperature with a thermometer instead of cutting through with a knife. Thanks for the question!