This post may contain affiliate links. See my disclosure policy.

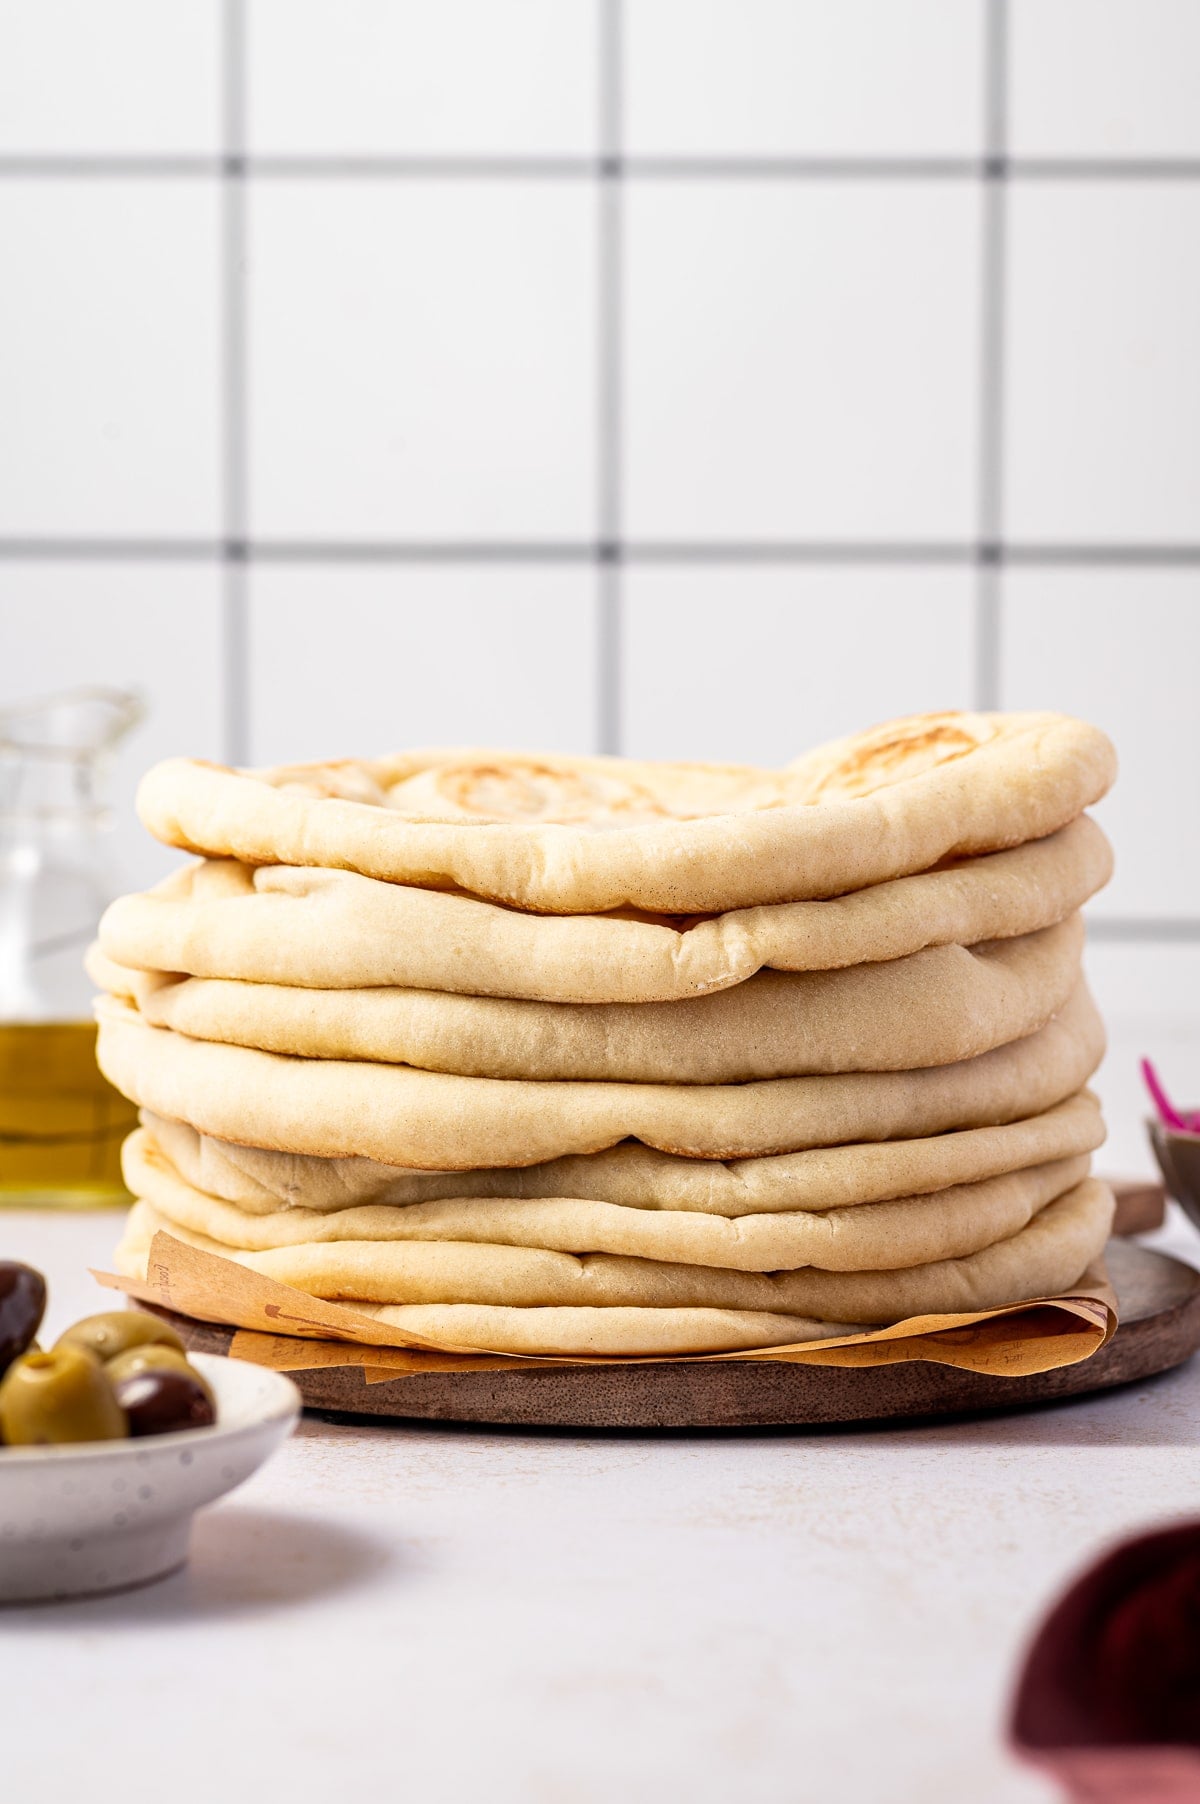
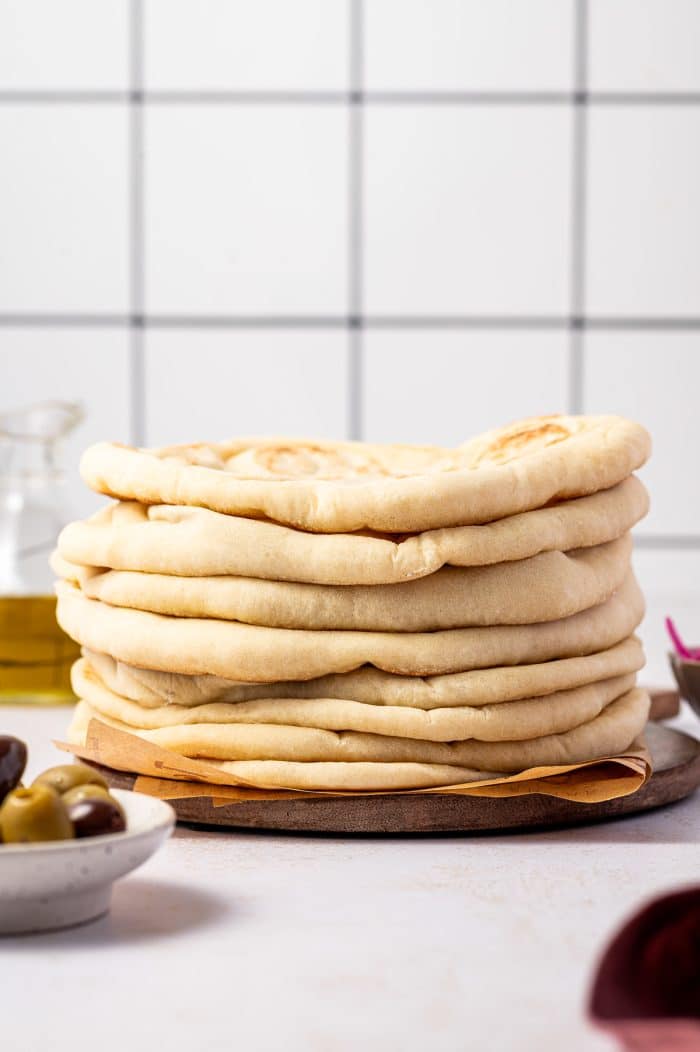
This easy Homemade Pita Bread Recipe makes soft, fluffy pita with simple ingredients like flour, yeast, olive oil, and warm water. Cook them in a hot skillet for soft, chewy flatbread or bake them in the oven for puffy pita pockets perfect for stuffing, dipping, and serving with your favorite Mediterranean-inspired meals.
About this Pita Bread Recipe
Flour, yeast, warm water, olive oil, sugar, and salt are all you need to make soft and fluffy homemade pita bread. It’s usually cheaper than buying pita bread at the store and tastes a million times better. Plus, this super easy recipe uses instant yeast, so there is no need to proof the yeast separately before mixing the dough. Just combine the dry ingredients, add warm water and olive oil, knead, let it rise, then roll and cook.
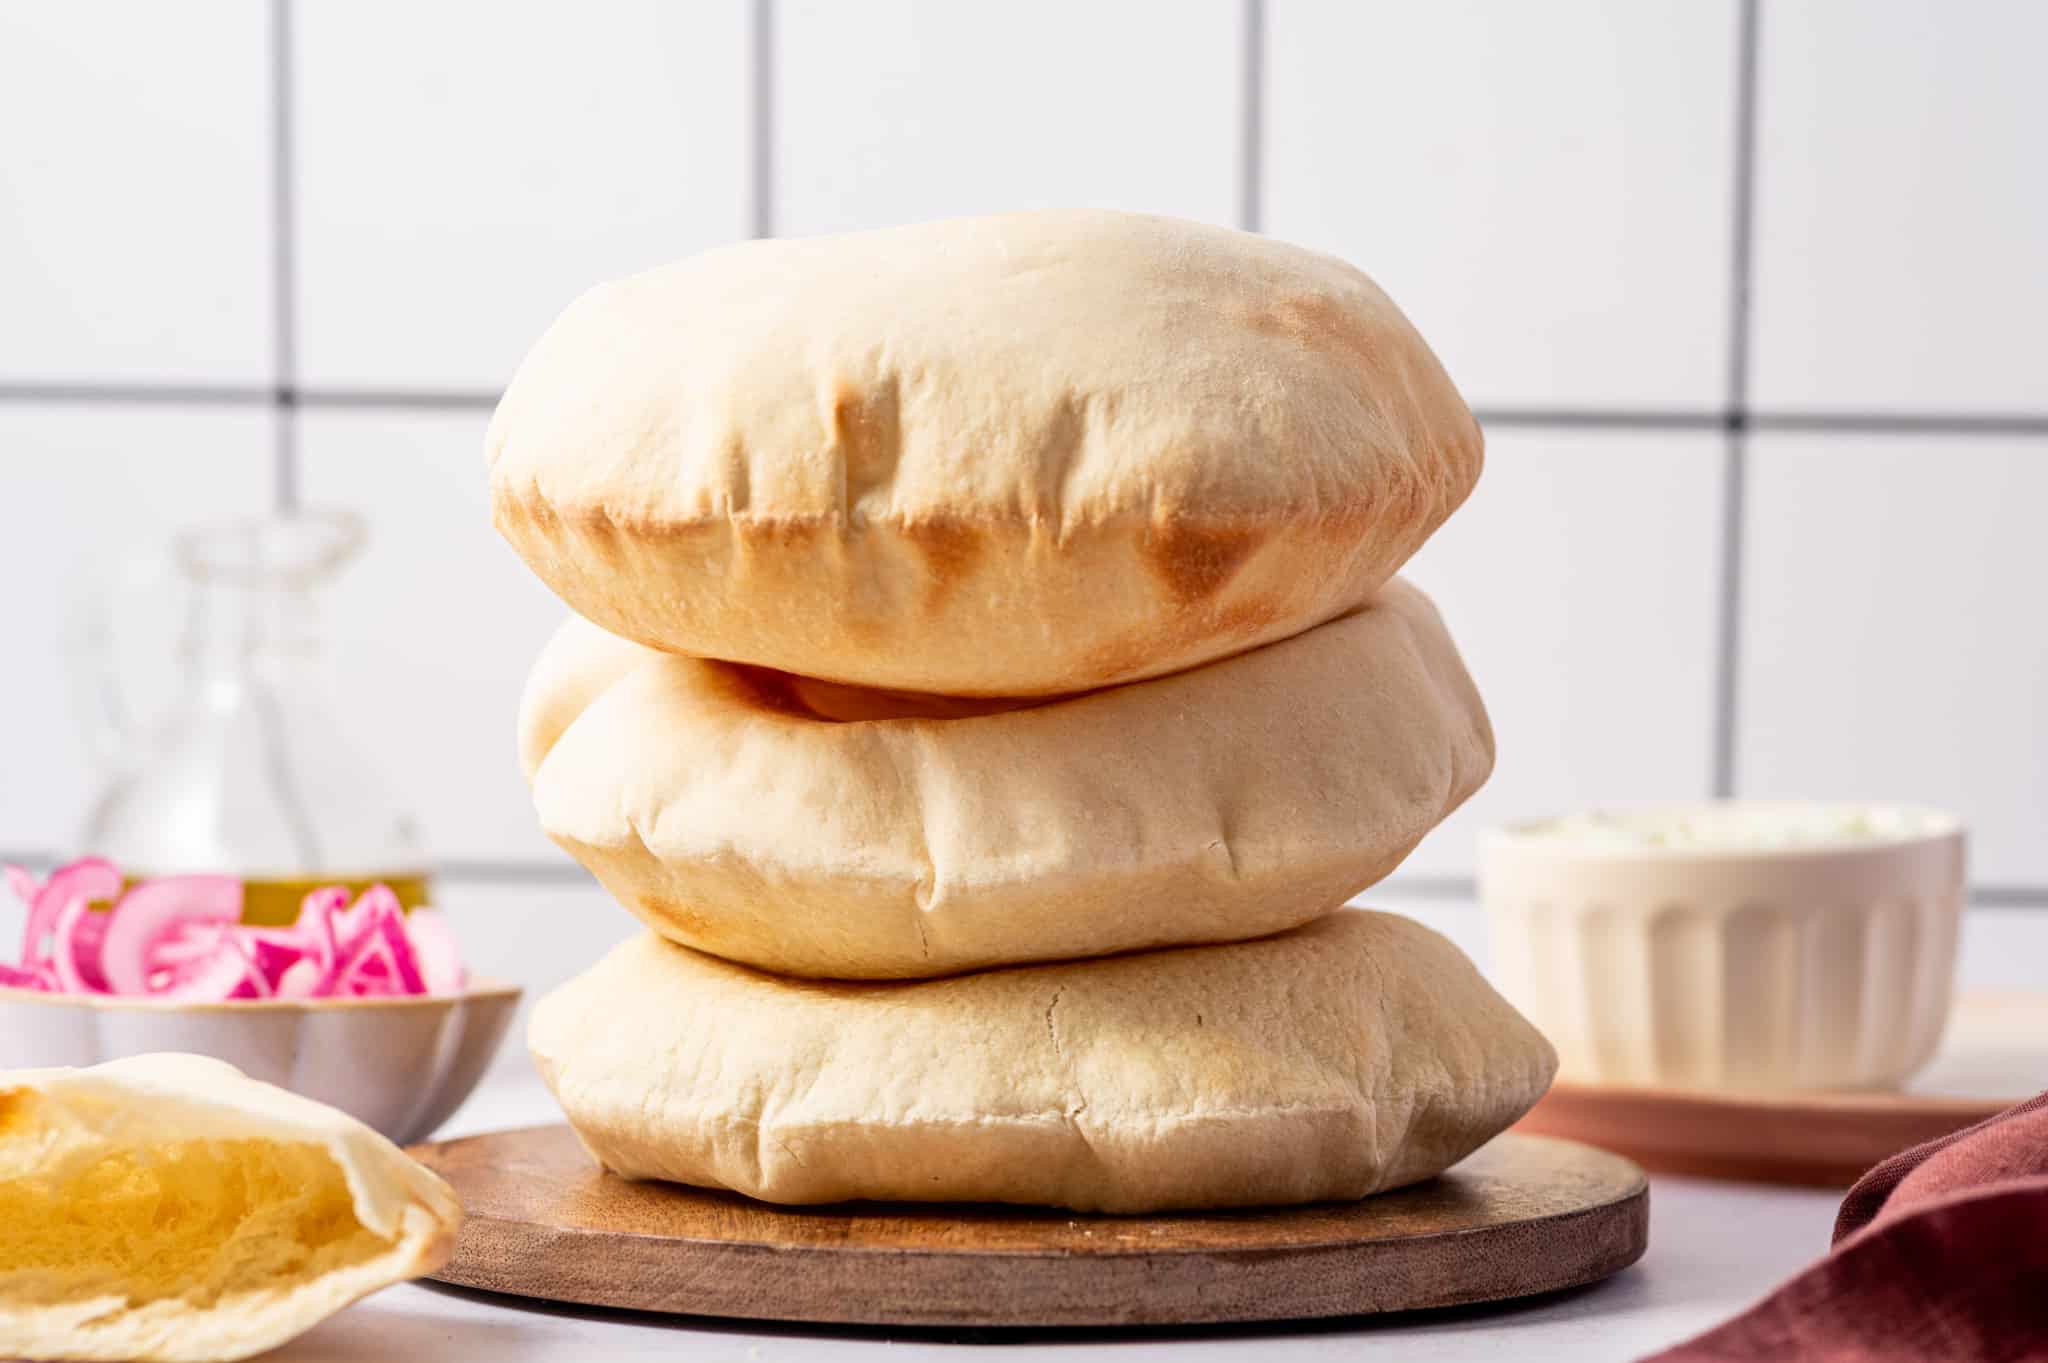
You can make this pita bread two ways: in a hot skillet or in the oven. The stovetop method makes soft, chewy pita with golden brown spots, while the oven method is best for puffy pita pockets. Both methods are easy, delicious, and freezer-friendly, so use whichever one works best for you.
This pita bread is a favorite whenever I make chicken gyro wraps, chicken souvlaki, or oven-baked chicken shawarma for dinner. It is also perfect for scooping up hummus and baba ganoush or serving alongside these chicken shawarma bowls.
Table of Contents
Ingredients for Homemade Pita Bread
You only need a few simple ingredients to make soft, fluffy homemade pita bread.
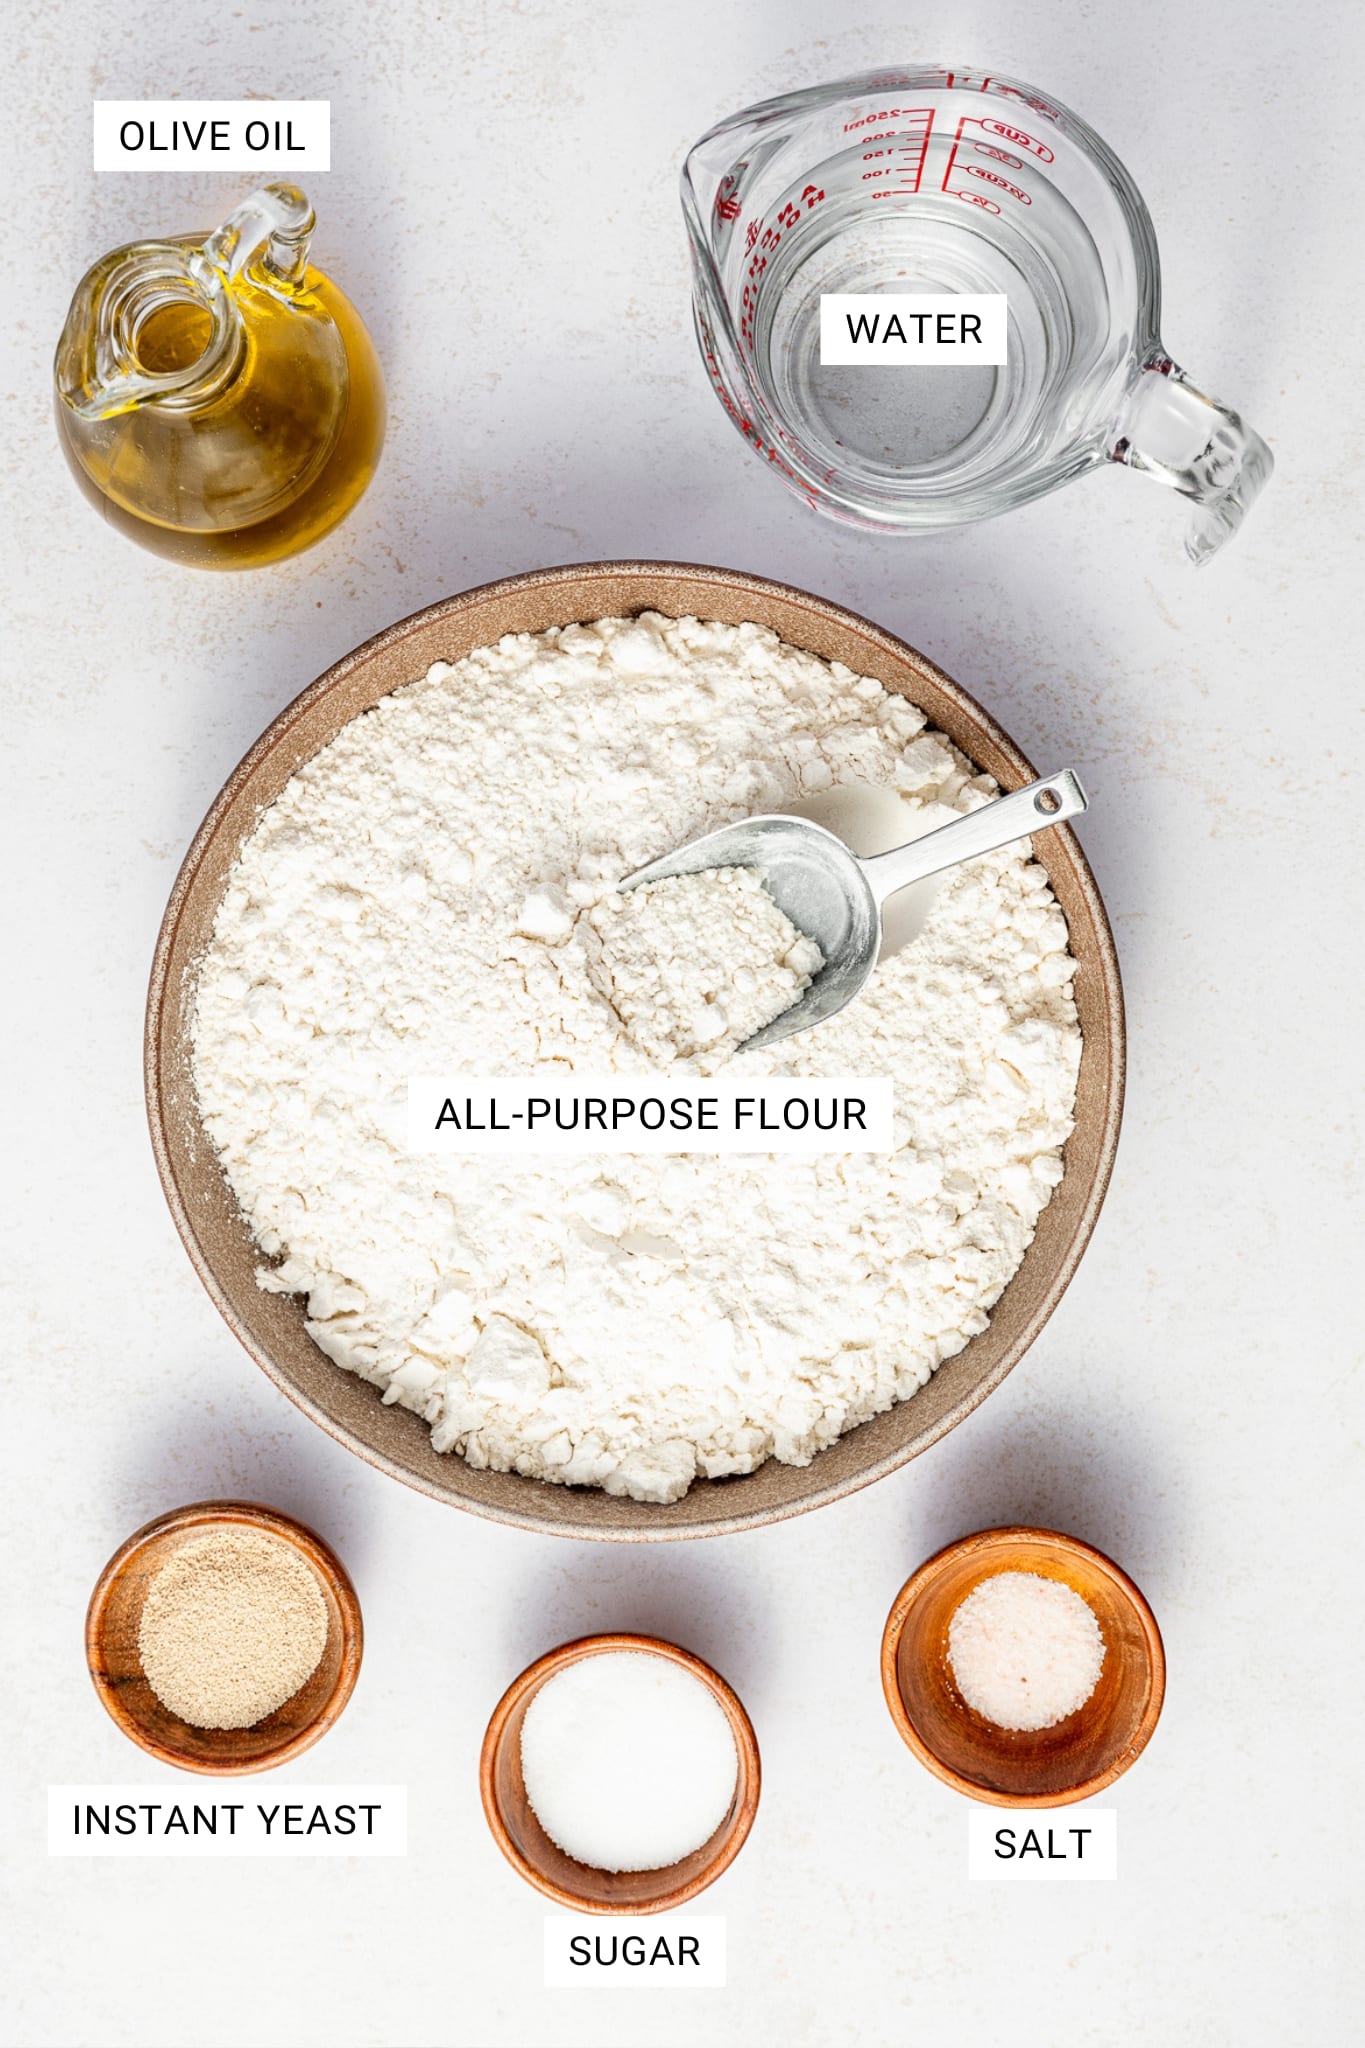
- All-purpose flour: The base of the dough. For best results, measure the flour with a kitchen scale or spoon and level it into the measuring cup to avoid adding too much.
- Instant yeast: Instant yeast can be mixed directly into the dry ingredients, so there is no need to proof it first.
- Salt: Adds flavor and helps balance the dough.
- Sugar: Feeds the yeast and helps the pita brown as it cooks.
- Olive oil: Adds flavor and helps keep the pita soft and tender.
- Warm water: Use warm water between 105-110°F to help activate the yeast and bring the dough together.
Substitutions and Variations
- Active dry yeast: You can use active dry yeast instead of instant yeast. Proof it in the warm water with the sugar for 5-10 minutes first, or until foamy, then mix it with the remaining ingredients.
- Whole wheat flour: Start with half whole wheat flour and half all-purpose flour. Using all whole wheat flour may make the pita more dense.
- Bread flour: Bread flour can be used for a slightly chewier pita.
How to Make Homemade Pita Bread
This homemade pita bread starts with a simple yeast dough, then can be cooked on the stovetop or baked in the oven.
Step 1: Mix the dough


Whisk together the flour, instant yeast, salt, and sugar in a large mixing bowl (or the bowl of a stand mixer) until well combined. Make a small well in the center of the flour mixture. Pour the olive oil and warm water (ideally 105-110°F) into the well. Use a sturdy wooden spoon or spatula to gradually stir the flour into the liquid, working from the edges inward. Continue mixing until a rough, shaggy dough begins to form and no dry flour remains.
Step 2: Knead until smooth
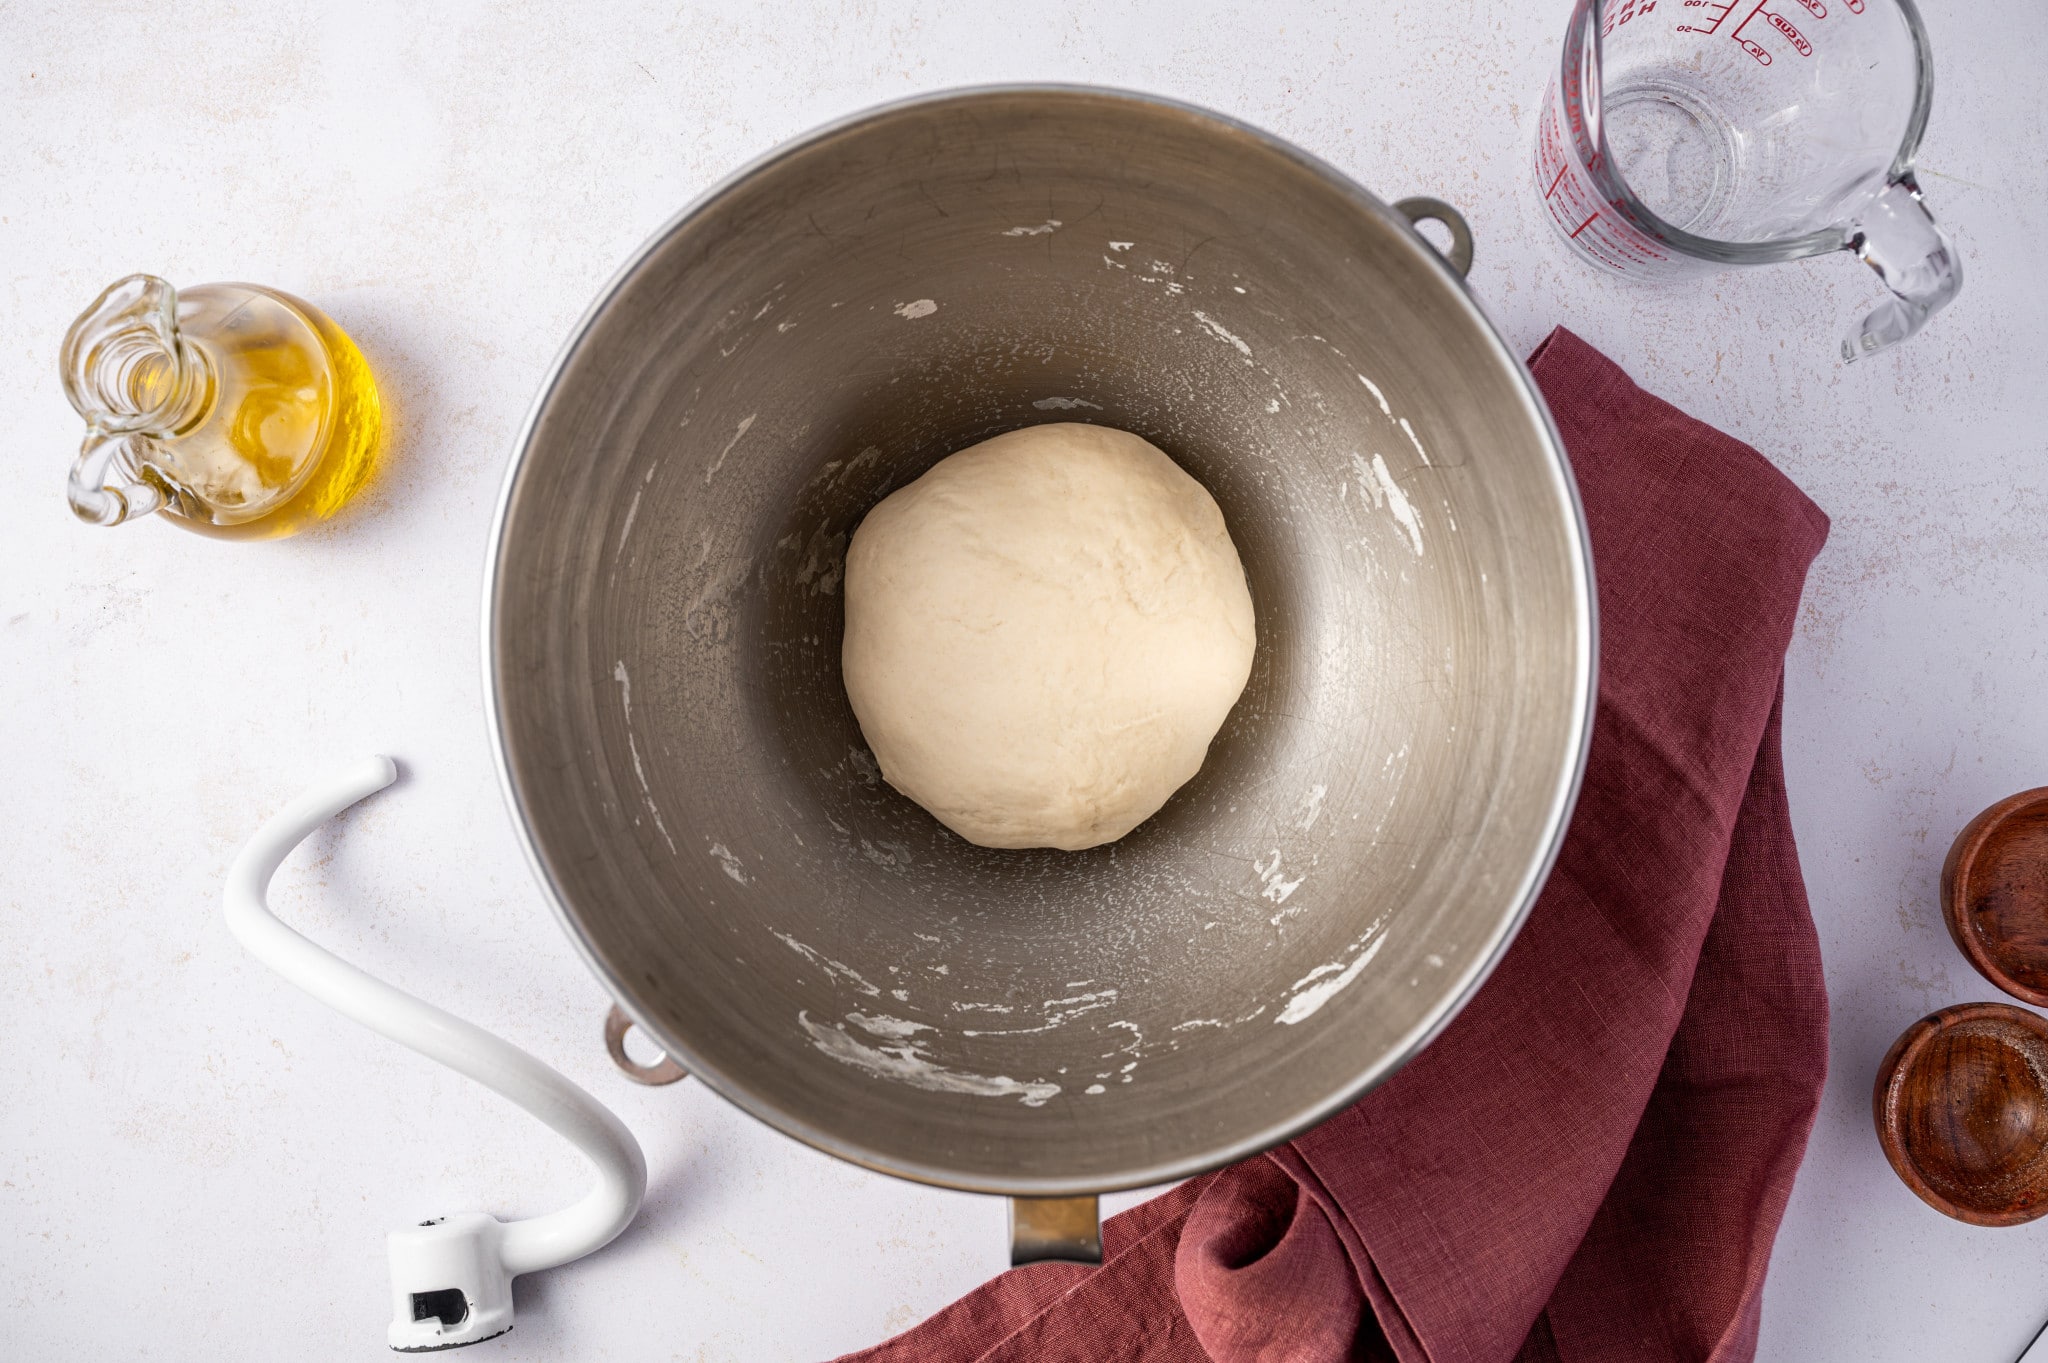
Knead the dough with a dough hook on medium speed for 7-8 minutes, or by hand on a lightly floured surface for 10-12 minutes. The dough should become smooth, elastic, and slightly tacky, but not wet. You’ll know it’s ready when it springs back after being gently pressed and can be shaped into a smooth, cohesive ball.
Step 3: Let the dough rise

Lightly oil a clean, large bowl and place the kneaded dough inside. Turn the dough once to coat all sides with oil. This keeps it from drying out and helps it rise evenly. Cover the bowl with a damp kitchen towel or plastic wrap and let it rise in a warm, draft-free place for about 1 hour, or until doubled in size. If your kitchen is cold, you can warm your oven to the lowest setting for 1 minute, turn it off, then place the dough inside to proof.
Step 4: Divide and shape
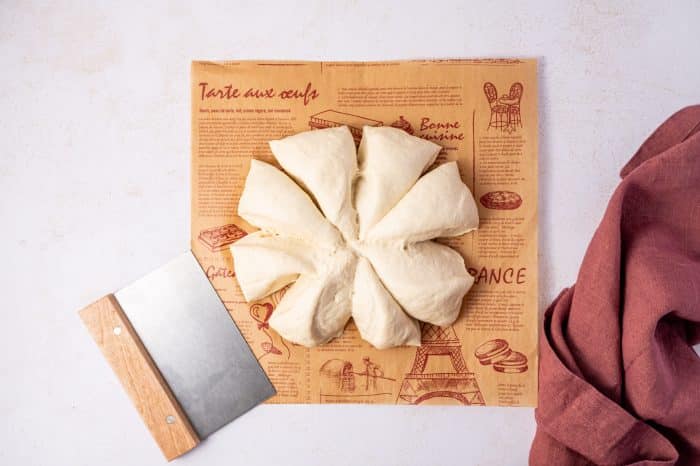
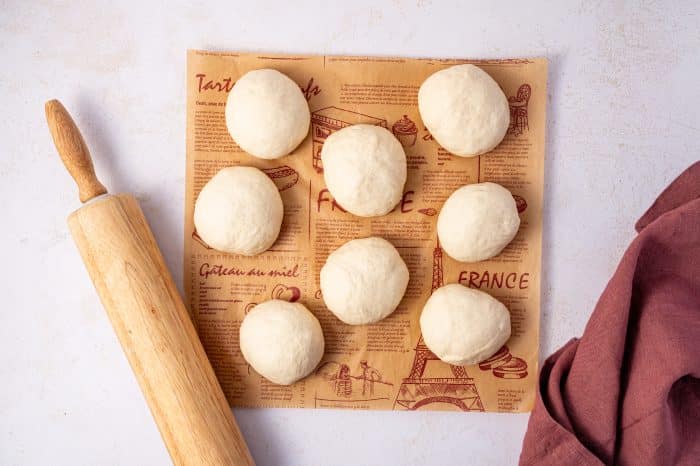
Gently punch down the dough to release the air, then transfer it to a lightly floured surface. Divide the dough into 8 equal pieces and shape each piece into a smooth ball.
Step 5: Roll into circles
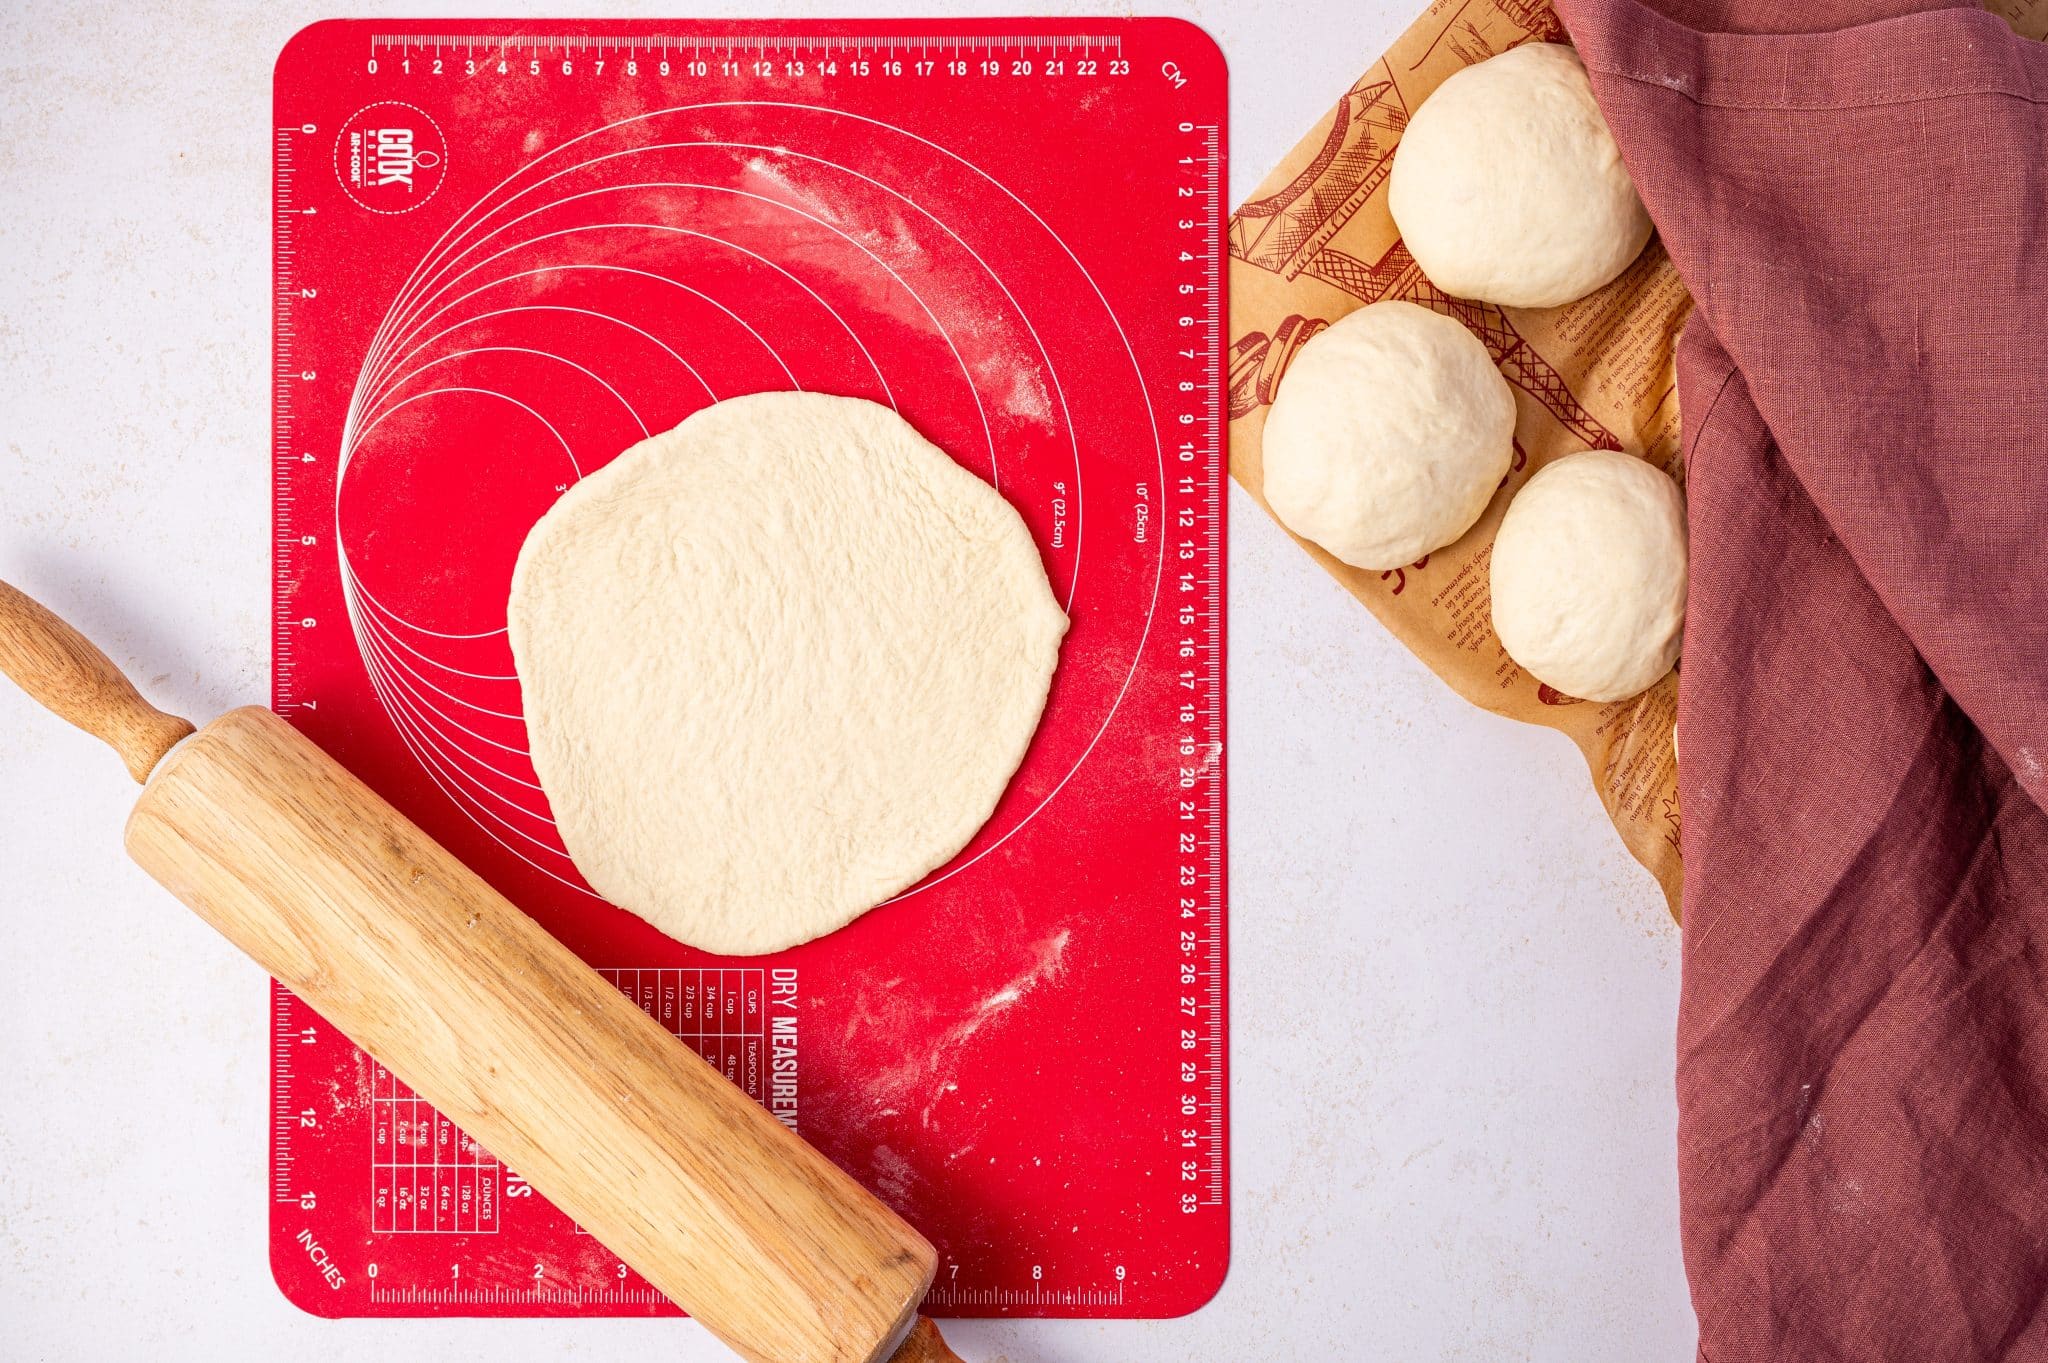
Use a rolling pin to roll each dough ball into a circle about 1/4-inch thick and 6-7 inches wide. Try to keep the thickness as even as possible so the pita cooks evenly and has the best chance of puffing.
Place the rolled pita rounds on a lightly floured surface or parchment paper. Cover with a clean kitchen towel and let them rest for 15 minutes before cooking.
Step 6: Cook on the stovetop or bake in the oven
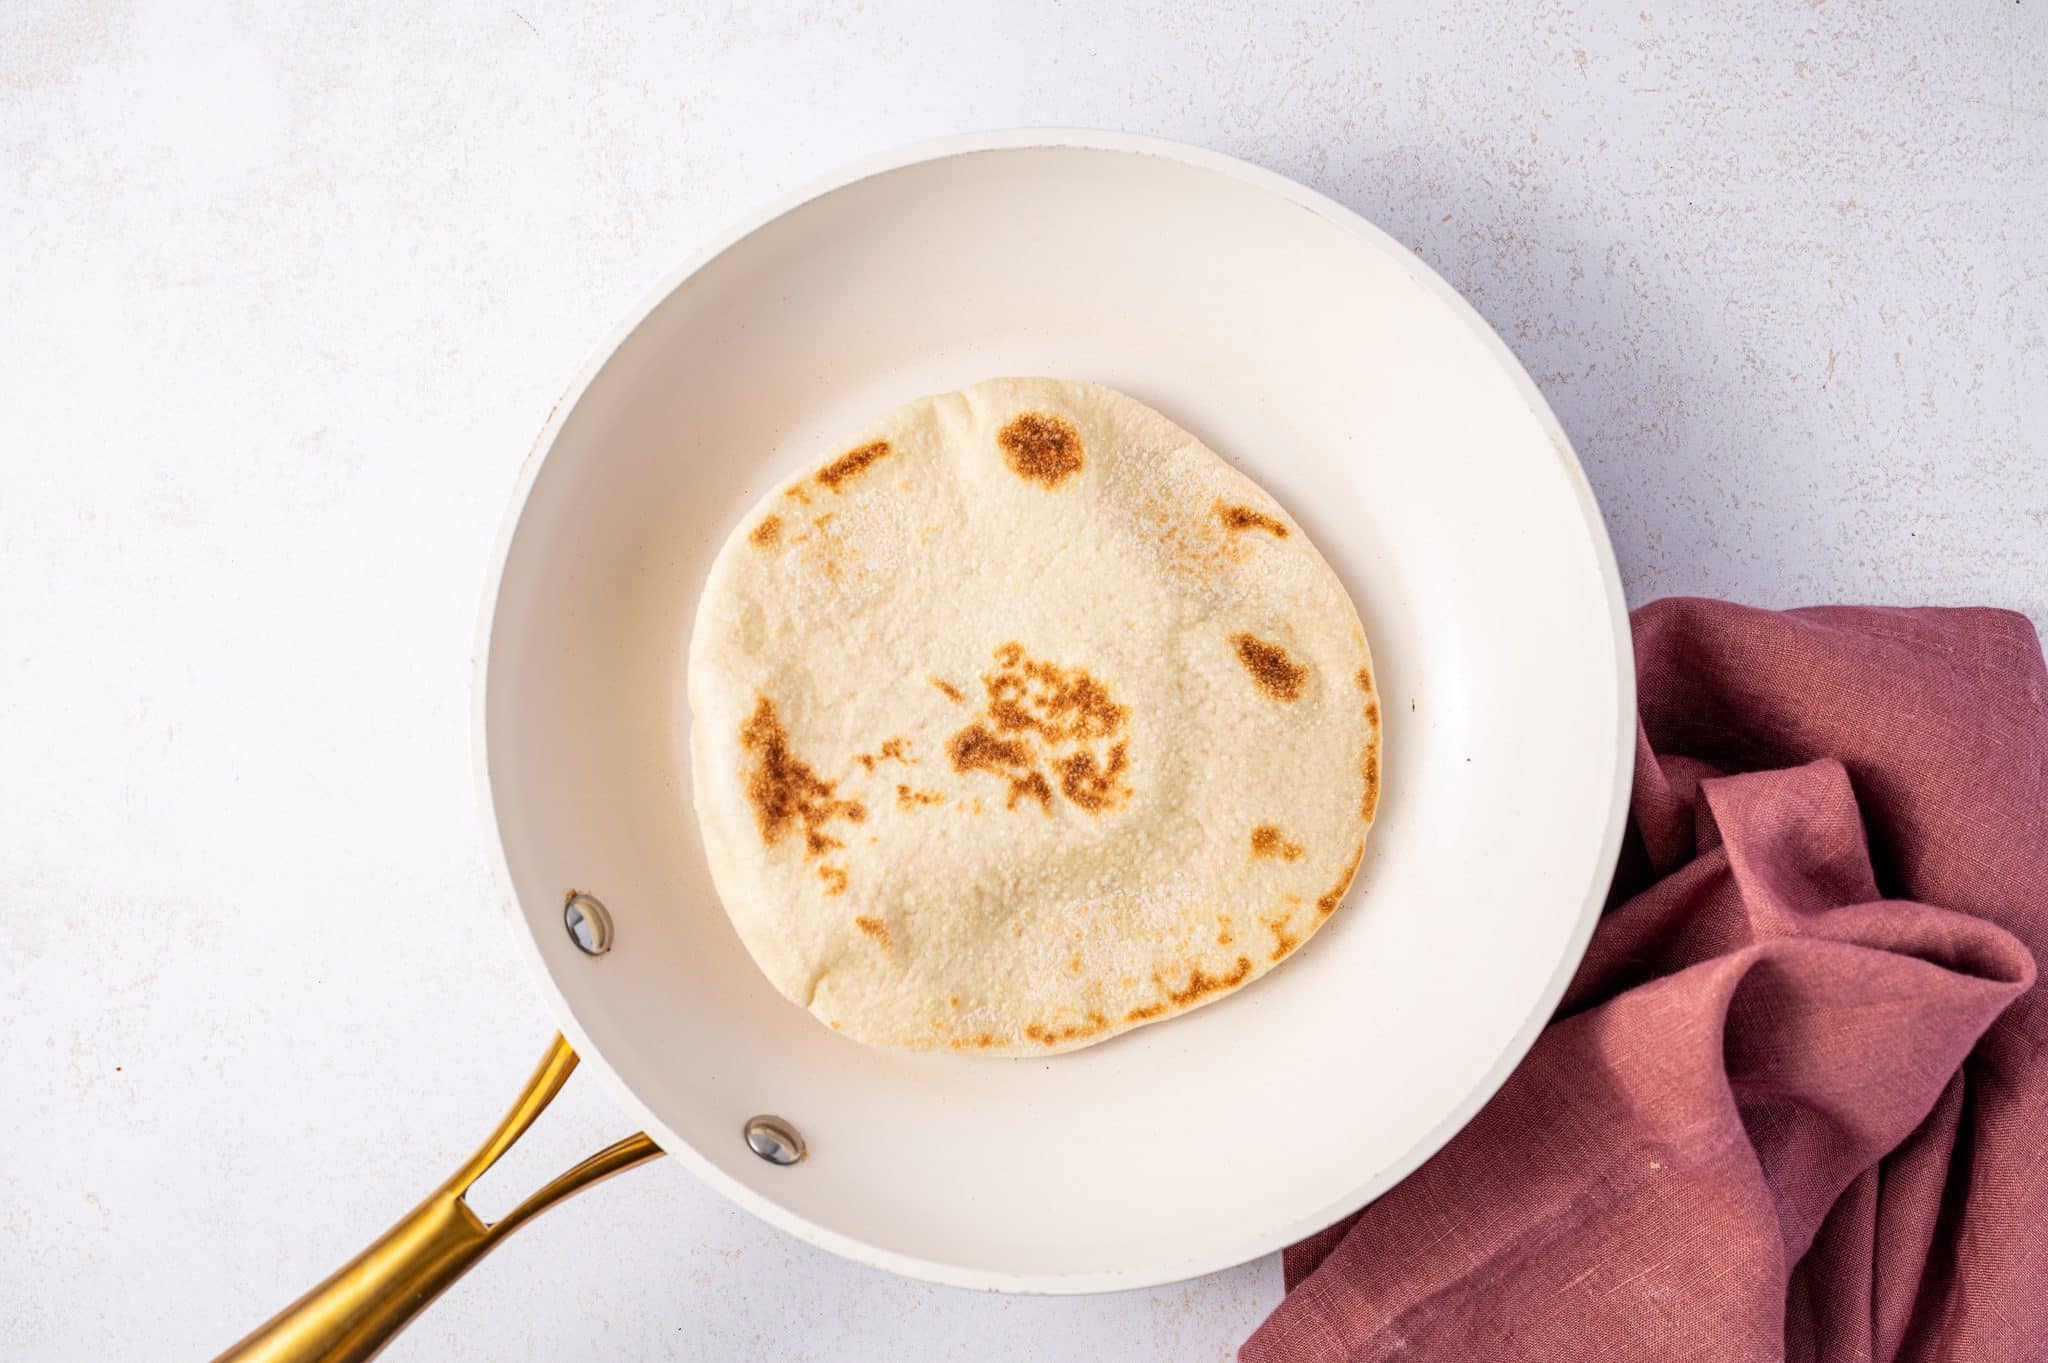
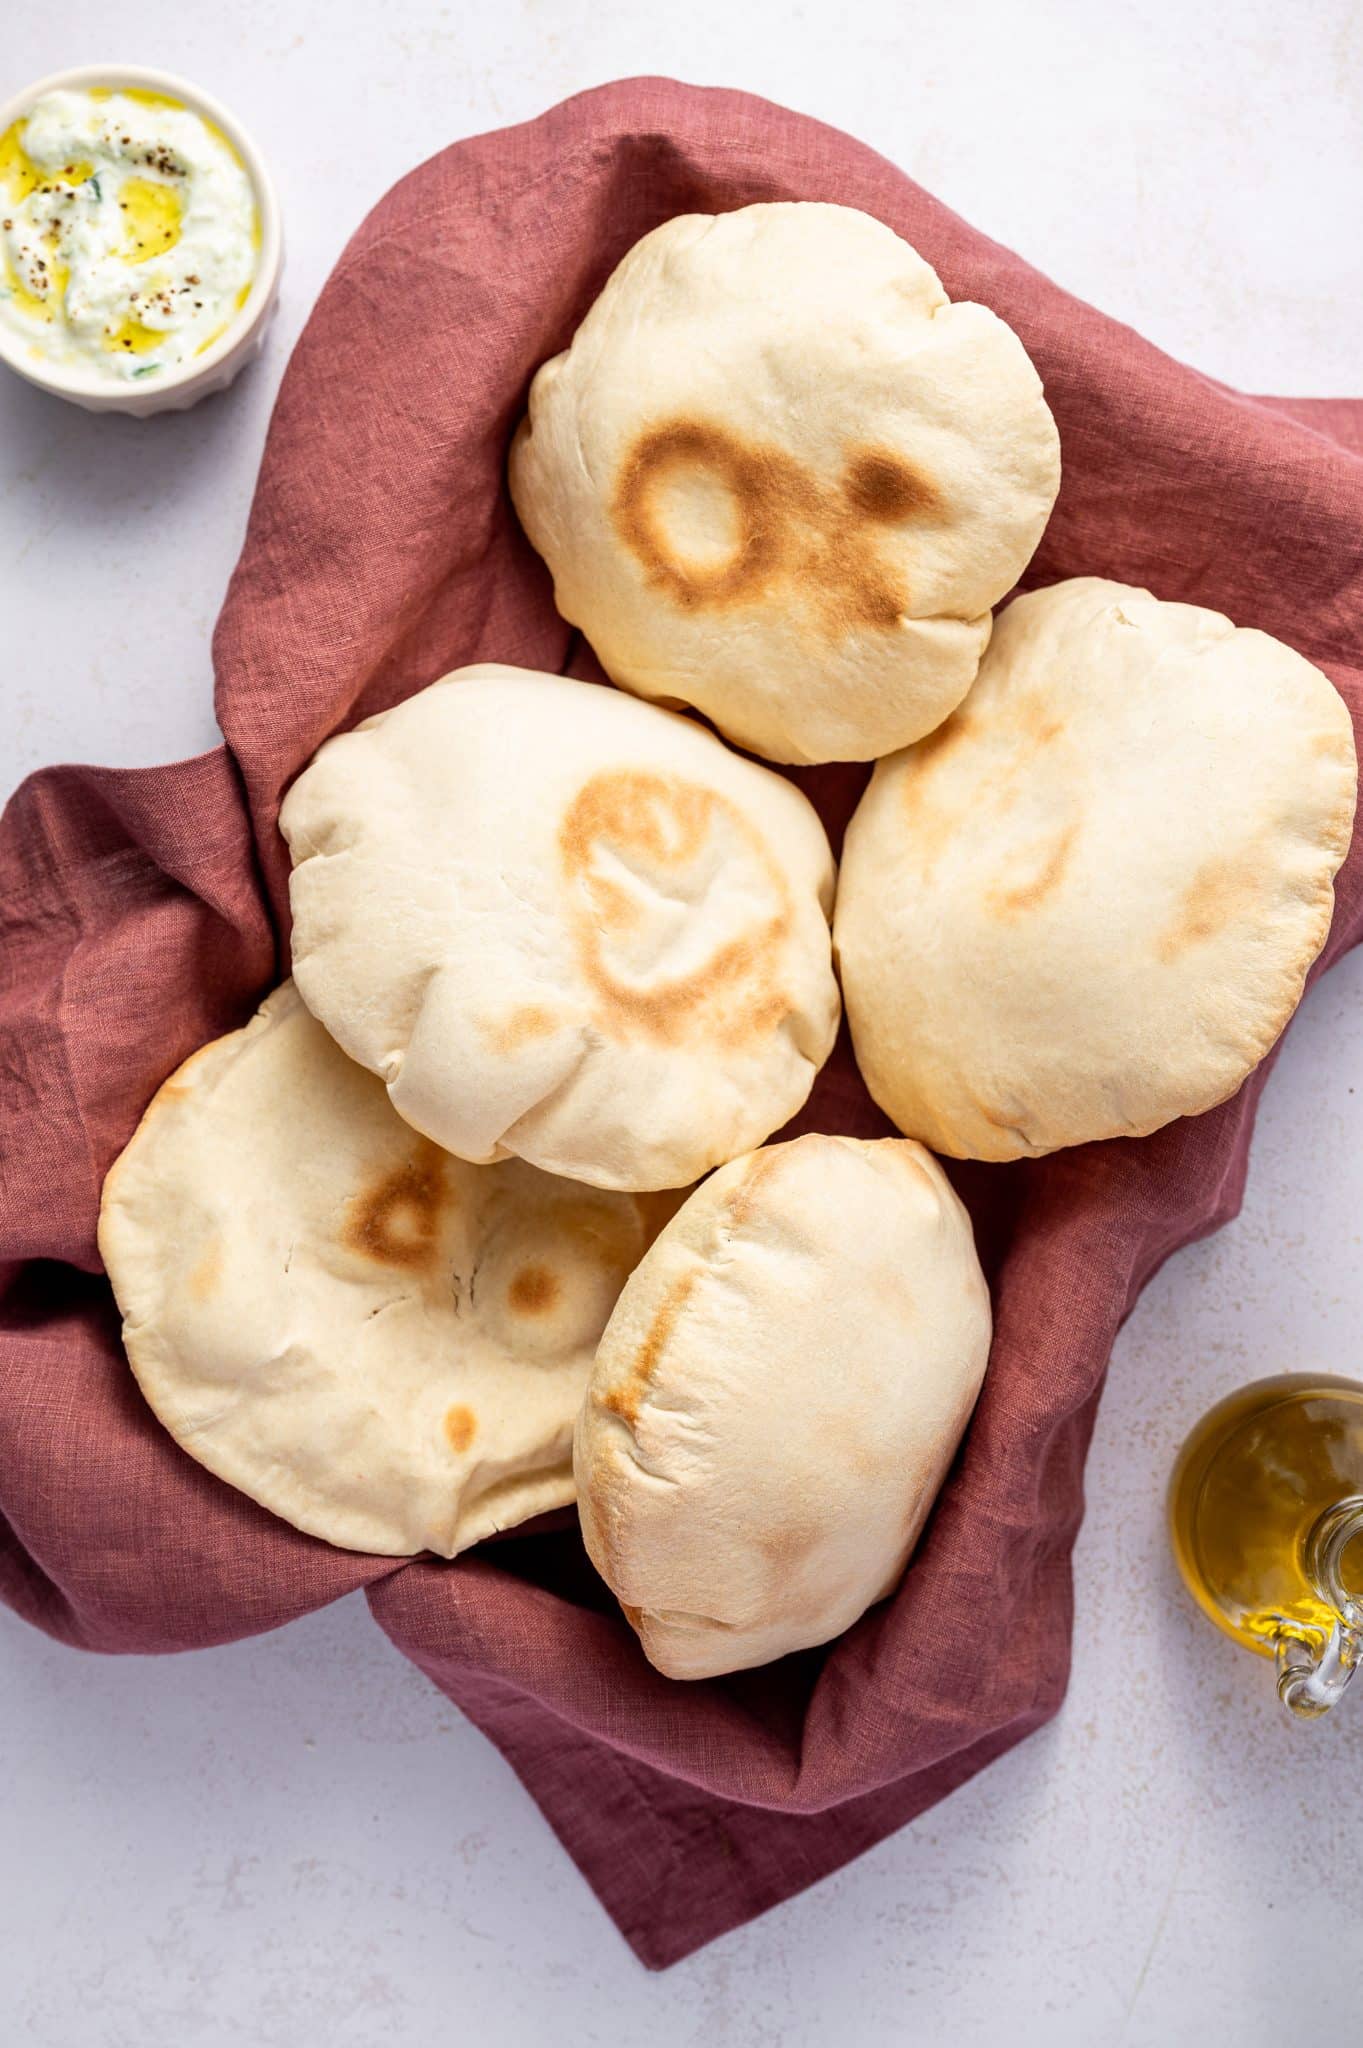
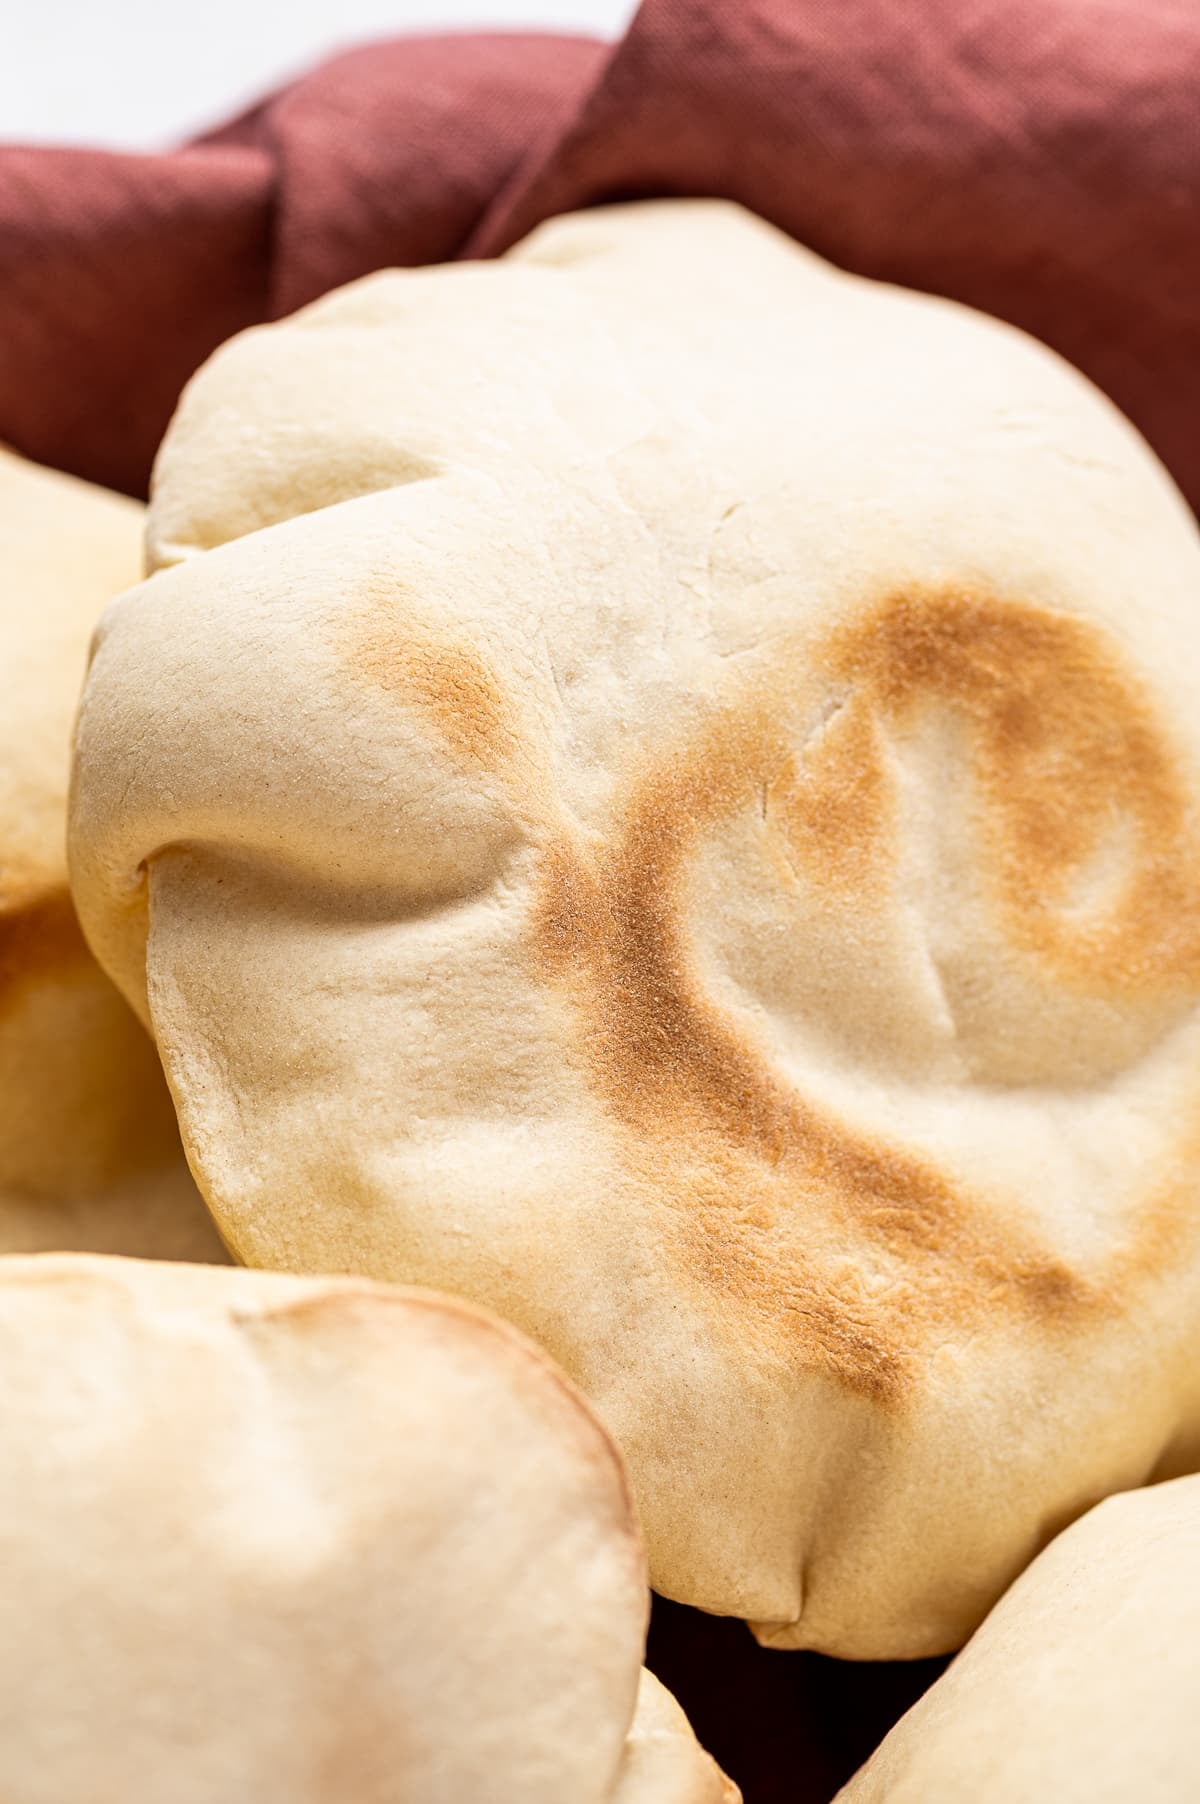
To cook pita on the stovetop, preheat a cast iron or nonstick skillet over medium-high heat until very hot. Add one pita round and cook for 1-2 minutes, or until bubbles form and the bottom is golden brown. Flip and cook for another 1-2 minutes, then repeat with the remaining dough. Resist the urge to press the dough. Steam is what creates the signature pocket.
- Stovetop pita is best for soft, chewy everyday pita, wraps, and dipping. Flip once after bubbles form and the bottom is lightly browned.
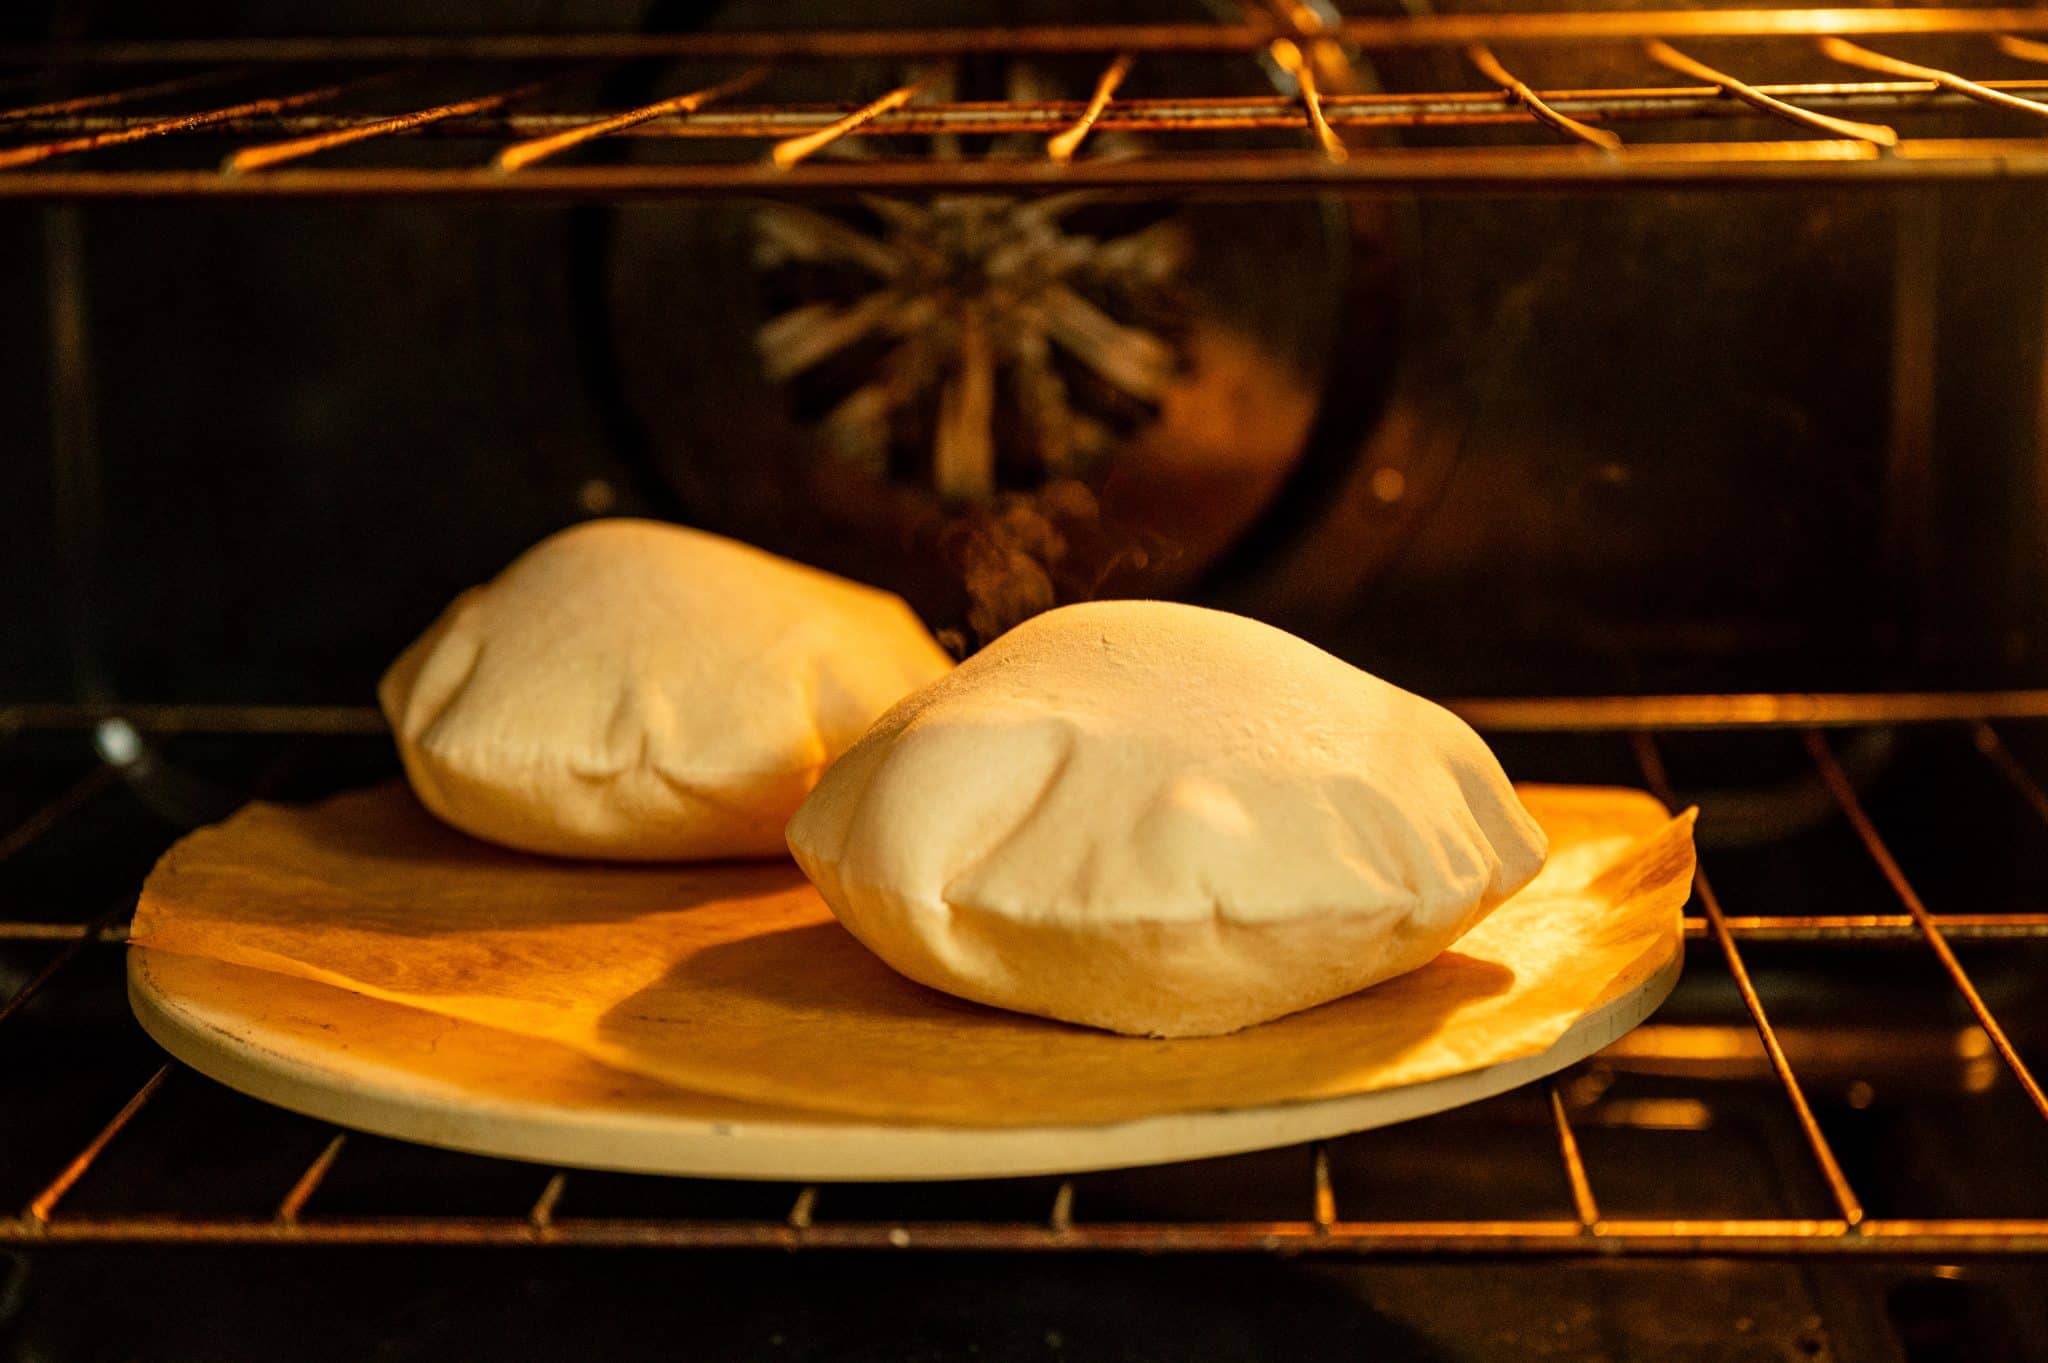
To bake pita in the oven, preheat the oven to 475°F with a pizza stone or heavy-duty baking sheet inside. Carefully place 1-2 dough rounds on the hot surface and bake for 3-4 minutes, or until puffed and lightly golden. Remove right away to prevent the pita from drying out.
- Baked pita is best if you want pitas that puff into pockets. Use a very hot pizza stone or heavy-duty baking sheet.
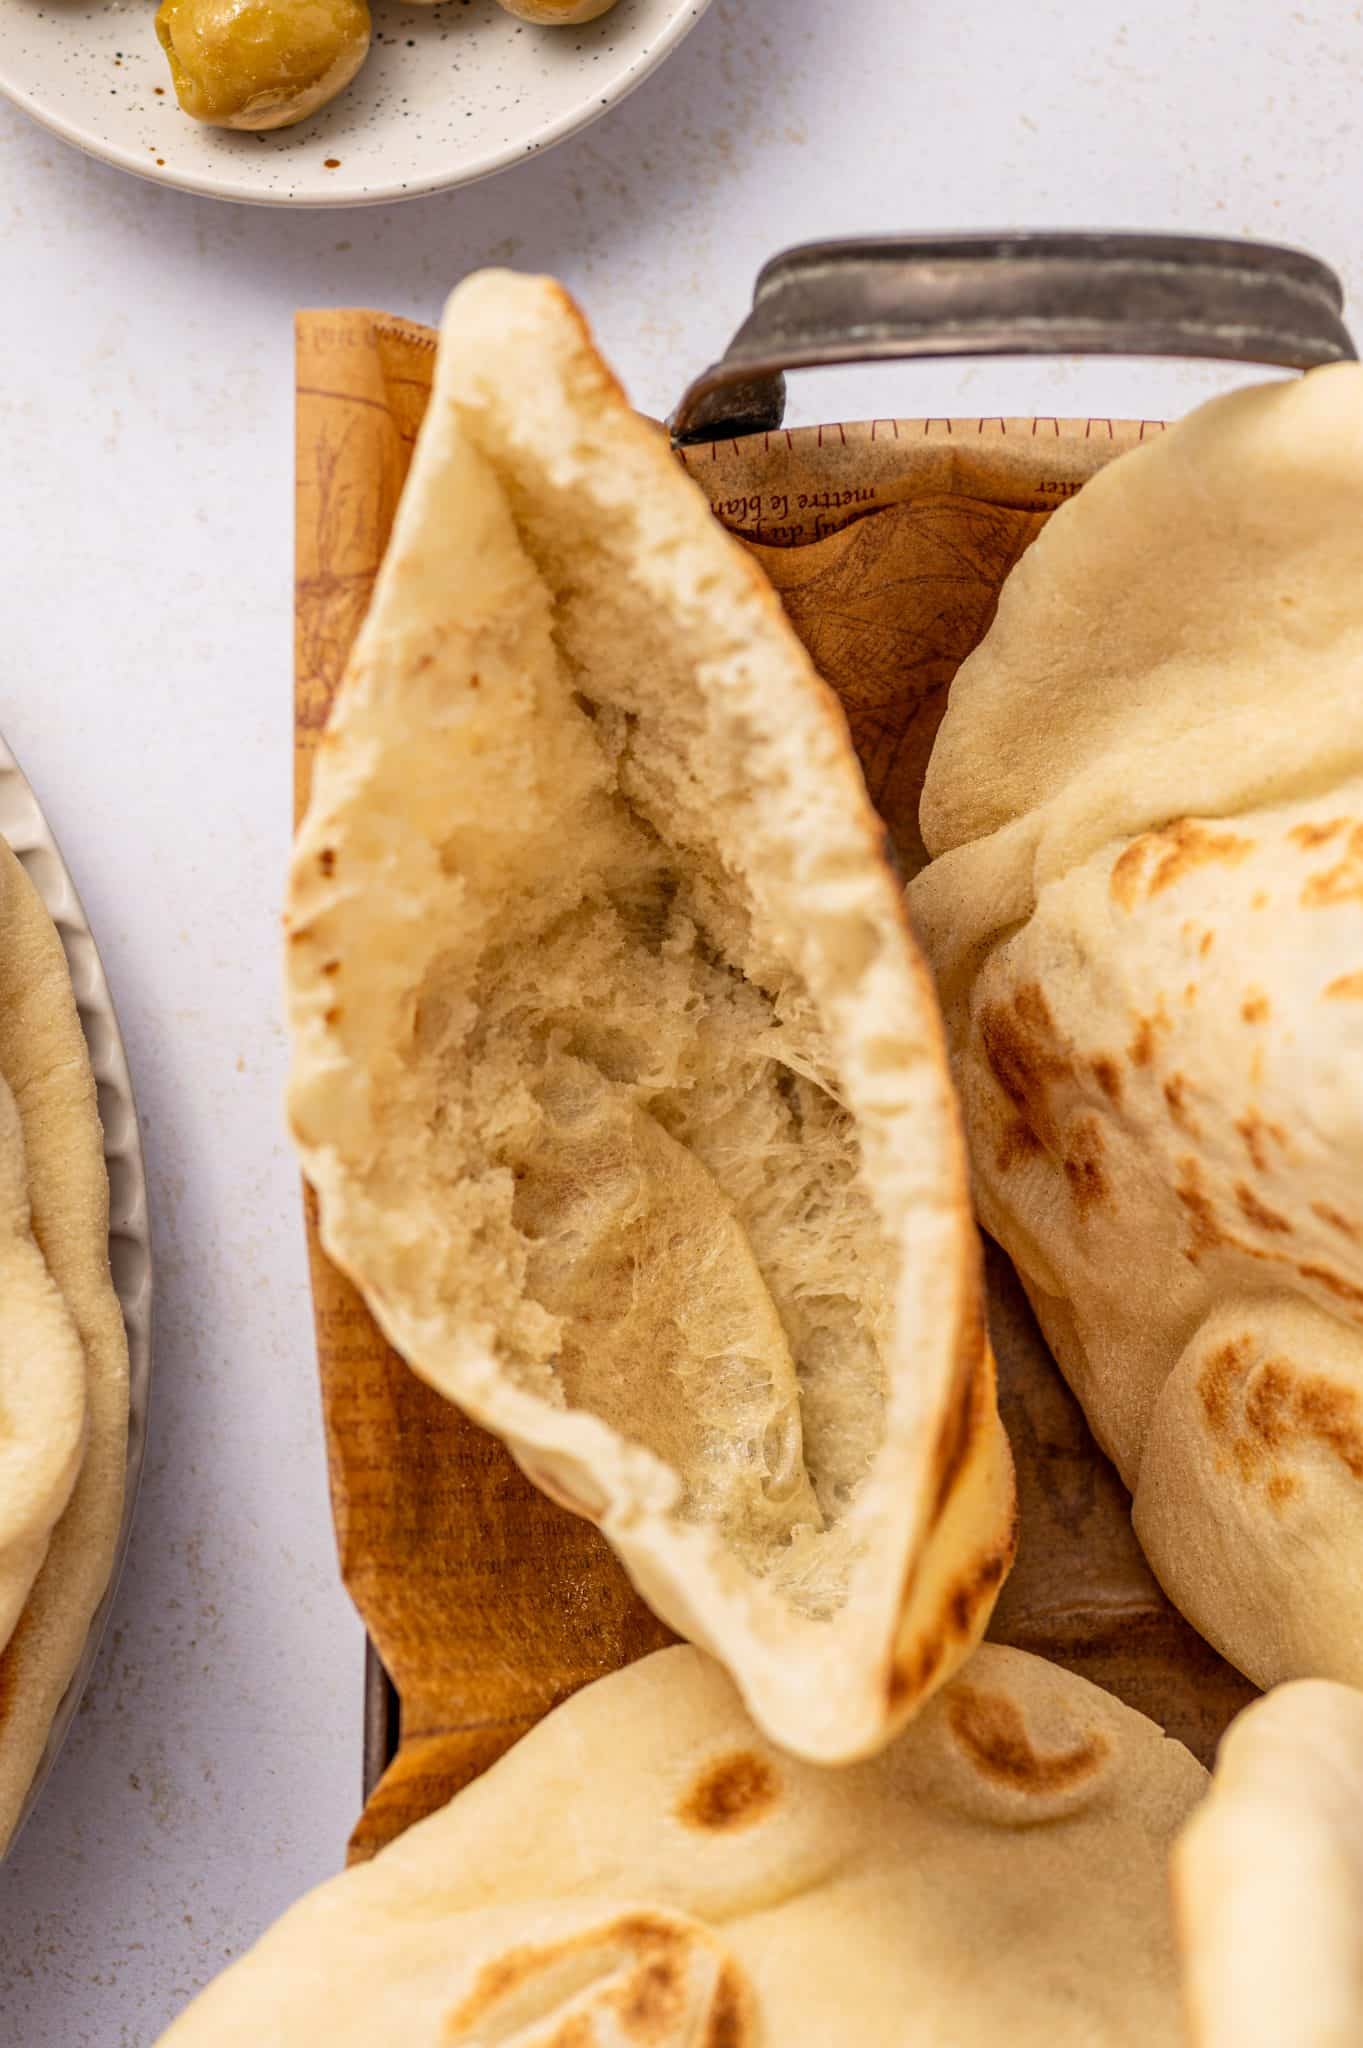
Why Didn’t My Pita Puff?
Not every pita will puff perfectly, and that’s completely normal. The most common reasons are uneven rolling, dough that is too thick or too thin, a cooking surface that is not hot enough, or dough that has dried out before cooking. Even if your pita does not form a full pocket, it will still be soft, chewy, and perfect for dipping, wrapping, or serving with grilled meats and salads.
For the best chance of puffing, be sure to:
- Roll the dough evenly, about 1/4-inch thick.
- Keep the dough covered while you work so it does not dry out.
- Preheat the skillet, baking sheet, or pizza stone fully before cooking.
- Avoid pressing down on the pita while it cooks.
- Wrap cooked pitas in a clean kitchen towel right away to keep them soft.
Tips for the Best Pita Bread
- Measure the flour carefully. For the most accurate results, use a kitchen scale. Too much flour can make the dough dry and prevent the pita from puffing. One cup of all-purpose flour typically weighs about 120–125 grams.
- Keep the dough slightly tacky. The dough should feel soft and slightly sticky, but not wet. Avoid adding too much extra flour while kneading or rolling.
- Let the dough rest after rolling. This helps the gluten relax, making the pita easier to cook and more likely to puff.
- Cook on a very hot surface. Whether you use a skillet, pizza stone, or baking sheet, it needs to be fully preheated before adding the dough.
- Keep cooked pita covered. As soon as each pita comes off the heat, wrap it in a clean kitchen towel or place it in a tortilla warmer to keep it soft.

What to Serve with Pita Bread
One of my favorite ways to enjoy homemade pita is hot off the skillet, smeared with olive oil or butter and sprinkled with salt. Of course, hot pita is also great for stuffing, wrapping, or serving alongside your favorite Mediterranean-inspired meals. Some favorites include:
- Chicken souvlaki
- Shish kabobs
- Chicken gyro meat
- Greek chicken bowls
- Greek meatballs
- Homemade falafel
- Chicken gyros
- Mediterranean chicken wraps
Of course, fresh pita is perfect for scooping up all your favorite dips and spreads. Try it with creamy homemade hummus, baba ganoush, tzatziki, whipped feta, and tirokafteri, a Greek spicy feta dip.
Make Ahead, Storage, Freezing, and Variations
Below are some of the most frequently asked questions about storing, freezing, and making homemade pita bread ahead of time, plus a few simple flour substitutions.
Can the Dough Be Prepared Ahead?
Yes. After kneading the dough, place it in a lightly oiled bowl, cover it tightly, and refrigerate overnight or for up to 24 hours. The dough will rise slowly in the refrigerator. When you are ready to use it, let it sit at room temperature for 30-45 minutes before dividing, shaping, and cooking.
You can also roll the dough into pita rounds a few hours in advance. Keep them covered so they do not dry out, then cook them just before serving.
How Can I Prevent Pita From Drying Out?
The best way to keep pita bread soft is to wrap each cooked pita in a clean kitchen towel or place the pitas inside a tortilla warmer as soon as they come off the heat. The trapped steam keeps the bread soft and prevents the outside from drying out.
Once cooled, store pita bread in an airtight container or resealable bag at room temperature for 2-3 days. Avoid storing pita in the refrigerator if possible, as it can dry out faster. For longer storage, freeze it.
Can You Freeze Pita Bread?
Yes. Let the pita cool completely, then stack the pitas with parchment paper between each one. Transfer them to a freezer-safe bag, press out as much air as possible, and freeze for up to 2 months. For best results, freeze the pita bread the same day you make it.
Reheat frozen pita directly from the freezer in a warm oven, a hot skillet, or in the microwave, wrapped in a damp paper towel until soft and warm.
Can I Make Whole Wheat Pita?
Yes. For the best texture, start by replacing half of the all-purpose flour with whole wheat flour. This gives the pita a slightly nutty flavor while still keeping it soft and flexible.
Using only whole-wheat flour may make the pita denser and a little less fluffy. If the dough feels dry, add a little more warm water, one teaspoon at a time, until it feels soft and slightly tacky.
Can I Make Gluten-Free Pita Bread Using This Recipe?
I have not tested this recipe with gluten-free flour, so I cannot guarantee the results. A 1:1 gluten-free flour blend may work as a flatbread, but gluten-free dough will not behave the same way as traditional yeast dough and may not puff or form pockets. For best results, I recommend using a pita recipe specifically developed and tested with gluten-free flour.
Why Is My Dough So Sticky?
Pita dough should be soft and slightly tacky, but not wet or impossible to handle. If it feels too sticky, let it rest for 10-15 minutes before adding more flour. This gives the flour time to hydrate and makes the dough easier to work with.
If it is still too sticky after resting, add flour one tablespoon at a time, just until the dough is easier to knead and shape. Try not to add too much, or the pita may turn out dry and dense.
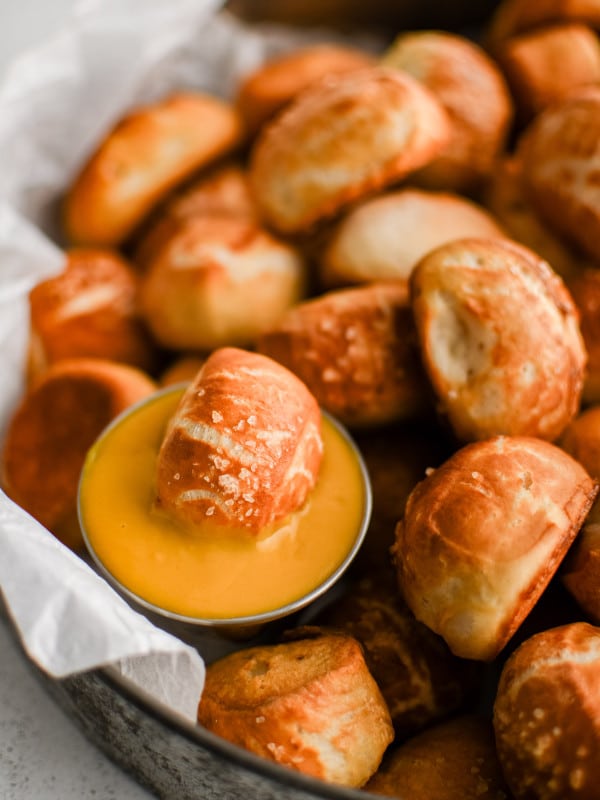
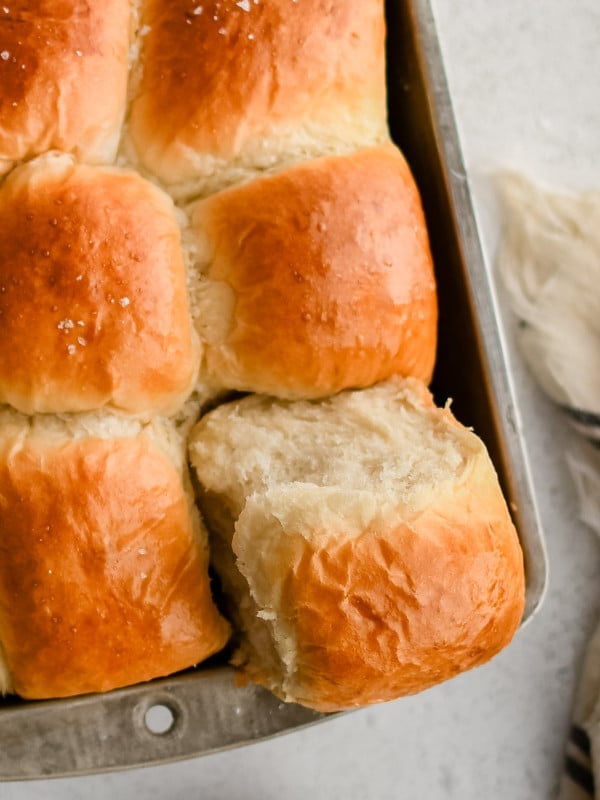
More Homemade Bread Recipes

If you try making this pita bread recipe, I’d love to hear what you think! Please leave a comment and a star rating below. Your feedback helps other readers discover (and enjoy) this recipe too. Thank you so much! 💛
Homemade Pita Bread Recipe
Ingredients
- 3 cups all-purpose flour, plus more for dusting
- 1 packet instant yeast, (2 ¼ teaspoons)
- 1 teaspoon salt
- 2 teaspoons sugar
- 2 tablespoons olive oil
- 1 ¼ cups warm water, (105–110°F)
Instructions
- Combine the dry ingredients. Add the flour, instant yeast, salt, and sugar to a large mixing bowl or the bowl of a stand mixer. Whisk until evenly combined.
- Add the water and olive oil. Make a well in the center of the flour mixture. Pour in the olive oil and warm water, then stir with a wooden spoon or sturdy spatula until a rough, shaggy dough forms.
- Knead the dough. If using a stand mixer, attach the dough hook and knead on medium speed for 7-8 minutes, or until the dough is smooth and elastic. To knead by hand, transfer the dough to a lightly floured surface and knead for 10-12 minutes. The dough should be soft and slightly tacky, but not wet.
- Let the dough rise. Lightly oil a clean bowl. Add the dough and turn it once to coat the outside with oil. Cover with a clean kitchen towel or plastic wrap and let it rise in a warm, draft-free place for about 1 hour, or until doubled in size.
- Divide and shape. Gently punch down the dough to release the air. Transfer it to a lightly floured surface and divide it into 8 equal pieces. Shape each piece into a smooth ball.
- Roll the pita. Use a rolling pin to roll each dough ball into a circle about 1/4-inch thick and 6-7 inches wide. Keep the thickness as even as possible. Cover the rolled pita rounds with a clean towel and let them rest for 15 minutes.
- Cook on the stovetop. Heat a cast-iron or nonstick skillet over medium-high heat until very hot. Place one pita round in the skillet and cook for 1-2 minutes, or until bubbles form and the bottom is golden brown. Flip and cook for another 1-2 minutes. Transfer to a clean kitchen towel and cover to keep warm. Repeat with the remaining dough.
- Or bake in the oven. Preheat the oven to 475°F with a pizza stone or heavy-duty baking sheet inside. Carefully place 1-2 pita rounds on the hot surface and bake for 3-4 minutes, or until puffed and lightly golden. Remove right away and wrap in a clean kitchen towel to keep soft.
Notes
- Measure the flour carefully: Too much flour can make the pita dry and dense. For the most accurate results, use a kitchen scale or spoon and level the flour into the measuring cup.
- The dough should be slightly tacky: Soft, slightly sticky dough makes softer pita bread. Avoid adding too much extra flour while kneading or rolling.
- To use active dry yeast: Proof it in warm water with sugar for 5-10 minutes, or until foamy.
- Whole wheat option: Replace half of the all-purpose flour with whole wheat flour for a slightly nutty flavor. Using only whole-wheat flour may make the pita denser.
- Bread flour option: Bread flour can be used for a slightly chewier pita.
- For puffy pita pockets: Roll the dough evenly, keep it covered so it does not dry out, and cook it on a very hot skillet, baking sheet, or pizza stone.
- Do not press the pita while cooking: Pressing down can prevent steam from forming inside the dough, which is what helps create the pocket.
- Keep pita soft: Wrap each cooked pita in a clean kitchen towel as soon as it comes off the heat.
- Storage: Store cooled pita bread in an airtight container or resealable bag at room temperature for 2-3 days.
- Freezing: Freeze cooled pita with parchment paper between each one in a freezer-safe bag for up to 2 months.
- Reheating: Reheat pita in a warm oven, hot skillet, or microwave wrapped in a damp paper towel until soft and warm.
- Gluten-free note: I have not tested this recipe with gluten-free flour, so I cannot guarantee the results. For best results, use a pita recipe specifically developed for gluten-free flour.
Nutrition
Nutrition information is automatically calculated, so should only be used as an approximation.


Your advice concerning weighing ingredients is spot on. Most, if not all, digital scales will read out in grams. I, myself, always weigh out the ingredients when I bake. That said you neglected to include the weight of all the ingredients in your formula. Bear in mind that 1 Imperial oz of water equals 30 ml which equals 30g metric. Ten oz (1 1/4 cup) of water equals 300g metric. Much easier to weigh liquids than to read the meniscus in a measuring cup. The water equivalency works for most liquids. Dry goods packages usually list the weight in grams on the package so it makes it easy to calculate the metric equivalent. Same goes for oils and syrups such as honey.
Thank you so much for the thoughtful feedback! I completely agree—baking by weight really helps with accuracy and consistency, especially for recipes like this. I also appreciate you mentioning the tips about weighing liquids; it’s such a helpful reminder. Thank you again for sharing your experience!