This post may contain affiliate links. See my disclosure policy.
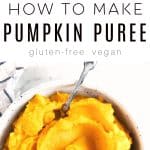
Learn How to Make Pumpkin Puree from Scratch and use it in all your favorite pumpkin recipes. In this post, you’ll learn everything you need to know to make fresh pumpkin puree including how to cook a pumpkin, how to puree, how to store, and how long it lasts.

Table of Contents
Pumpkin puree is an absolute must-have in my house this time of year. It’s used to make cookies, pumpkin muffins, curried pumpkin soup, pumpkin lattes, and pumpkin pie. The season is incomplete without at least one big batch of homemade pumpkin puree.
Some of you may be wondering, why make my own pumpkin puree when I can buy canned pumpkin from the grocery store?
The answer is in the taste. Homemade pumpkin puree is fresher, lighter, and sweeter. Less convenient? Well, yes. Unfortunately, you can’t just pop open a fresh pumpkin and have tender, smooth, perfect pumpkin puree.
But getting it there is super easy!
All you need is one sugar pumpkin, an oven, and a blender. You’ll have warm pureed pumpkin in under an hour!
Get ready, because we’re learning how to make pumpkin puree from scratch.
Related: Types of Winter Squash: A Guide to Winter Squash Varieties

How to Make Homemade Pumpkin Puree
First things first – put down the big, fat, jack-o-lantern carving pumpkins. When making homemade puree, you want to use sugar pumpkins, also referred to as pie pumpkins. They are cultivated specifically for cooking and are sweet and flavorful with smooth flesh.
Big carving pumpkins, while a wonderful choice for roasted pumpkin seeds is not so great for puree. The flesh tends to be bland, watery, and stringy.
Now, we need to bake our sugar pumpkin! This is much easier than it sounds. Read all the details in my tutorial dedicated to cooking pumpkins.

Start by washing the outside of your pumpkins and drying them thoroughly. Carefully cut in half from stem to base and scoop out the guts and seeds with a large spoon.
Preheat oven to 350 degrees F and line a large rimmed baking sheet with parchment paper.
- Optional: Coat the pumpkin halves with olive oil and sprinkle with salt.
Transfer to your prepared baking sheet, cut-side down. Pierce the skin with a fork in 2-3 places on each half to allow for steam to escape.
Bake for approximately 45 minutes, or until the flesh is easily pierced with a fork. Remove from the oven and allow to cool for 5-10 minutes before scooping out the flesh or peeling away the skin.
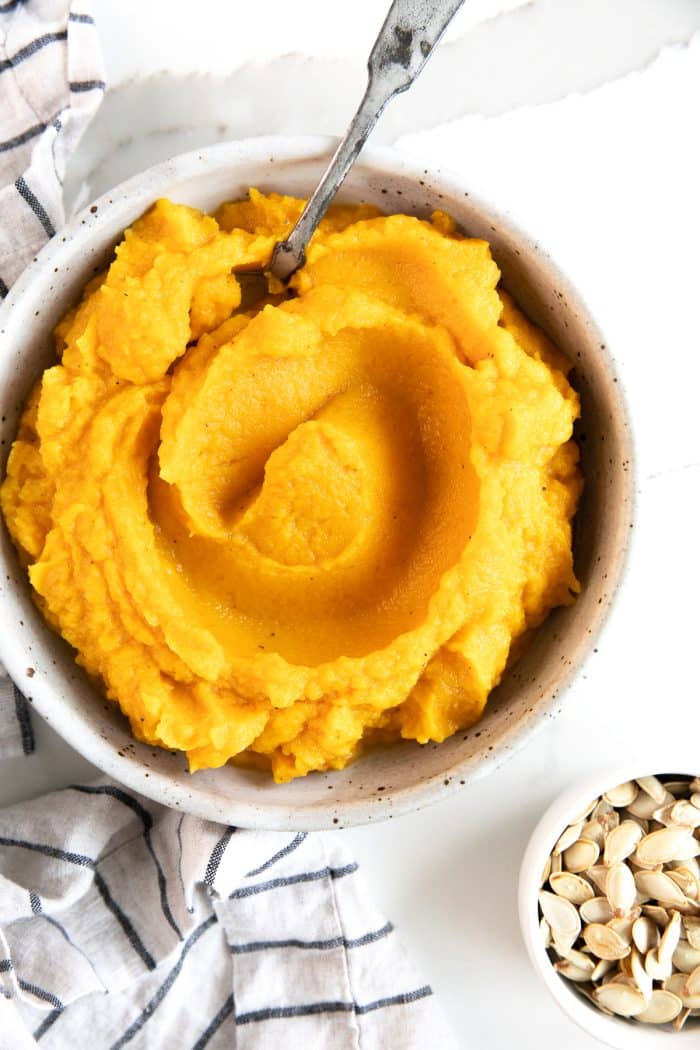
To puree the pumpkin flesh, you may use a high-speed blender or food processor. Process until smooth.
That’s it. So easy!
And, you can use this same method to cook all kinds of other winter squash, like butternut squash, acorn squash, and delicata squash.

Tips and Tricks
- I do not recommend boiling or steaming pumpkins if your plan is to make puree. The pumpkin flesh will absorb water as it cooks, and the result will be a puree that is less flavorful and more watery than a pumpkin that has been baked or roasted.
- If the resulting puree is quite watery, drain it in a fine-mesh sieve or place it in a cheesecloth and allow the water to slowly drain through.
- Homemade pumpkin puree will last for up to 1 week when stored in a sealed container in the refrigerator.
- To freeze, transfer to a freezer-safe jar/bag/container and keep frozen until ready to use. Frozen pumpkin puree will last for up to 3-4 months.

More Pumpkin Recipes,
- Pumpkin Smoothie Recipe
- Pumpkin Oatmeal Chocolate Chip Cookies
- Persimmon Pumpkin Pudding Cake
- Veggie Burger Recipe
- Easy Pumpkin Spice Cookies Recipe

If you try making your own Homemade Pumpkin Puree, please leave me a comment and let me know! I always love to hear your thoughts.
How to Make Pumpkin Puree Recipe
Ingredients
- 1 sugar pumpkin (baking pumpkin), about 4-5 pounds
- 1 teaspoon olive oil
- salt, to season
Instructions
- Preheat oven to 350 degrees F. Line a rimmed baking sheet or small roasting pan with parchment paper.
- Give the outside of your pumpkin a quick wash and dry thoroughly then use a sturdy knife to cut each pumpkin in half, from stem to base. Use a sturdy spoon or ice cream scooper to remove the seeds and stringy bits from the pumpkin. If desired, save the seeds for roasting.
- Brush the entire surface – skin and flesh – of each pumpkin with a slight coat of oil. Sprinkle with salt, if desired. Transfer to your baking sheet, cut-side-down, and pierce the skin of each pumpkin half 2-3 times to allow for steam to release.
- Bake at 350 degrees F for approximately 45 minutes, or until the flesh is easily pierced with a fork.
- Remove from the oven and allow the pumpkins to cool for 5-10 minutes before scooping the soft, cooked flesh from the skin. Transfer the cooked flesh to a food processor or high-speed blender.
- Blend on high until smooth and creamy.
Notes
- For the best pumpkin puree, skip the Halloween jack-o-lantern pumpkins and use sugar pumpkins to make this homemade pumpkin puree. They taste sweeter with firmer flesh.
- If you find that your puree is especially watery, transfer the puree to a cheesecloth and set in a fine-mesh strainer set over a bowl or pot. Allow the excess water to drain until thickened.
- Homemade pumpkin puree will last for up to 1 week when stored in a sealed container in the refrigerator.
- To freeze, transfer to a freezer-safe jar/bag/container and keep frozen until ready to use. Frozen pumpkin puree will last for up to 3-4 months.
- For reference, 1 (15-ounce) can of pumpkin puree contains 2 cups minus 2.5 tablespoons.
- Pumpkin is naturally gluten-free and vegan
Nutrition
Nutrition information is automatically calculated, so should only be used as an approximation.