
This post may contain affiliate links. See my disclosure policy.

This Homemade Chicken Stock starts with a whole chicken, roasted with vegetables until golden, then simmered with fresh herbs and cold water into a rich, flavorful stock. I pull the chicken after an hour to save the tender meat, then return the bones to the pot to finish the stock. You end up with about 12 cups of savory, golden stock and enough cooked chicken for another meal.
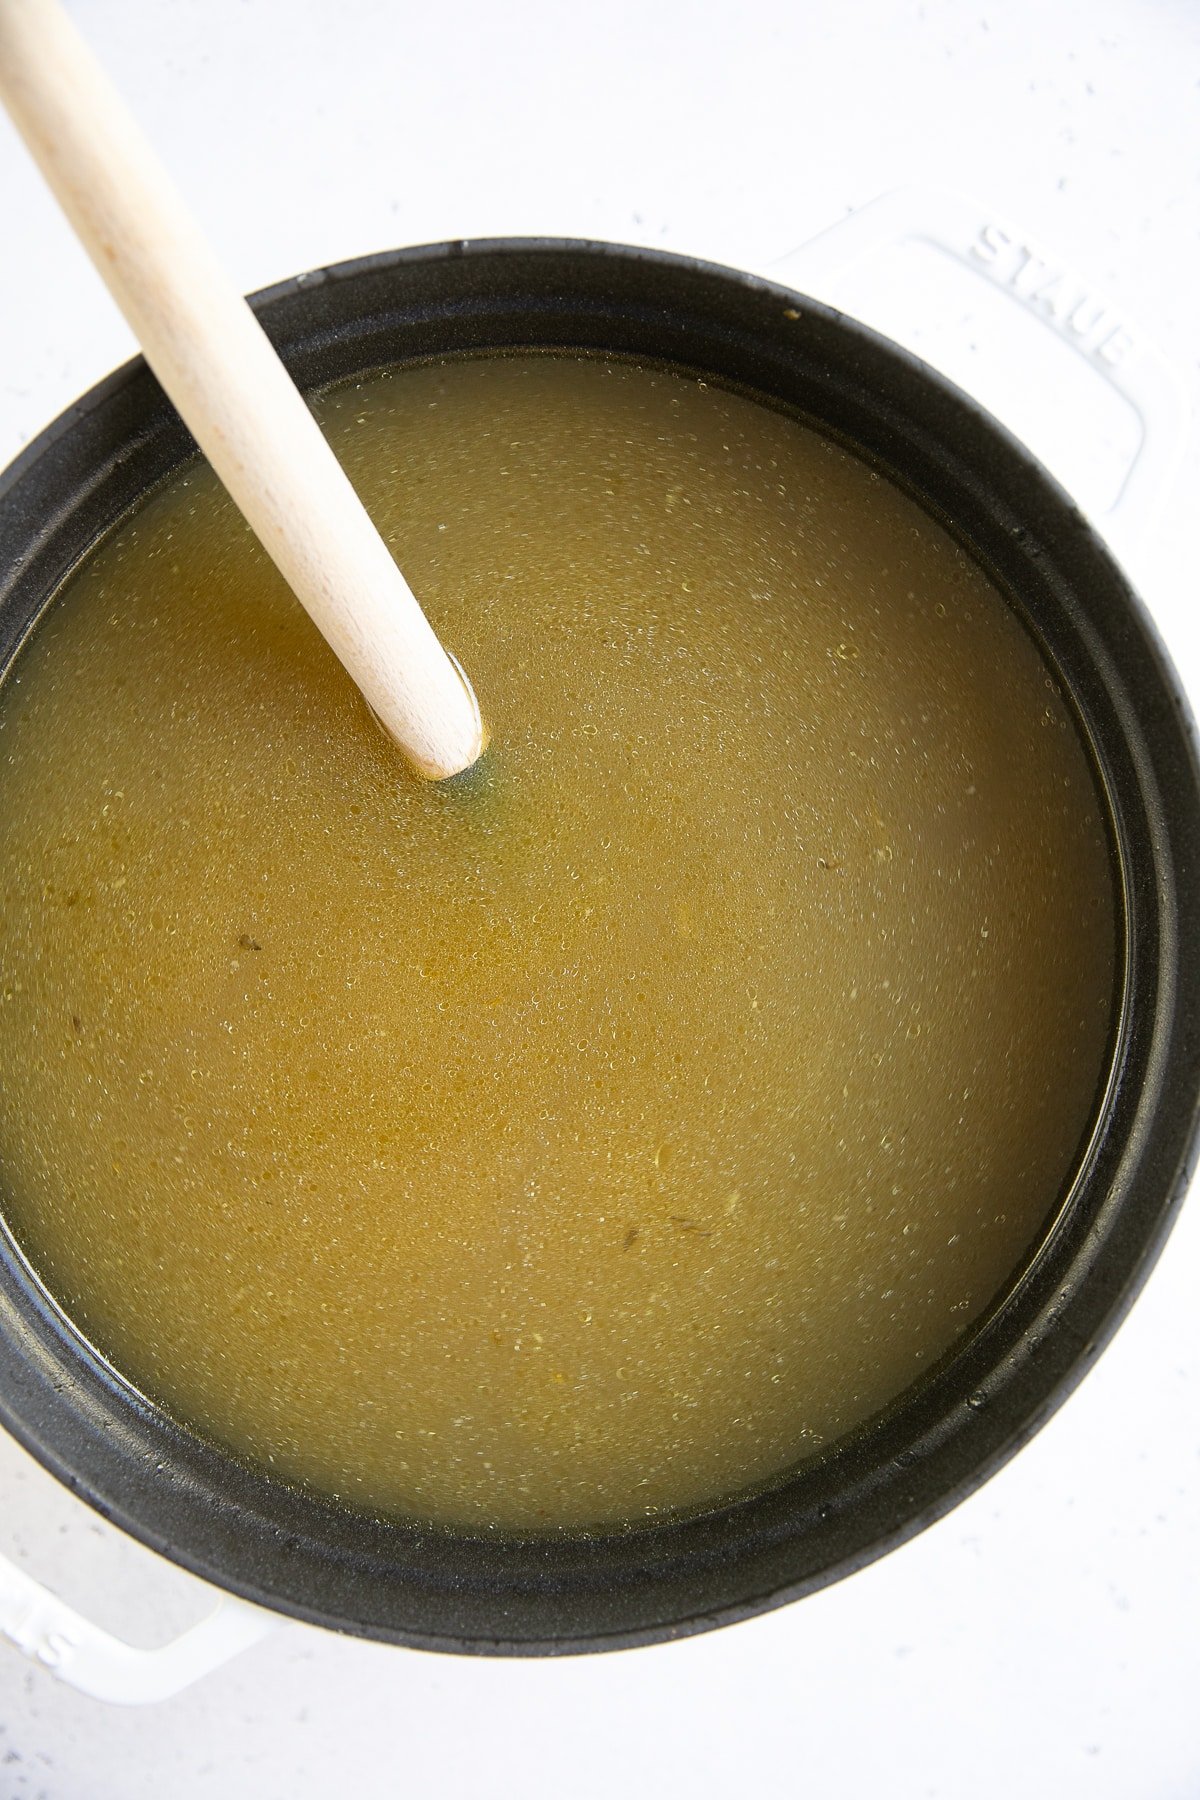
Quick Look: Homemade Chicken Stock
- Why Make THIS Recipe: This chicken stock starts with a whole chicken and vegetables roasted first, and then cooked in the pot. The meat comes off after one hour, so it stays moist while the bones keep simmering. You get both stock and chicken to use in recipes.
- Key Ingredients: A whole chicken, onion, carrot, celery, garlic, and fresh herbs. Add chicken feet or necks for a richer, firmer stock.
- Yield: About 12 cups of stock and 3-4 cups of chicken.
- Total Time: About 4 1/2 hours
- Uses: Homemade chicken stock is great in soups, gravy, pan sauces, rice, and braises. Save the reserved meat for my creamy chicken soup or chicken and wild rice casserole.
- Key Tip: Maintain a gentle simmer to keep the stock clear, and remove the chicken once it’s cooked through so the meat stays tender.
- Equipment: 12-quart stockpot (or larger), roasting pan, and a fine-mesh strainer.
I’ve been making my own chicken stock for more than a decade. Every time I bought a rotisserie chicken, I’d simmer the leftover carcass with whatever vegetables I had to make homemade chicken noodle soup. For a long time, I didn’t even realize I was making chicken stock. I just thought I was using up leftovers and saving money.
Over the years, making homemade chicken stock (and soup in general) has become one of my favorite pastimes. And while a leftover chicken carcass makes a perfectly good, lighter stock, I’ve learned that roasting a whole chicken before simmering it produces a richer, more flavorful, full-bodied stock. It may even set into a soft jelly when chilled, thanks to the gelatin released from the bones and connective tissue. It’s the same roast-then-simmer method I use for my homemade bone broth, just with a shorter simmer.
Table of Contents
Reader Comment
“THIS recipe… answered 60 years of chicken stock questions for me! All of your in-depth explanations of ‘why’ this and not that are part of what makes this the BEST recipe ever!” – Jeanette
Ingredients and Substitutions
Every ingredient here is either building flavor or building body. For the full list and amounts of ingredients, scroll down to the recipe card at the bottom of the page.
- Whole chicken: This recipe starts with a whole 4-5 pound chicken. The meat adds chicken flavor, while the bones, skin, and joints release gelatin that gives the stock body. You also get several cups of tender cooked chicken to use in soups, tacos, and casseroles. There’s no need to cook the chicken all the way through in the oven since it finishes cooking in the stockpot.
- Chicken feet and necks (optional): Both help make a richer, more full-bodied stock. Chicken feet are especially high in collagen from their skin, tendons, and cartilage, while necks contribute both gelatin and chicken flavor. Adding either can help the stock set into a firmer jelly when refrigerated.
- Onion, carrot, celery, and garlic: Onion, carrot, and celery are a classic flavor base, called mirepoix. Together with the garlic, they add natural sweetness and savory flavor to the stock. There’s no need to peel the carrots or finely chop the vegetables since everything gets strained out at the end.
- Fresh parsley, thyme, bay leaves, rosemary, and sage: Parsley, thyme, and bay leaves add a subtle, savory herbal flavor without overpowering the chicken. Rosemary and sage have a stronger, more distinctive flavor that’s especially delicious when making stock for holiday dishes like homemade turkey gravy and stuffing. Leave out the rosemary and sage for a more neutral, all-purpose stock.
- Black peppercorns. Whole peppercorns add gentle warmth. I prefer them over ground pepper, which can leave sediment and make the broth cloudy or overly peppery.
- Salt: I add 1 tablespoon to the whole pot, which makes approximately 12 cups of stock, or about 1/4 teaspoon of salt per cup. The actual saltiness will depend on the type of salt used and how much stock you end up with. If you’re making stock for gravy or a pan sauce, leave out the salt and season at the end, since reducing the stock concentrates its flavor and saltiness.
How to Make Chicken Stock
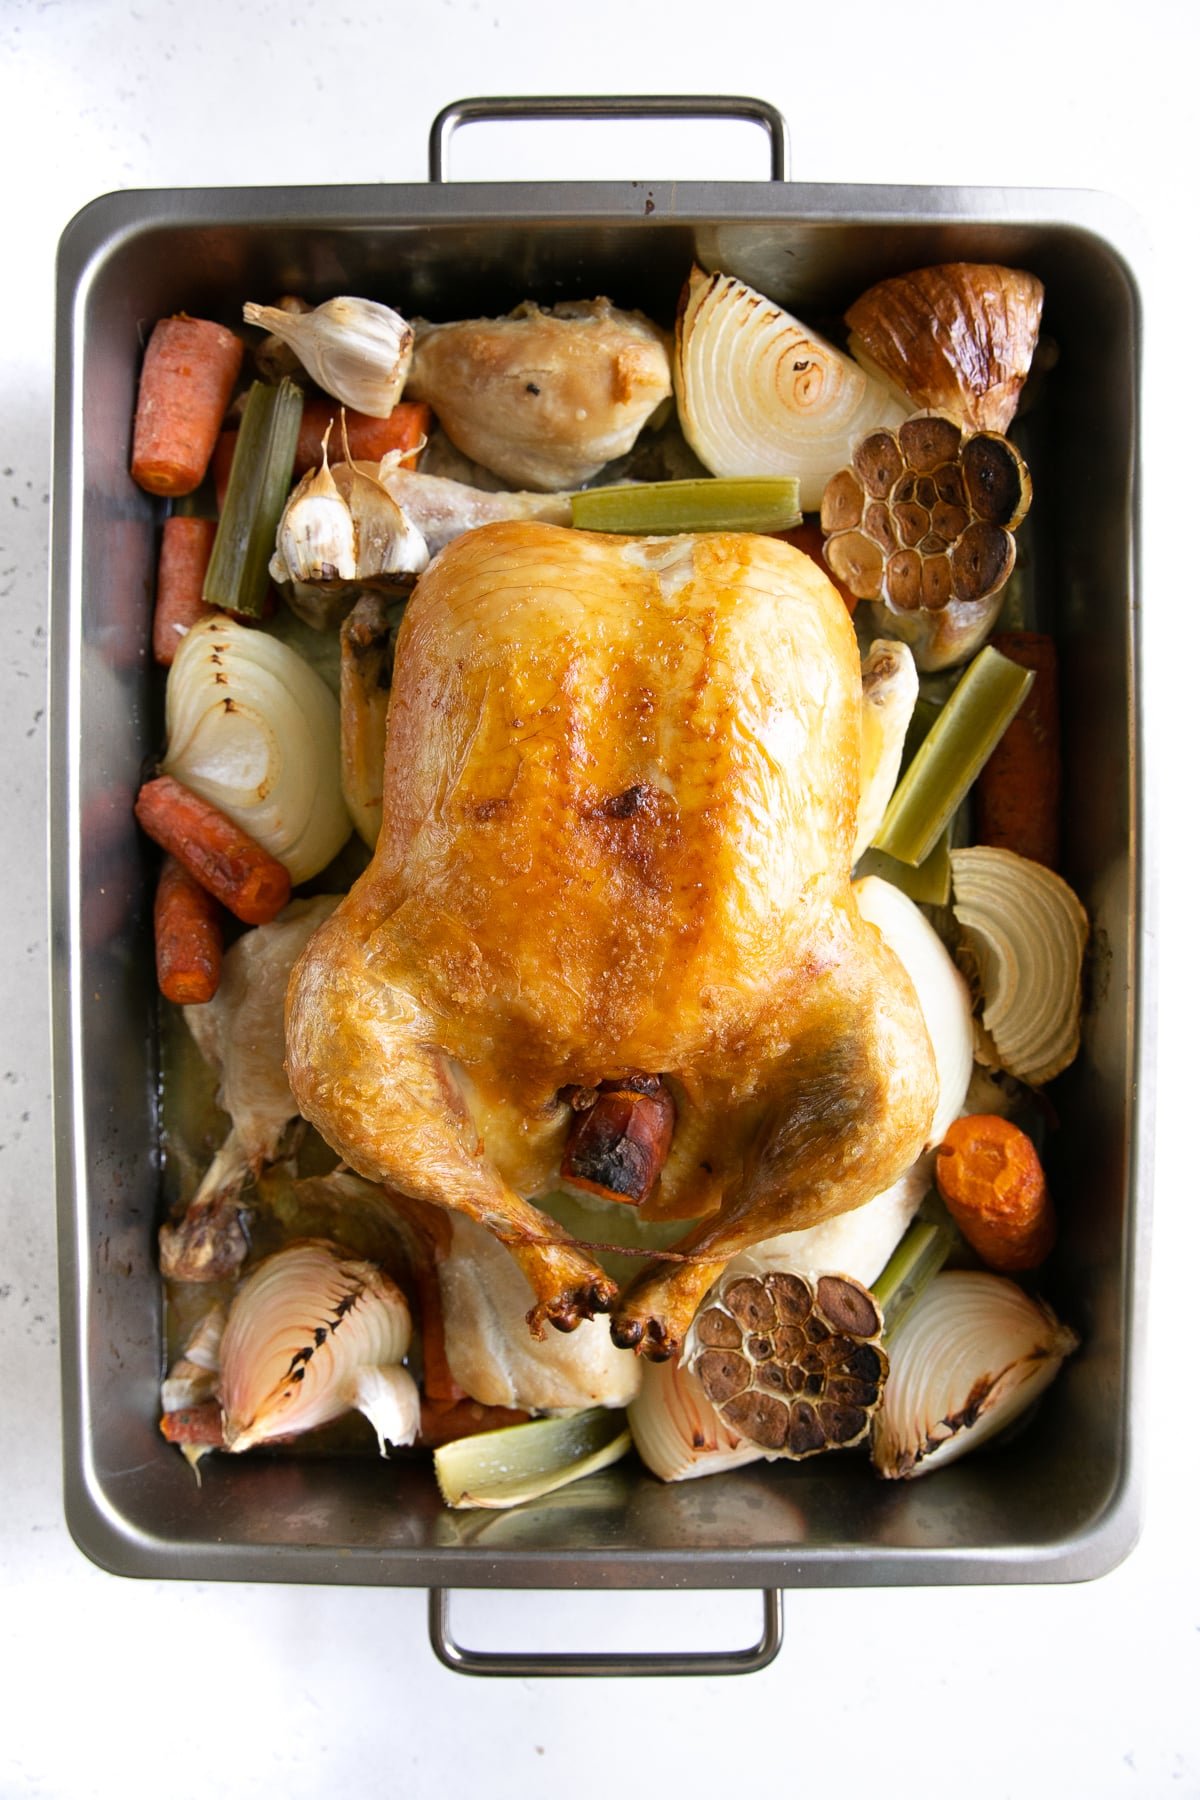
- Roast the chicken and vegetables. While optional, I highly recommend this step. Roasting adds richer flavor and a deeper color to the finished stock, especially when you scrape the browned bits from the roasting pan into the pot. Preheat the oven to 450°F and arrange the chicken and vegetables in a large roasting pan. Start with the chicken breast-side up and roast for 20-30 minutes. Flip the chicken and continue roasting for another 15 minutes, or until nicely browned. Keep an eye on everything as it roasts. You want golden-brown, not burnt, so flip the chicken or remove anything that’s getting too dark.
- Place in a stockpot. Transfer the roasted chicken and vegetables to a large stockpot (ideally 12-16 quarts). Scrape up any browned bits stuck to the bottom of the roasting pan and add them to the pot. They’re packed with flavor! Add the fresh parsley, rosemary, bay leaves, thyme, sage, sea salt, and black peppercorns. Pour in enough cold water to completely cover the chicken and vegetables.
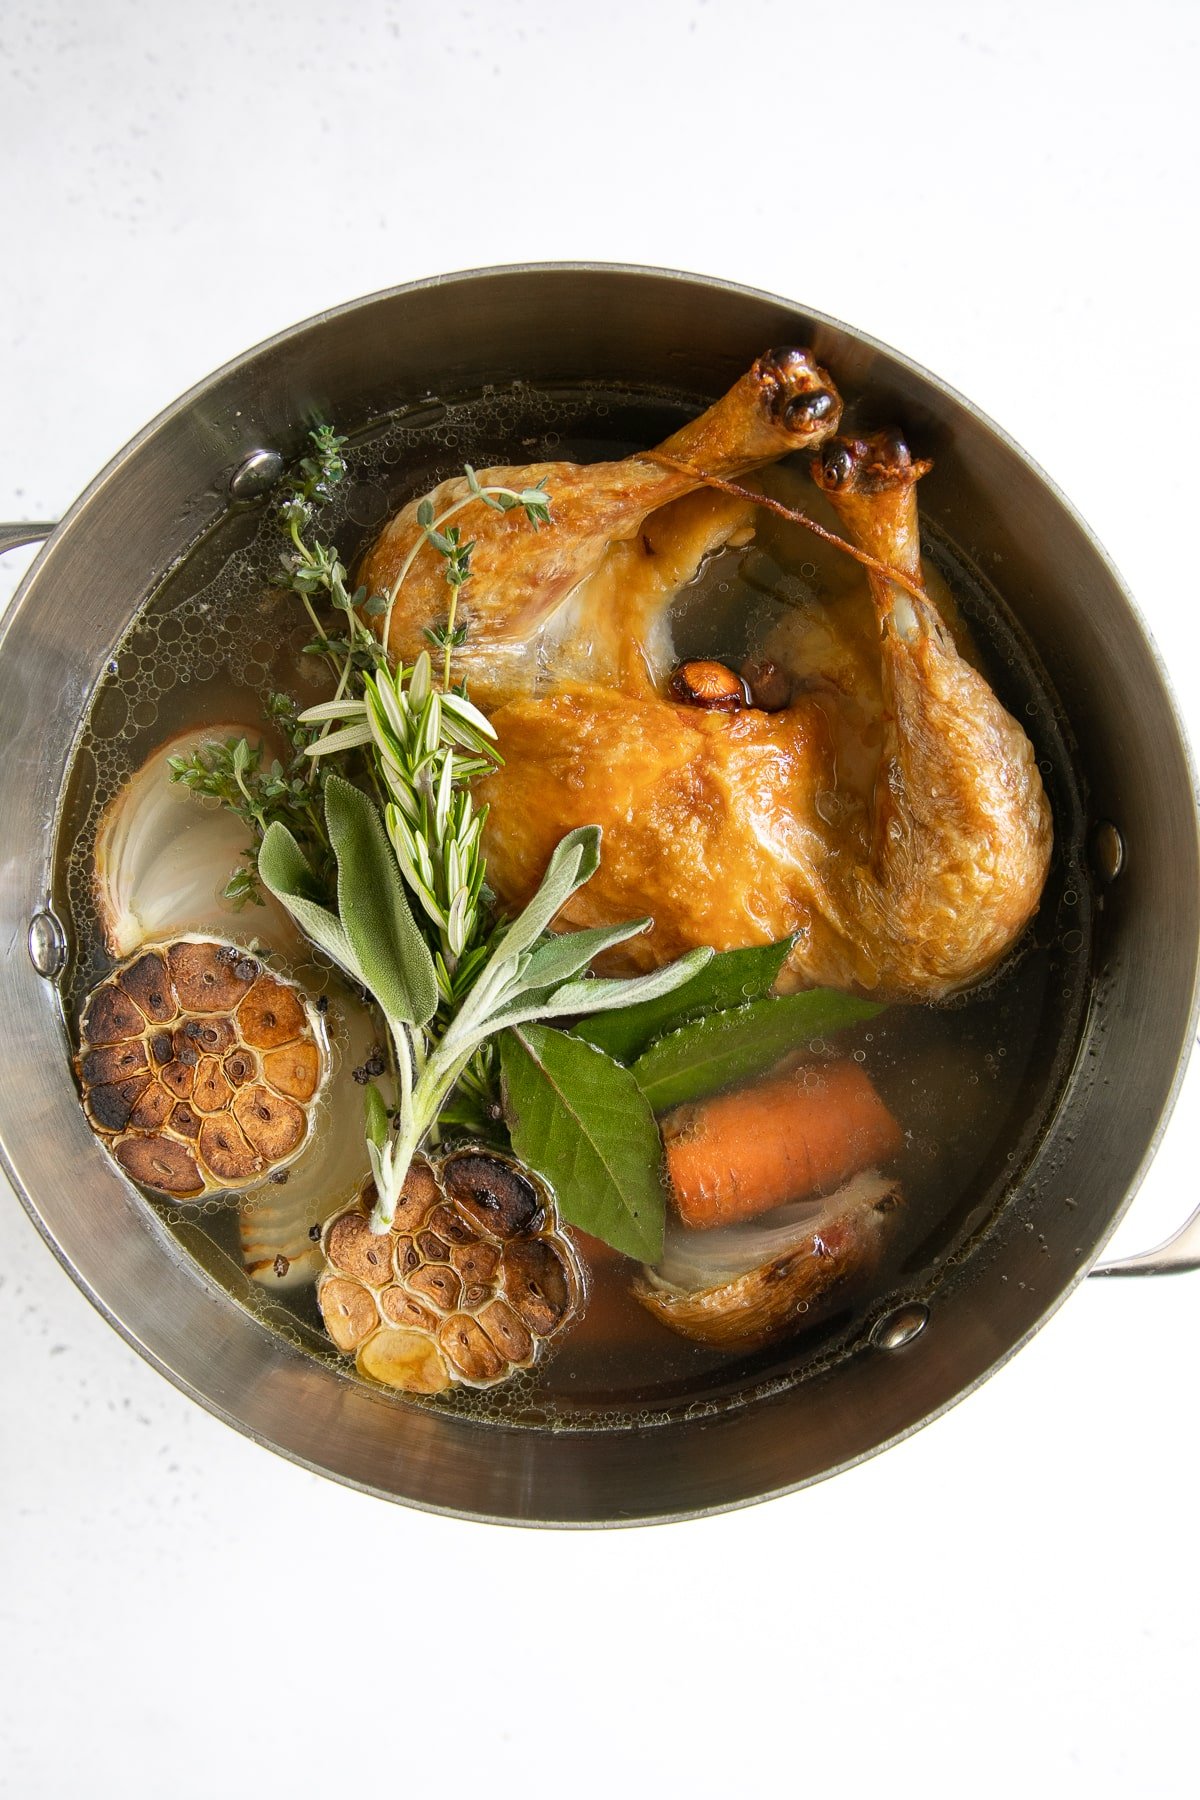
- Simmer the stock. Slowly bring the stock to a gentle simmer over medium heat. As it heats, skim off any foam that collects on the surface to help keep the stock clear. Once simmering, reduce the heat to low and cover with a tight-fitting lid, leaving it slightly ajar. Maintain a gentle simmer rather than a rolling boil, occasionally skimming off any additional foam or excess fat.
Tip: Keep the stock at a gentle simmer, with just a few small bubbles breaking the surface. Avoid a vigorous boil, which can make the stock cloudy.
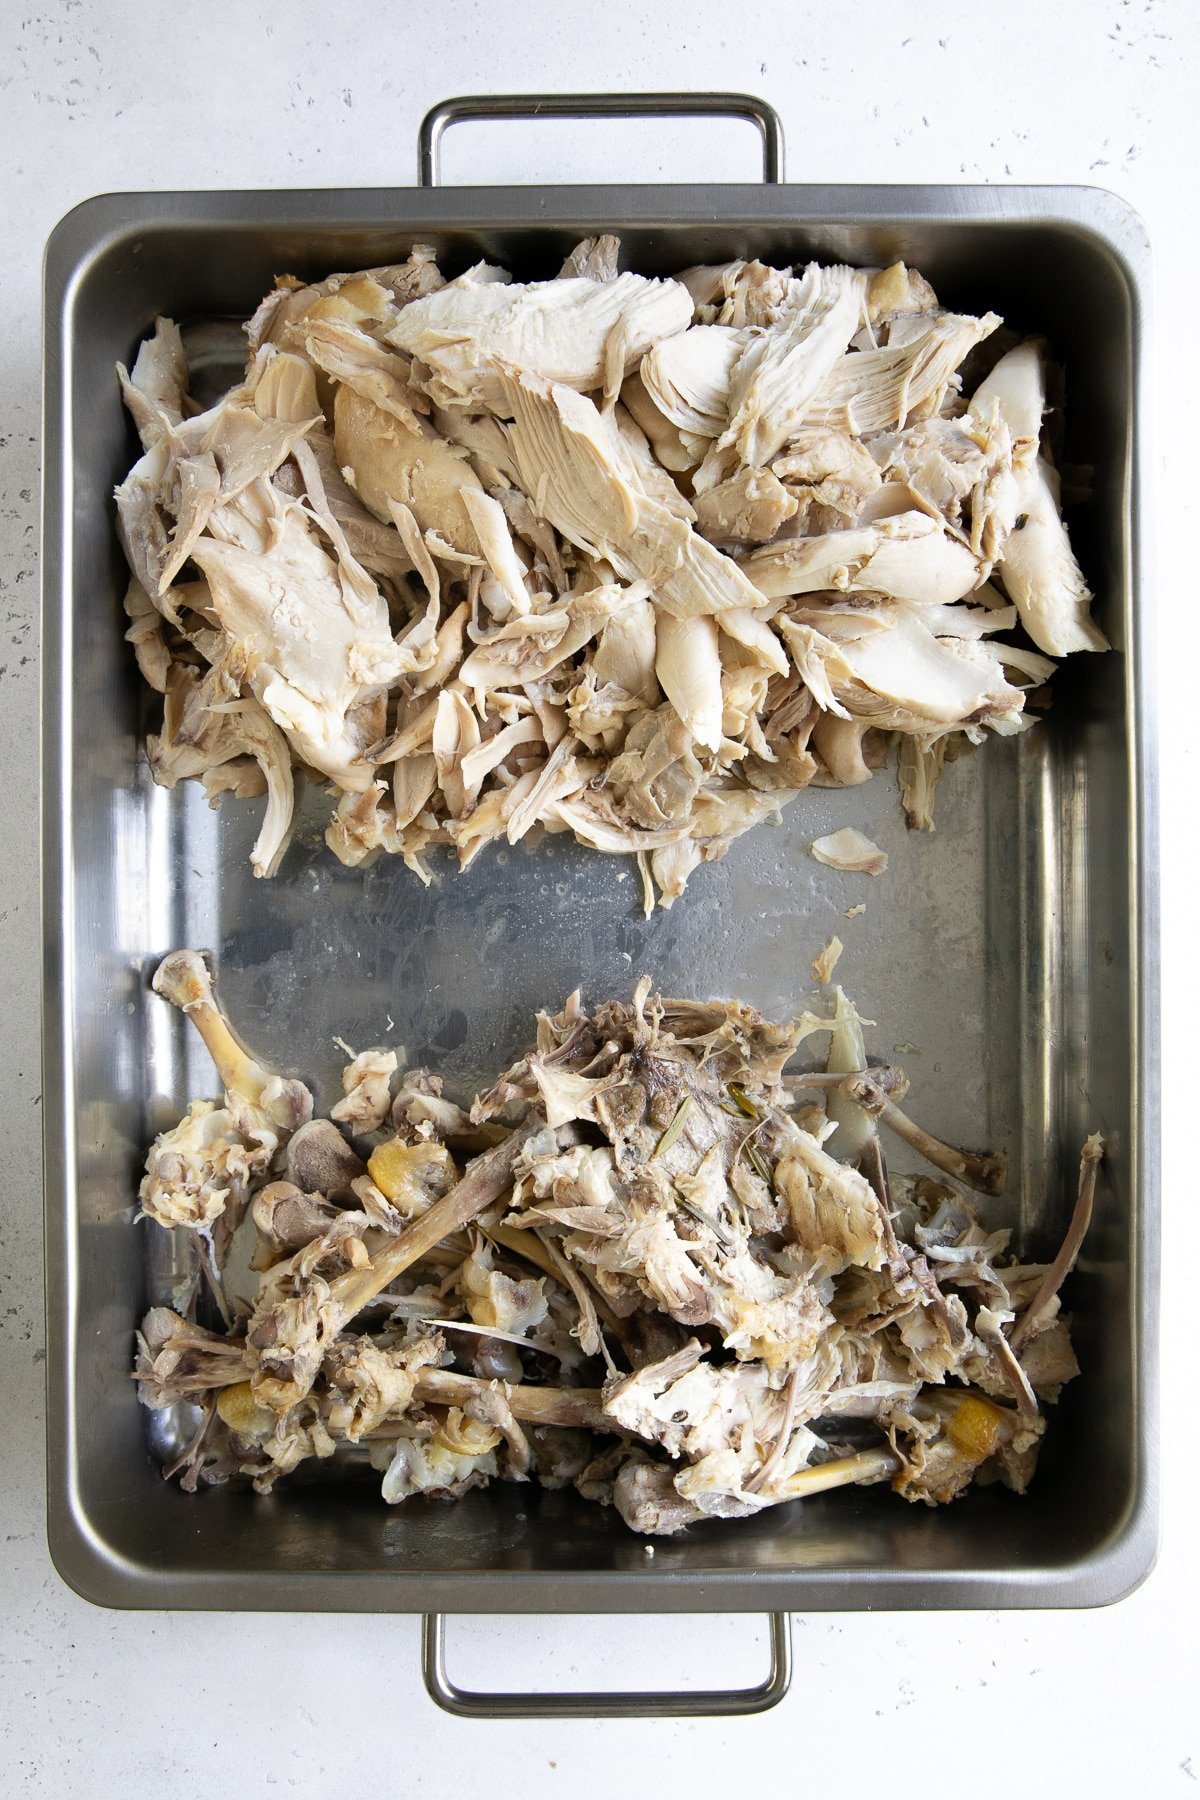
- Remove the meat and return the bones to the pot. After about an hour of simmering, check the chicken’s internal temperature with an instant-read thermometer. The breasts should reach at least 165°F, while the thighs and legs are best cooked to 175-185°F for tender meat. Once cooked, carefully lift the chicken from the stockpot using large cooking tongs and transfer it to a rimmed baking sheet to cool. Once cool enough to handle, remove the meat from the bones and set it aside for soups, sandwiches, salads, or other recipes. Return the bones, skin, and cartilage to the stockpot and continue simmering to extract more flavor and gelatin.
- Continue simmering. Allow the stock to simmer gently for another 1-3 hours, adding more water as needed to keep the bones submerged. The vegetables will become very soft, which is completely normal. If the carrots become especially mushy and start falling apart, carefully remove them with a slotted spoon to help keep the stock clear. For longer cooking times, consider removing the herbs to prevent bitterness.
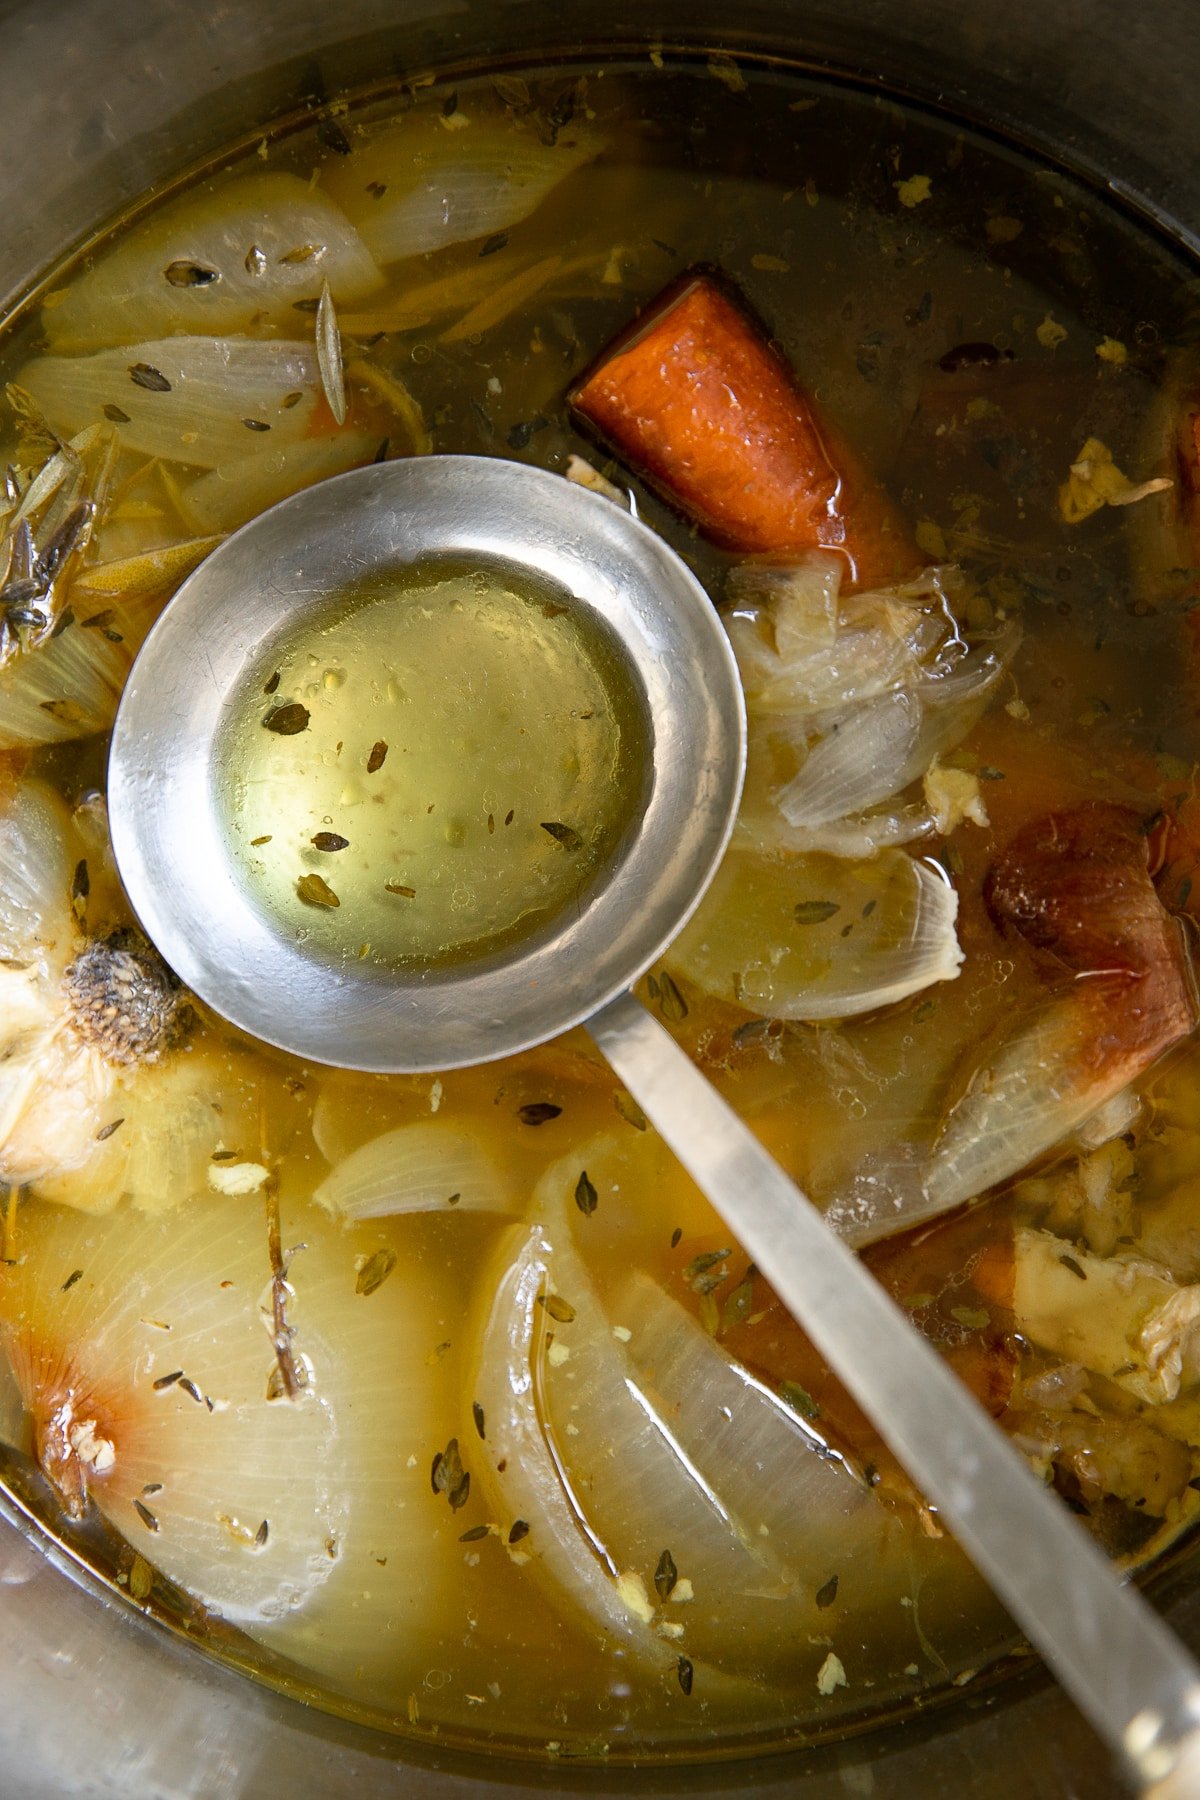
- Strain the cooked chicken stock. Carefully pour the stock through a fine-mesh strainer into a clean, heatproof pot or large bowl. For an extra-clear stock, line the strainer with cheesecloth. Avoid pressing down on the cooked vegetables and bones, as this can make the stock cloudy.
Chicken Stock vs Broth
Chicken stock is traditionally made by simmering bones and connective tissue for several hours. As the collagen breaks down into gelatin, it gives the stock a richer texture and more body. It may even set into a soft jelly when refrigerated. Chicken broth, on the other hand, is typically made with more meat, simmered for a shorter time, and has a lighter consistency. It’s also more likely to be seasoned.
That said, the distinction isn’t always clear-cut. Many stocks, including this recipe, use both meat and bones, while broths often contain bones, too. Bone broth is essentially stock that’s simmered for a longer period.
Here’s how they compare:
| Chicken broth | Chicken stock | Bone broth | |
|---|---|---|---|
| Made from | Mostly meat, often with vegetables and herbs | Bones, joints, skin, sometimes meat, plus vegetables and herbs | Collagen-rich bones and connective tissue (like feet, knuckles, and necks) |
| Simmer time | About 1-2 hours | Usually 2-6 hours | Often 10+ hours |
| Texture when cold | Usually stays liquid | May set into a soft jelly | Often gelatinous, sometimes quite firm |
| Seasoning | Usually seasoned | Lightly salted or unsalted | Seasoned for sipping or left unsalted for cooking |
| Best for | Light soups, sipping, cooking rice | Soups, gravy, sauces, rice, braises | Sipping, pho, rich soups |
| Example | The liquid left from poaching chicken | This chicken stock recipe. | My bone broth recipe. |
Where this recipe fits: This recipe is a chicken stock, but starting with a whole chicken gives it the meaty flavor of broth along with the body of stock. Roasting the chicken and vegetables first also makes it a brown stock, with a deeper color and richer, roasted flavor than stock made without roasting.
Can you use broth and stock interchangeably? Yes, in most recipes! Chicken stock has more body from the gelatin, making it especially good for soups, gravies, and sauces. Chicken broth works just as well when you want something lighter. If you’re reducing either one for a sauce or gravy, choose an unsalted version so it doesn’t become too salty.

Tips for Making Homemade Chicken Stock
- Keep it at a gentle simmer. Look for a few small bubbles breaking the surface, not a rolling boil. Boiling too vigorously can make the stock cloudy.
- Skim the foam early. Most of the foam rises as the stock first heats up. Remove it with a large spoon or ladle, then skim occasionally as needed.
- Don’t add too much water. Use just enough to keep the bones submerged, adding more hot water as needed. Too much water can dilute the flavor.
- Avoid unnecessary stirring. Once the stock is simmering, leave it mostly undisturbed. Stirring can break apart softened vegetables and make the stock cloudy.
- Be careful when removing the whole chicken. After an hour of simmering, the chicken will be hot and may start falling apart. Use large tongs and a spatula to support it as you lift it onto a rimmed baking sheet. Return any collected juices to the stockpot.
Storage, Freezing, and Reheating
First, cool it quickly. The fastest way to cool a large batch of chicken stock is to place the pot in an ice-water bath in your sink or divide the stock into smaller, shallow containers. Avoid putting a large, hot stockpot directly into the refrigerator, as it can take too long to cool. Refrigerate the stock within 2 hours.
Refrigerator: Store cooled chicken stock in covered, airtight containers for 3-4 days. Depending on how much gelatin was extracted from the bones and connective tissue, the stock may set into a soft jelly when chilled. This is completely normal and will turn back into liquid when heated. You may also notice a layer of hardened fat on top. Remove as much as you like with a spoon, or leave a little for flavor.
Freezer: For the best flavor and quality, freeze chicken stock for up to 2-3 months. It will remain safe longer when kept continuously frozen at 0°F, although the quality may gradually decline. I like freezing stock in different portions so I can thaw just what I need.
- Ice cube trays: Perfect for freezing small amounts to add to pan sauces or other recipes. Once frozen, transfer the cubes to a freezer-safe bag.
- Freezer bags: Great for storing 2- or 4-cup portions. Press out as much air as possible, label with the amount and date, and freeze flat on a baking sheet so the bags stack neatly.
- Glass jars: Use freezer-safe, straight-sided glass jars, such as certain Ball Mason Jars with reusable lids. Allow the stock to cool before filling, and leave enough space for expansion as it freezes (about 1/2 inch for pint jars and 1 inch for quart jars).
Reheating: Thaw frozen stock overnight in the refrigerator, or place the frozen stock directly into a saucepan over low to medium-low heat until melted. Heat thoroughly before serving or adding to recipes.
The reserved chicken: Store the cooked, shredded chicken separately from the stock in an airtight container in the refrigerator for 3-4 days, or freeze for up to 3-4 months for the best quality.
Chicken Stock Recipe FAQs
It may be too diluted or simply need more salt. Start by tasting a small amount with a pinch of salt, since stock that tastes flat often just needs seasoning. If it still tastes weak, simmer the strained stock uncovered until some of the water evaporates and the flavor becomes more concentrated.
It’s optional, and I don’t use it in this recipe. Some cooks add 1-2 tablespoons of apple cider vinegar to help extract collagen and minerals from the bones, but there’s limited evidence that such a small amount makes a noticeable difference. A gentle simmer and enough cooking time are more important. Feel free to add a splash, but it isn’t necessary for a rich, flavorful stock.
Usually, there was too much water, not enough collagen-rich bones and connective tissue, or the stock didn’t simmer long enough. Don’t worry! Stock doesn’t have to turn into jelly to taste good. To help it firm up, simmer the strained stock uncovered to concentrate the gelatin. Next time, try adding a pound of chicken feet, necks, or wings for more body.
No, but I highly recommend it. Roasting the chicken and vegetables first gives the stock a deeper golden-brown color and a richer, roasted flavor. It adds about 35-45 minutes, but it’s worth the extra time. If you’re in a hurry, simply add the raw chicken, vegetables, and herbs to the pot, cover with cold water, and simmer. You’ll still get a delicious stock with a lighter, more delicate flavor. You can also brown chicken pieces and vegetables directly in the stockpot, similar to the method I use for my Instant Pot bone broth.
Absolutely! Remove most of the meat and use the leftover carcass in place of the whole chicken. Since it’s already roasted, you can skip roasting the bones and roast just the vegetables, if desired. Add enough cold water to cover everything and simmer as directed. A single carcass will generally make a smaller, lighter batch than this whole chicken recipe, so avoid adding too much water. Rotisserie chickens are also usually seasoned, so taste the stock before adding any salt. The same method works with leftover Thanksgiving turkey bones, too! See my homemade turkey stock recipe for details.
Ways to Use Homemade Chicken Stock
Homemade chicken stock makes the biggest difference in recipes where the liquid plays a major role, especially soups, gravies, and sauces. Here are some of my favorite ways to use it:
- Soups: Homemade stock adds rich chicken flavor to everything from brothy chicken noodle soup to creamy, blended soups like this carrot ginger soup.
- Gravy and pan sauces: The gelatin in homemade stock gives sauces more body as they reduce. It’s especially good in my homemade gravy without drippings.
- Rice and grains: Replace water with chicken stock when cooking rice, couscous, or quinoa. The grains absorb the stock as they cook, adding flavor without any extra work. You can also use it as the cooking liquid for beans.
- Stews, braises, and casseroles: Chicken stock adds savory depth to dishes like chicken and dumplings and chicken pot pie, and even a small amount can add flavor to stews like Norwegian bacalao (salt cod stew).
- Mashed potatoes: For a more savory flavor, replace some of the milk in mashed potatoes with warm chicken stock. It helps loosen the potatoes while keeping them a little lighter.
Don’t forget the reserved chicken! One whole chicken typically gives me about 3-4 cups of cooked, shredded meat. Use it to make my chicken broccoli rice casserole, chicken enchiladas, quesadillas, or even buffalo chicken dip!
If you try this homemade chicken stock recipe, I’d love to hear how it turns out! Did you start with a whole chicken or use leftover bones? And what did you make with your stock? Leave me a comment below, and don’t forget to leave a star rating if you found the recipe helpful! Thank you so much! 💛

Homemade Chicken Stock Recipe

Ingredients
- 1 whole chicken, (approximately 4-5 pounds)
- 1 pound chicken feet or chicken necks, (optional)
- 2 medium yellow onions, quartered
- 3 large carrots, unpeeled and chopped into 2-inch pieces
- 3 ribs celery, chopped into 2-inch pieces
- 1 head garlic, unpeeled and halved crosswise
- 1 small bunch fresh parsley
- 2 sprigs fresh rosemary
- 3 bay leaves
- 8 sprigs fresh thyme
- 10 fresh sage leaves
- 1 tablespoon salt, (see notes)
- 1 tablespoon whole black peppercorns
- Cold water, enough to cover the chicken and vegetables
Instructions
- Roast the chicken and vegetables (optional). Preheat the oven to 450°F. Remove the neck and giblets from the chicken cavity, reserving the neck for the stock if desired. Place the chicken breast-side up in a large roasting pan and arrange the onions, carrots, celery, and garlic around it. Roast for 20-30 minutes, then carefully turn the chicken over and roast for another 15 minutes, or until the chicken and vegetables are nicely browned. Watch closely to prevent burning. The chicken does not need to be fully cooked at this stage.
- Combine the ingredients in a stockpot. Transfer the roasted chicken and vegetables to a large 12-16-quart stockpot. Add a splash of water to the roasting pan to loosen any browned bits, scraping them into the pot. Add the chicken feet or necks (if using), parsley, rosemary, bay leaves, thyme, sage, salt, and peppercorns. Pour in enough cold water to completely cover the chicken and vegetables.
- Bring to a gentle simmer. Place the stockpot over medium heat and slowly bring the liquid to a gentle simmer. As the water heats, use a large spoon or ladle to skim away any foam that rises to the surface. Reduce the heat to low and partially cover the pot with a lid, leaving a small opening for steam to escape. Maintain a gentle simmer, with just a few small bubbles breaking the surface.
- Remove and shred the cooked chicken. After approximately 1 hour of simmering, check the chicken with a meat thermometer. The breasts should reach at least 165°F, while the thighs and legs are best cooked to 175-185°F for tender meat. Once cooked, carefully transfer the chicken to a large rimmed baking sheet using tongs and a spatula for support. Let it cool until safe to handle, then remove the meat from the bones. Reserve the meat for other recipes and return the bones, skin, and cartilage to the stockpot.
- Continue simmering the stock. Simmer the bones and vegetables for another 1-3 hours, keeping the heat low. Add a little more hot water if necessary to keep the bones submerged. Skim away any additional foam or excess fat. If the vegetables become extremely soft and begin falling apart, carefully remove them to help keep the stock clear.
- Strain the stock. Remove the stockpot from the heat. Carefully ladle or pour the stock through a fine-mesh strainer into a clean, heatproof pot or large bowl. For a clearer stock, line the strainer with cheesecloth. Avoid pressing on the cooked vegetables or bones, as this can make the stock cloudy. Discard the strained solids.
- Cool and store. Cool the stock quickly using an ice-water bath or by dividing it into smaller, shallow containers. Refrigerate promptly. Once chilled, remove any hardened fat from the surface, if desired. Store in airtight containers in the refrigerator for 3-4 days or freeze for longer storage.
Notes
- I wanted the meat for soup (and quesadillas).
- I really wanted an extra rich, concentrated stock with loads of flavor.
- If you are using chicken bones or a chicken carcass, you may choose to skip this step altogether or just roast the vegetables- entirely up to you.
- Alternatively, if you are using chicken pieces (legs, wings, necks, bone-in skin-on thighs, you may also brown your chicken and veggies directly in your stockpot (as I did with this Instant Pot Bone Broth Recipe). It will take about the same time.
Explore More with AI
Nutrition
Nutrition information is automatically calculated, so should only be used as an approximation.













Hi,
I have not made this yet, but I want to make a broth from this. From what I’ve read from your instructions and from the comments these are the changes I would do to make the broth.
1-simmer for 12 hours
2-keep the chicken meat in for the whole time it is simmering ie 12 hours
3-include the chicken feet
Are there more changes I should include?
Thanks
Great questions – here is how I would tweak your plan for the result you want:
If you want a broth (meat-forward, lighter): Do not simmer 12 hours with the meat in – it will dry out. Simmer gently 1½ to 3 hours, then remove the chicken meat once cooked and tender; reserve it for soup and return the bones to continue if you want a bit more body. Keep the simmer very gentle (not a boil).
If you want a richer stock/bone broth (gelatin-rich): After about 1 hour, pull the meat off, put the bones back in, and simmer 4 to 6 hours for classic stock; up to 12 hours moves you into bone-broth territory – use chicken feet for extra collagen.
Helpful add-ins & technique: Add 1 to 2 Tbsp apple cider vinegar (helps extract collagen), start with cold water, keep everything submerged, skim occasionally, and season to taste at the end. Cool quickly before storing (ice bath or a few handfuls of ice), then refrigerate or freeze.
So: include the feet, yes; do not leave the meat in for 12 hours; and choose shorter time for broth or longer (bones only) for stock/bone broth.
I love this recipe and your clear instructions! On occasion, the chicken seems dry. Am I simmering it too long at three hours? Or, I usually use a 3.5 pound whole chicken. Should I roast for less time than in the recipe? Thank you!
I’m thrilled you love the recipe and find the instructions clear! If the chicken is turning out dry, it might indeed be due to simmering it too long, especially since you’re using a whole chicken. Three hours might be a bit much for a 3.5 pound chicken. You could try reducing the simmering time to about 2 to 2.5 hours to see if that helps retain more moisture. Additionally, ensure the chicken is fully submerged and the heat is low enough to keep it at a gentle simmer. Adjustments like these should help you achieve a juicier result. Thanks for reaching out, and happy cooking!
Can this recipe be made in a crockpot (after roasting the chicken)?
Absolutely, a chicken stock recipe can be conveniently made in a crockpot after roasting the chicken. Simply add the roasted chicken bones, along with the other ingredients, to the crockpot. Set it to cook on low for several hours, allowing the flavors to meld together and create a rich, nourishing stock.
When straining the veggies out what do you do with the two halves of garlic? Do you squeeze them into the stock or remove them completely? I’ve never known what to do at this step!
I remove them completely and add them to the compost bin 🙂
Hey Jessica,
I’ve been making chicken stock for years, but never roasted everything at the start. What a great idea! I see you opted for necks in your presentation over feet. Have you used chicken feet for your stock? Curious if the flavor would be different than neck bones…not that I think chicken feet would taste like stinky feet, HA!
Chicken feet work great for chicken stock! See my note on chicken feet above in the main post.
And no, it doesn’t make it sticky 🙂
Excellent chicken broth, amazingly tasty, this is the second recipe I have made from your site. So far you have gotten Five Stars ⭐️ ⭐️⭐️⭐️⭐️. I love your cooking knowledge and ability to formulate and establish this great website. Thank you for sharing all these recipes.
Thank you for the excellent feedback, Paul 😀
Love this recipe! I usually cook mine for around 5-6 hours, but I’m curious if you have a recommendation to an upper limit to the cooking time? Is 12 hours still OK?
I don’t normally go that long on Chicken Stock, but yes you could do 12 hours, which is getting to a bone broth length of cook time. 6 hours is generally the furthest I go on Chicken Stock 🙂
Amazing recipe with a few adjustments, after baking stock, pull the chicken you want off the bone and set aside leaving chicken on the bone. You want flavorful chicken to go into the pot that you chop and add at at the last instead of chicken with the flavor boiled out. Additionally, SIMMER the stock so that it is treated delicately and not boiled so that you get a nice clear stock. If you want to puree the vegs left the flavor is already in the pot and you are adding texture. Instead if you want the flavor of creamy, add a tablespoon or two of cream cheese or the like. The same but executed a little different. Excellent recipe. PS this was my profession.
Thanks for the recipe!
I was wondering what to do with the vegetable that were boiled. Have you tried to puree them into then stock, make like a creamy stock? I don’t want to throw them away.
Thanks!
Hi Christina,
Absolutely! It just depends if you want a creamy stock or a clear stock. Either way, I definitely support repurposing the veggies 🙂
I needed a quick soup today so I boiled the whole chicken in water with herbs and then strained the chicken, pulled the meat off the bones and placed into the soup with veggies. I now have these bones, could I make a bone broth with them or are the nutrients boiled out? (the chicken boiled for about 2 hours whole) thanks!
Hi Arpita,
Yes, you can still use your previously boiled chicken bones. You would want to start the process over for the new batch of stock. It probably won’t gell unless you add additional chicken pieces like chicken feet.